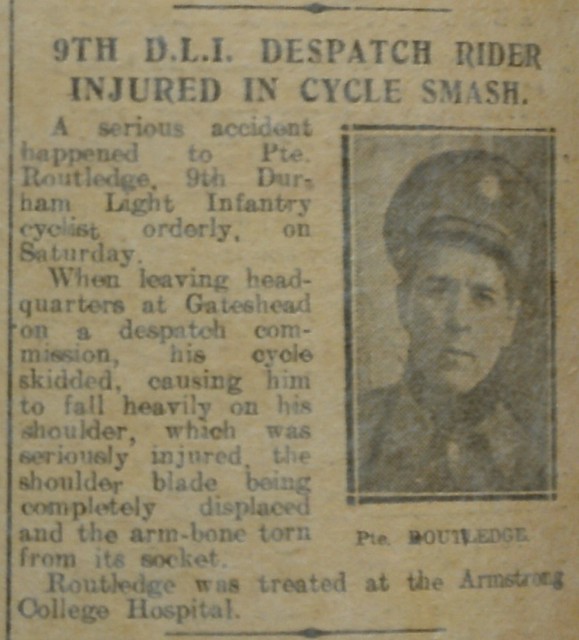
Topics > Industry and Work > Armed Forces > Durham Light Infantry
Durham Light Infantry
 Durham Light Infantry (D.L.I.) was a regiment of the British Army from 1881 to 1968. DLI served in the Second Boer War, First World War and Second World War, the Korean War and the Indonesia–Malaysia confrontation. During times of peace it had duty in India, China, West Germany and Cyprus.[1] In 1968, the DLI was was amalgamated with other regiments to to form The Light Infantry; now The Rifles.
The Durham Light Infantry (D.L.I.) was a light infantry regiment of the British Army in existence from 1881 to 1968. It was formed in 1881 under the Childers Reforms by the amalgamation of the 68th (Durham) Regiment of Foot (Light Infantry) and the 106th Regiment of Foot (Bombay Light Infantry) along with the Militia and Volunteers of County Durham.
The regiment served notably in the Second Boer War, World War I and World War II, the Korean War and the Indonesia–Malaysia confrontation. During times of peace it had duty in India, China, West Germany and Cyprus.
In 1968, the regiment was amalgamated with the Somerset and Cornwall Light Infantry, the King's Own Yorkshire Light Infantry and the King's Shropshire Light Infantry to form The Light Infantry, which again amalgamated in 2007 with the Devonshire and Dorset Regiment, the Royal Gloucestershire, Berkshire and Wiltshire Regiment and the Royal Green Jackets to form a new large regiment, The Rifles, which continues the lineage of the regiment.
Formation
As part of the Cardwell and Childers Reforms of the British Army's regiments, in 1881 the 68th (Durham) Regiment of Foot (Light Infantry) and the 106th Regiment of Foot (Bombay Light Infantry) became the 1st and 2nd battalions of the Durham Light Infantry. Both already had their depots at Sunderland Barracks in Sunderland, as was the Brigade Depot (No. 3). The militia battalionsthe 1st Durham Fusiliers and 2nd North Durham Militiabecame the 3rd and 4th battalions of the new regiment, with their depots in Barnard Castle and Durham City. The five Volunteer Force battalions of Durham Rifle Volunteersthe 1st to 4th Administrative battalions of the Durham Rifle Volunteers and the 3rd Durham Rifle Volunteer Corpsbecame the 1st to 5th Volunteer battalions.
A new regimental badge was to be worn, a Tudor rose, this was never worn on any article of clothing, but did appear on the colours until 1934. Instead the light infantry bugle horn was modified with a crown and the regiment's abbreviation.
The system was designed to permit one regular battalion of a regiment to be stationed at home, providing trained recruits for the other on overseas service.
History
1881–99
On formation of the regiment the 1st Battalion was in India at Meerut and the 2nd Battalion was in Ireland at Dublin. The elements of the new regiment still maintained a separate and independent existence, as they had since being grouped together in 1873, however the introduction of shorter service (six years, then another six in the reserves) and the increase in cross posting of officers in the linked regular and Militia battalions, increased the assimilation into a single regiment.
In August 1882 the 2nd Battalion was sent to the garrison the Mediterranean, being split between Gibraltar and Malta, it was reunited in March 1883 at Gibraltar.
In 1884, the Depot moved from Sunderland to Fenham Barracks in Newcastle upon Tyne which it shared with the Northumberland Fusiliers as there was no suitable site near Durham City "which could not be relied upon as not being undermined". The move was not popular as it took the Depot out of the County, it was not to return until 1939, when it was transferred to Brancepeth Castle.
In 1885 the 2nd Battalion was transferred to Egypt to take part in the Mahdist War and was employed with the force under General Stephenson to repel attacks on the railway between Wadi Halfa and Akasha, fighting at the Battle of Ginnis. After the battle, while securing one of the Arab's nuggers (supply boats), an Arab child of about two years was found by the battalion's mounted infantry. Brought back and baptised as James Francis Durham (Jimmy Durham) he would enlist with the regiment and become a corporal of buglers before dying in August 1910. In January 1887, the 2nd Battalion sailed from Suez to India, while in March the 1st Battalion returned from there to Britain.
While in India, the 2nd Battalion came to dominate the Indian polo scene, winning 17 tournaments against "rich men's regiments" and cavalry regiments. In 1897 and 1898, it assisted in combating outbreaks of the plague in Poona and Bombay.
Second Boer War
The 1st battalion was dispatched from Britain to South Africa to take part in the Second Anglo-Boer War, arriving in November 1899, after local forces had been besieged in Mafeking, and the British forces stationed there had been surrounded in the town of Ladysmith. The battalion was involved in General Redvers Buller's unsuccessful attempts to approach Ladysmith across the Teluga river, in reserve for the Battle of Colenso, launching diversionary attacks to the east of Spion Kop, and in early February attacked Vaal Krantz with the battalion taking two hills of the ridge, before the position was abandoned. The battalion was in a supporting role for the Relief of Ladysmith and took little part in the offensive that ended with the annexation of the Transvaal in September 1900.
The war now became one of guerilla raids by the Boers against the British forces and their lines of communication. The battalion was deployed guarding a section of railway line in the Transvaal, while sending two platoon sized units to the mounted infantry. During this time the battalion was joined or reinforced by other units from the regiment. One company from the 2nd battalion came from India in January 1900 and formed part of the Burmah Mounted Infantry, seeing action at Sanna's Post. The 3rd and 4th battalions were embodied and also served in South Africa, the 3rd arriving in February 1900, where it guarded lines of communications in the Cape Colony and the Orange Free State, escorted convoys and garrisoned Dewetsdorp for 6 months. The 4th arrived in February 1902 and was split into detachments serving in many places, and a mounted infantry company, which escorted convoys. The 4th returned to Britain in September. The volunteer battalions supplied contingents to form three special service companies, reinforcing the 1st battalion, which served individually between from March 1900 to April 1902.
Pre First World War
The 1st battalion and the company from the 2nd left South Africa for India at the end of October 1902, and on 15 November both battalions met at Calicut, before the 2nd battalion, which had been guarding Boer prisoners, left for Britain.
In 1908, as part of the Territorial Forces Act, the 3rd and 4th battalions exchanged numbers and were recast as the 3rd (Reserve) and 4th (Extra Reserve) battalions in a draft finding role. The 1st to 5th Volunteer battalions were renumbered as the 5th to 9th battalions Durham Light Infantry of the Territorial Force. The 5th formed part of the York and Durham Brigade and the 6th–9th battalions formed the Durham Light Infantry Brigade of the Northumbrian Division (eventually the 150th (York and Durham) Brigade and 151st (Durham Light Infantry) Brigade respectively of the 50th (Northumbrian) Division when the territorial formations were given numbers in May 1915). The 5th Battalion was based at Paradise Row in Stockton-on-Tees, while the 6th Battalion was based at Union Street in Bishop Auckland, the 7th Battalion was based at Livingstone Road in Sunderland, the 8th Battalion was based at Gilesgate in Durham and the 9th Battalion was based Burt Terrance in Gateshead (all since demolished). In 1911, the 1st battalion took part in the Delhi Durbar, receiving new colours from the King.
First World War
During the First World War, the D.L.I. expanded to 42 battalions, comprising two Regular, two Militia, 17 Territorial (1st, 2nd and 3rd line, some never completed) and 21 service and other types (some short lived), with 22 seeing active service overseas – on the Western Front (at Ypres, Loos, Arras, Messines, Cambrai, the Somme and Passchendaele), in Italy, Egypt, Salonika and India. Some battalions were part of the Army of occupation in Germany after the War. In addition, ten battalions of County Volunteers were raised under the terms of the 1859 Volunteer act.
The regiment earned 59 battle honours and won six Victoria Crosses, but at the cost of 12,006 dead NCOs and other ranks. When officers are included this rises to approximately 12,530the 10th highest of any of the infantry regiments of the British Army.
When War was declared, the 1st battalion was in India part of the Nowshera Brigade, 1st (Peshawar) Division, and was one of only eight of 52 British Army regular infantry battalions to remain in India. When volunteers for drafts to fight in France were called for, 880 out of 900 responded. The 2nd battalion was in Whittington Barracks, assigned to the 18th Brigade of the 6th Division. The Territorial battalions had been withdrawn early from their summer training camp to their home mobilisation stations.
1914
The 6th Division reached France on 10–11 September as part of the British Expeditionary Force. By this time the German Army's advance had been halted on the Marne and pushed back to beyond the Ainse. The 6th Division was dispersed among the units of the BEF holding the line on the ridge of the Chemin des Dames, with 2nd battalion the penultimate battalion on the right of the line. On 20 September the Germans attacked the junction of the British and French forces but were held; in this introduction to the war the battalion lost in one day almost as many men as the 1st battalion lost in the whole of the Boer War. The Allies and the Germans now began a series of moves to try and outflank each other resulting in a northwards movement called the Race to the Sea. Rejoining the rest of the Division in early October during this northward movement the 2nd battalion fought at the Battle of Armentières, dispersed in companies to reinforce other units to the south-east of Armentiers. By the end of October when it was withdrawn from the front, the 2nd battalion had lost over 80% of its original complement killed or wounded.
On 16 December, the 18th battalion (a Pals battalion) became the first New Army battalion to come under enemy fire when two companies on coastal defence duty at Hartlepool suffered 5 dead and 11 wounded when the town came under fire from the battlecruisers SMS Derfflinger, SMS Von der Tann and SMS Blucher.
1915
After the failure of British attacks at Neuve Chapelle and the French in Champagne, the Germans attacked at the Second Battle of Ypres on 22 April. By this time the territorial battalions of the regiment had just landed in France with the 50th (Northumbrian) Division on 17–18 April. Without any 'nursery' period the brigades of the Division were deployed as needed in the northern part of the salient around St Julian and the Gravenstafl Ridge. Repeated German attacks throughout late April and May forced a withdrawal toward Ypres. Between 25 and 27 April, the 8th battalion was reduced to the effective strength of one company after being enfiladed at Boetleer's Farm with the 8th Canadian battalion and is credited with saving the flank of the 85th Brigade. In late May, the 5th, 7th, 8th and 9th battalions were part of the forces that slowed the German assault on the Bellewaarde Ridge the last battle of Second Ypres. Due to its losses, in June the 8th battalion was merged with the 6th battalion to form the 6th/8th Composite battalion, which separated back into its components in August after reinforcement.
The first of the service battalions of the New Army, the 10th battalion of the 43rd Brigade, 14th (Light) Division and the 11th battalion which were pioneers of the 20th (Light) Division, arrived in France in May and July respectively. The 5th battalion was converted to the (50th) Division pioneer battalion on 16 May 1915.
In July, the 41st Division was in the line in the Ypres salient at the chateax of Hooge, where the Germans held the house and the allies the stable block, just north of the Menin road. On 30 July, the Germans used Flamethrowers, which threw back the 41st Brigade and pushed the front line south back to Zouave and Sanctuary Woods. The 6th Division was tasked to retake the old line of late July. The now reinforced 2nd battalion had to face a 500-yard advance paralleling the German line before reaching its objective. In the early hours of 9 August, together with the 1st K.S.L.I. on its left, the battalion overran the German trenches at bayonet point and re-established the British line on the north of the Menin road at a cost of nearly 200 dead and 270 wounded. Praise was received from the brigade, Division, corps and Army commanders and Sir John French commander of the BEF said of the assault it was "...one of the best conducted of the smaller operations of the campaign".
Four more service battalions arrived in France, the 12th and 13th of the 68th Brigade of the 23rd Division in late August and the 14th and 15th of the 64th Brigade of the 21st Division in early September.
The 21st and 24th Divisions were chosen as part of the reserve for the Battle of Loos despite being newly arrived in France and having had comparatively little training. After a long night march, dawn found the battalions between Loos and Hulluch with a German redoubt on Hill 70 to their right. Over the course of the day, both essentially untrained battalions attacked a total of five times unsupported by artillery but were beaten back. The 14th battalion lost 294 killed and wounded, the 15th 642. In late November, the 14th battalion joined the 2nd in the 18th Brigade of 6th Division.
On 4 November, the regiment won its first VC of the war when Pte Thomas Kenny of the 13th battalion rescued a wounded officer.
1916
The arrival of service battalions of the regiment continued: the 19th battalion (Bantams) in the 106th Brigade of the 35th Division on 29 February, the 20th battalion (Wearsiders) in the 123rd Brigade of the 41st Division and the 22nd battalion which landed on 16 June attached to the 19th (Western) Division, but quickly transferred to the 8th Division as Division pioneers. The 18th battalion (Pals) had arrived in March from Egypt where it had garrisoned the Suez Canal at Qantara as part of 93rd Brigade of the 31st Division.
;The Somme
The Somme offensive was originally planned, earlier in the year, as a joint British-French offensive but due to the increasing pressure on the French at Verdun was fought in part to relieve that pressure without much of the expected French support. General Haig felt that he lacked sufficient artillery and that many of the New Army Divisions were not yet fully trained but was pressured into starting the offensive at the start of July.
The regiment had two battalions in action on the first day of the Somme, 1 July, the 18th (31st Division) opposite Serre and the 15th (21st Division) north of Fricourt. The 15th battalion, aided by its Division artillery's used of a rolling barrage, captured the German front line trenches and pressed on, until by the afternoon the battalion advanced an additional 600 yards to the edge of Shelter Wood, beating off a counterattack until relieved that night. Casualties amounted to 440 officers and other ranks.
The planned advance of D company of the 18th battalion that morning was overlooked by German forces in the ruins of Serre and together with the other assaulting troops of the first wave suffered grievous losses and gained no ground. The retaliatory German shelling virtually destroyed the front line and communication trenches and the remaining companies of the 18th and other battalions were ordered to prepare a defence in case of counterattack. They remained in these shattered trenches, attempting to repair them and rescuing the wounded from no-mans land, under at times intense bombardment, until relieved during the night of 4 July. When reassembled the battalion had 14 officers and 357 men, having lost 58% of its strength killed and wounded.
British tactics now changed; instead of attacks aiming for deep penetrations, smaller objectives were set, the first at Bezatin Ridge on 14 July. The 12th and 13th battalions fought between Poiziers and Martinpuich up to the end of July, the 19th although only in a supporting role, had still lost more than 250 officers and men near Guillemont at the end of July, the 10th fought in Delville Wood in August, and the 11th, a pioneer battalion, was fighting in the trenches near Ginchy in early September.
The next objective was on a 10-mile front between the villages of Flers and Courcelette in mid September. The 2nd and 14th battalions were part of the attack that took the Quadrilateral strong point near Ginchy. The territorials and the 10th, 15th and 20th battalions were also involved in this phase, with the 5th battalion having only 92 officers and men fit by 19 September. Le Transloy ridge was the next target in the increasingly wet autumn, this involved the 2nd battalion, the 6th, 8th (temporarily joined with the 1/5th Borderers) and 9th territorials and the 12th and 13th service battalions. These last two captured the village of Le Sars in what the Official History called "...the striking success of the day." The territorials were again involved in the last assault of the Somme offensive, on the Butte de Warlencourt, the 1/6th, 1/8th and 1/9th losing between them nearly 940 officers and men killed, wounded or missing for no gain.
In early November the 2/5th and the 2/9th battalions consisting of category B fitness men separately embarked for Salonika and the front against Bulgaria.
1917
;Arras
The attack along the line at Battle of Arras (1917), starting on 9 April was intended as a diversion for the French attack at Nivelle. In the first phase of the attack, the 10th battalion had advanced ~4000 yards through the Hindenburg trench system until relieved on the night of 10 April. The 15th battalion also fought on the first day taking the front line trench (at ~1,000 yards) but being held up afterwards. The territorial battalions were in action in mid and late April south of the village of Guemappe.
In the coalfields of Lens the 2nd and 14th battalions fought the Germans over a feature called 'Hill 70' between April and July, adding it as a battle honour to the regiment.
;Messines
The set piece battle of Messines was intended to take high ground to the south of Ypres prior to the northern offensive. After an intense bombardmant, the explosion of underground mines and following a creeping barrage the 12th and 13th battalions near Hill 60 advanced ~1,000 yards and the 20th battalion starting from St Eloi advanced nearly 4000 yards with fewer losses than previous operations.
;Third Ypres
The next battle around the Ypres salient was to clear the Germans from the remaining high ground to the East of the city. The 20th battalion was involved in the first day's attacks on 31 July, advancing alongside the Ypres-Comines canal for the loss of 8 officers and 431 other ranks. The next advance was held up until near the end of August by heavy rains and was directed along the Menin Road, here the 10th battalion attempted to take and hold Inverness Copse losing over half its original strength by 25 August. General Plumer's methodical advance began on 20 September on the Menin Road ridge. The 20th battalion's advance on 21 September was checked after 200 yards, the 13th battalion reached their objective with both battalions losing around 300 men. The third of General Plumer's steps, the Battle of Broodseinde on 4 October involved the 15th battalion on the extreme right of 21st Division, despite being reduced to two composite companies by German heavy bombardment, they advanced south of Polygon Wood achieving the objective of the village of Reutel. When the battalion was relieved on 6 October it was commanded by a Lieutenant and had lost 430 officers and men.
For the remainder of the Third Ypres the regiment's battalions were in reserve positions, the Territorials during Second Battle of Passchendaele, or holding the line, and the 19th battalion (which had ceased to be a 'Bantam' unit in January) at Weidendreft in early November and the 10th battalion at Passchendaele in December. The Pioneer battalions, 11th and 22nd, also served with their respective Divisions (20th and 8th) during the Battle.
;Italy
When the Central Powers forced a retreat on the Italian Front at the Battle of Caporetto, 5 British and 2 French Divisions were sent to Italy. The British Divisions contained the 12th and 13th battalions (23rd Division) and the 20th battalion (41st Division) leaving the Ypres Salient between the end of October and mid November and arriving in at the Italian front between the end of November and early December.
;Cambrai
The Battle of Cambrai was the first successful use of maturing combined arms tactics by the British. On 20 November the 2nd and 14th battalions of the 6th Division were to pass through the assaulting forces and take the Hindenburg Line support trench; both battalions reached their objective with a total loss of 30 killed or wounded. On the next day, 3 companies from 14th battalion assisted tanks and squadron of cavalry in taking the village of Cantaing (north-west of Marcoing). The advance came to a halt as the Germans brought their reserves into the battle. The 11th battalion had been consolidating the ground behind the 4 mile advance of 20th Division but on 29 November its scattered companies were involved in fighting the German counter-attack on the ridges north of Gouzeacourt. The 14th battalion (together with the 1st battalion Shropshire Light Infantry) was ordered across the Canal du Nord on the night of 2 December to trenches facing Masniere, one of which was only 2–3 feet deep. After beating off one attack they were forced to withdraw back over the canal and over the next few days withdrew to the "Flesquires Line" and, for the British the disappointing end of the Battle.
1918–19
With the Russians out of the war, Germany was able to transfer forces and at last outnumber the Allies on the Western Front before the arrival of the Americans in force. Large numbers of stormtroopers were to be used, together with new artillery tactics. The Allies knew what was in store and began to prepare a defence in depth with varying degrees of effectiveness. As a result of manpower shortages (some politically induced), in February the British Army was reorganised from a four battalion to a three battalion infantry brigade structure, with many infantry battalions being disbanded to strengthen remaining battalions. In this way the 10th and 14th battalions were disbanded, reinforcing the other battalions of the regiment while the 9th was converted to a pioneer battalion and joined the 62nd (2nd West Riding) Division. The 20th battalion returned from Italy to the Western Front with its Division in early March.
;Spring Offensive
On the first day of the German "Operation Michael" the 2nd battalion was in the front line north of the Bapume-Cambrai road. After losing the two forward companies, the infantry withdrew in the evening mist with the remains of the 1st battalion West Yorkshire Regiment. At dusk on the 22nd, out of an original strength of 30 officers and 639 other ranks, the battalion had two officers and 58 men unwounded with six officers and 286 other ranks wounded. The 11th pioneer battalion was building a supply railway in the 20th Division's rear, in the Saint-Quentin area around Ham. It was scattered during the week long battle, and only a few men regrouped in Amiens at its conclusion.
All the regiment's battalions on the Western Front suffered heavy losses as a result of the weight of numbers and new tactics of the Germans. The 18th, 19th and 20th battalions also fought on the Somme. The 9th battalion fought before Bucquoy at the end of March where Pte Young won the V.C. for rescuing 9 men under fire. When relieved on 1 April, the battalion had lost 492 officers and men, and the 15th battalion reduced to one company.
The territorials of the 50th Division, the 5th, 6th and 8th battalions and 7th (Pioneer) Bn were particularly unfortunate, forced into the long retreat on the Somme, they were reinforced by drafts from the graduated battalions and sent to the Ypres salient in April where, after the initial assault they were only saved by the German looting: Reduced to a total of a battalion in strength, The 151st Brigade was then sent to the Aisne to recuperate where a third German attack found them on 26 May, 21 days after arriving. The scattered parties were forced back to south of the Marne where eventually the Durham battalions of 151 brigade could only muster 103 men of all ranks.
Also on the Lys, the 18th battalion fought in retreat south and west around Bailleul and, when taken out of the line on 14 April was formed into a composite battalion with the 15th West Yorkshire Regiment which totalled around 450 men.
The 22nd (Pioneer) battalion fought as infantry on the Aisne on 27 May; after losing 513 officers and men in continual withdrawal, it was absorbed into the 8th Division Composite Battalion.
In June, the remains of the 5th, 6th and 8th battalions were reduced to cadre strength and were sent to the Dieppe area while the 7th (Pioneer) Battalion joined 8th Division and absorbed 22nd (Pioneer) Battalion.
The 62nd Division arrived on the eastern flank of the new salient 2 days after the start of the German attack on 17 July. The 9th battalion was used as infantry for the counter-offensive along the Ardre river, and on 20 July fought through thick woods and captured the village of Cuitron on 22 July at a cost of 294 officers and men killed wounded and missing.
;Hundred Days Offensive
The German offensive had petered out without the decisive breakthrough that was desired and the German high command knew that the allies would respond, knowing of the German losses, and bolstered by the arrival of the Americans and the reinforcement of the British and French making up for some of the losses from the spring offensive. The first blow fell on 8 August at Amiens in which the regiment had no part. This signalled the beginning of a general advance of the five British Armies through Picardy on 21 August and Flanders on 28 September, four of which contained battalions from the regiment.
The remaining battalions of the regiment participated in this advance being joined in France by the 2/6th battalion in May as part of the 177th brigade of the 59th Division, the 29th battalion reinforcing the 41st Brigade of the 14th Division and the 13th battalion returning from Italy in September to join the 74th brigade in the 25th Division.
On the Somme with the Third Army the 15th battalion made a night advance of over 3000 yards on 23/24 August and fought again on the Hindengurg Line in mid September. In the Fourth Army the 2nd battalion attacked the Hindenburg Line near St Quentin over terrain that was "...a bare, glacis-like slope devoid of cover..." and lost over 300 men for only 200 yards gained. The 13th battalion attacked the reserve line of the Hindenburg system on 6 October near Villers-Outreaux, with the 15th battalion attacking the same day a few miles to the North. In Flanders, the clearing of the German's spring salient and subsequent advance over the battlefields of the last four years at Ypres was shared by the 18th, 19th, 20th, 2/6th and 29th battalions. The 29th battalion's only battle was the crossing of the Lys near Comines on 15 October. The 2/6th fought on the Premesques ridge and went on with the Division to cross the Scheldt. The 2nd, 13th and 15th battalions took part in the final advance across the Selle and Sambre rivers, the 15th having to drive out the Germans at Limont-Fontaine at bayonet point losing 127 men on 7 November.
;Italy
The British Divisions were deployed between Lake Garda and the Piave River, however in February the 41st Division with the 20th battalion was returned to the Western Front. In June the Austrians launched the Battle of the Piave River with the 12th and 13th battalions facing the northern pincer which made no progress against the British, the two battalions losing six dead and 61 wounded during the day. The 13th battalion returned to the Western Front in September. At the end of October the 12th battalion took part in the Battle of Vittorio Veneto assaulting across the Piave River before being relieved on 30 October.
;Macedonia
Initially both 2/5th and 2/9th battalions were employed on guard duties in and around Salonika where the 2/9th battalion remained until the end of the War. In March 1917 the 2/5th battalion was brigaded into the independent 228th Brigade and sent into the line west of Lake Butkovo. There it stayed until the Bulgarian armistice on 1 October 1918 when it began to advance with the brigade under Greek command. When the Turkish armistice was signed on 31 October the battalion was sent with the 2/5th battalion Seaforth Highlanders to occupy the ports of Varna and Burgas. While overseas the battalion lost two men from wounds but 21 from disease.
;Russia
The 2/7th battalion joined the Allied Intervention in Russia in Archangel, Northern Russia as a garrison battalion, arriving on 7 October 1918. It did not see action and was withdrawn in January 1920.
;Army of Occupation
In November and December the 2nd and 9th battalions were among the British forces that marched to the Rhine as part of the Army of Occupation. In early 1919 the 51st and 52nd (Graduated) battalions together with the 20th battalion formed the 3rd Northern Brigade of the Northern Division with the 53rd battalion, reduced to cadre, supplying reinforcements; all were based in Cologne.
India
The 1st battalion remained in India throughout the First World War, suffering a continual drain of drafts for the Western Front. In August 1914 it was part of the Nowshera Brigade of the Peshawar Division, and served on the North West Frontier in 1915, and 1916–17 in campaigns against the Mohmands. The battalion was in Rawalpindi in 1919 at the outbreak of the Third Anglo-Afghan War in which it played a mostly supporting role. Demobilising its time expired men, a cadre of the battalion returned to Britain in February 1920.
Inter-war
By 1920, the service battalions had been disbanded with their King's colours laid up in Durham Cathedral except for the 20th battalion's at the parish church of Bishopwearmouth.
The 1st battalion was reformed with drafts from the 3rd (the last act of the Militia) and left for Germany, still understrength, in March 1921 for duty in Upper Silesia, returning to Britain in July 1922. The battalion spent 3 years in Egypt again returning to Britain in April 1930. Joining the 6th Brigade of the 2nd Infantry Division it took part in experiments in infantry mechanisation. It was then sent to Shanghai arriving in November 1937, reinforced by personnel from the 2nd battalion at Port Sudan. In October 1938 the battalion moved to Tientsin and was there when Britain declared war against Germany.
The 2nd battalion returned to Britain from Germany in April 1919 as a cadre; the battalion reformed and was sent to Batoum in South Russia in October 1919 to police territorial terms of the Armistice. In July 1920 it was sent to the Izmit in Turkey to police the terms of the Turkish armistice until November. From here they went to India and in February 1927 were deployed to Shanghai to protect the International Settlement. Returning to India in August, it fought against the Mahsuds, relieving the post of Datta Khel in May 1930. The battalion arrived back in Britain in November 1937 after a few months in Egypt, replacing the 1st battalion in the 6th Infantry Brigade, 2nd Infantry Division.
In February 1920 the Territorial Force was re-raised and later in the year renamed the Territorial Army. In the 1930s as part of the growing realisation of the threat of air power, numbers of territorial battalions were converted to an air defence role, either as Anti-Aircraft gunners or search light regiments, in this way the D.L.I. lost the 5th and 7th battalions. These units were no longer a part of the Regiment.
Second World War
During the Second World War the D.L.I. raised 15 battalions, two Regular, six 1st and 2nd line Territorial (one renamed and transferred to another regiment), and the remainder war formed (mostly so called 'Dunkirk' battalions), with 10 seeing active service overseas in France, Burma, North Africa, Italy, and France and Germany. The low number of battalions raised compared to the First World War was due to the increasing specialisation of a more mechanised army and its associated support requirements. Additionally, twenty six battalions of the Home Guard wore the D.L.I. cap badge.
After the war Field Marshal Montgomery was to write,
The remaining first line territorial battalions once again formed the 151st Infantry Brigade of the 50th (Northumbrian) Infantry Division, initially a two brigade motorised Division. The territorials again raised second line battalions now numbering them sequentially, 10th, 11th and 12th battalions, these were now part of 70th Infantry Brigade of the 23rd (Northumbrian) Division the 2nd line copy of the 50th Division. The 12th battalion was named as a Tyneside Scottish unit and on 31 January 1940 the battalion left the regiment to become 1st battalion, Tyneside Scottish of the Black Watch (Royal Highland Regiment).
When the War broke out the 1st battalion was in China at Tientsin, the 2nd battalion at Woking in the 2nd Infantry Division and the territorial battalions had already begun to form their 2nd line.
France 1940
The 2nd battalion arrived in France with the 2nd Infantry Division as part of the BEF in late September 1939 and was quickly deployed on the border with Belgium. The 151st brigade arrived in late January 1940 with 50th Division, with training still to be completed for some men, and moved up to the border at the end of March. The second line battalions (and the Tyneside Scottish) arrived in the part trained 23rd Division in early April, with no artillery or mortars and a reduced rear echelon with orders to complete their training and construct airfields. In the 70th brigade, 1400 men had not fired a Bren gun and 400 had not completed the war course with the rifle.
When the Germans attacked on 10 May the 2nd battalion had moved into Belgium to the River Dyle by late on the 11th, 151st brigade was to be held in reserve. On the Dyle, the 2nd battalion held the Germans for two days until ordered to withdraw on 16 May, with Lt Annand winning the Army's first V.C. of the War. The 151st brigade was ordered to move forward to the River Dendre on 16 May, only to begin to fall back on the 18th.
In an attempt to delay the German armoured thrust, the rear echelon, including 70th brigade, was ordered into its path. After a series of marches and counter marches that began on 13 May the brigade, on 20 May, was spread along the roads south of Arras travelling west. Here they were ambushed by German armour, without heavy weapons their defence became a series of isolated and confused company actions. At St Pol the next day the brigade headquarters, the survivors of the three battalions and some engineers amounted to 14 officers and 219 other ranks, joined by other stragglers in the next few days they total ~800 men. On the claim that the action south of Arras delayed the German advance by five hours, the official history states: The remains were formed into "Marleyforce" and as such it reached Dunkirk to be evacuated on 31 May.
On 20 May 151st brigade, after a series of marches west and south, was chosen as part of the Arras counter-attack. The 6th and 8th battalions were to support the 4th and 7th Royal Tank Regiments respectively, with the 9th battalion in reserve. After initial successes to the west of Arras the Germans counter-attacked, and the British forces were withdrawn to Vimy Ridge. The brigade was then ordered north on 25 May to plug the gap of the impending Belgian surrender. To do this it had to extract itself from fighting on the Le Bassee Canal, the 8th battalion having to recapture the village of Carvin north of the canal, and only on the 27th could the brigade move north following the rest of 50th Division to Ypres.
The 2nd Division had been sent to man 21 miles of the western side of the Dunkirk corridor with the 2nd battalion positioned near St. Venant. From 24 to 27 May the Division held off attacks by four Panzer Divisions (3rd, 4th, 7th and S.S. Totenkopf), ending with over 70% of the Division becoming casualties and the massacre of 97 men of the 2nd battalion, Royal Norfolk Regiment at La Paradis. When the 2nd battalion reformed in Britain after evacuation from Dunkirk on the night of 29 May it consisted of the remains of D company and the battalion's B echelon, stragglers and convalescents, some 180 men.
Arriving at Ypres 151st brigade was almost immediately forced back, and the retreat to the Dunkirk perimeter began. By 30 May the brigade was entrenched between the Bergues and Ringsloot canals and reinforced by some remnants from 70th Brigade, after repulsing German attacks on the 31st, the brigade embarked for Britain from the Dunkirk mole late on 1 June.
Iceland
British forces had invaded Iceland in May 1940, and in October the 10th Battalion arrived followed by the rest of 70th Brigade a month later replacing 148th Brigade in 49th (West Riding) Infantry Division. While there the division used the empty terrain of the island to train using live ammunition, the 70th brigade left in December 1941.
North Africa, the Middle East and the Mediterranean 1940–43
The 1st battalion left China and arrived in North Africa in January 1940 The battalion played a supporting role in Lieutenant-General O'Connor's offensive in December except for a composite company which advanced as far as Sidi Barani. It joined the 22nd Guards Brigade in January 1941 and trained for amphibious operations at Qassassin, only to be returned to the desert in March when Erwin Rommel counter-attacked. Counter attacking at Halfaya Pass the battalion used primitive motorised tactics and communications (flag signals), the attack failed and the battalion lost more than half its strength including the whole of D company. In June the reinforced battalion was deployed as part of the take-over of Vichy controlled Syria, but in October 1941 it moved back to North Africa as part of the rotation of forces in the besieged Tobruk garrison. Here they patrolled and raided the German and Italian lines, and in early December extended the perimeter near El-Adem as part of the lifting of the siege.
Meanwhile, 50th Division with 151st Brigade had been sent to the Middle-east arriving early July 1941 and at the end of the month deployed to Cyprus to improve the islands defences. From there the 50th Division was sent to Palestine in November and then on to Irbil in Iraq to be part of the forces to meet an anticipated German advance from southern Russia.
In January 1942 the 1st Battalion was moved to garrison Malta, returning to North Africa in June 1943 after losing only a few men to air attack.
In February 1942 the 50th Division was recalled to the Western Desert and the British Eighth Army and found itself on the Gazala line. For some months the Durham battalions patrolled no mans land disrupting and stealing German and Italian supply lines in front of them, 'commerce raiding' and then attacking the supply columns for Rommel's armoured thrust which began the Gazala on 27 May. The Division's 150th brigade was forced to surrender on 1 June and Axis forces were now west, south and east of the remaining brigades. Forming columns most of the 6th and 8th battalions broke out west through Italian then German lines on the night of 14/15 June, then travelled south past the German armoured thrust and east to the Egyptian border. The 9th battalion and a party from the 6th were forced to take the coastal route after the Italians and Germans had been alerted to the western breakout and fought through German positions west of Tobruk, they were reunited with the rest of the division on 16 June. After the fall of Tobruk the division was now placed on an escarpment south of the town of Mersa Matruh and on 27 June held attacks by the German 90th Light Division during which Pte A H Wakenshaw won a posthumous V.C. but after which the 9th battalion positions were isolated and overrun with only the headquarters company escaping. The division was ordered to withdraw on 28 June again in column formation but this time over ground broken by wadis. In one of these the 8th battalion lost its D company to a German ambush and the rendezvous point, Fuka, was in German hands leading to the capture of some un-diverted columns. When reassembled the 50th Division was withdrawn behind the Alamein line to rest and reorganise after suffering over 8000 casualties since the start of the Gazala battle.
While behind the lines the 6th, 8th and 9th battalions each contributed a company to a composite battalion for an attack on the southern part of Ruin Ridge on 27/28 July, while the Australians attacked the northern part. Although the position was taken, almost the entire composite battalion was killed or captured by the German counterattack.
The 50th Division returned to the front line on 4 September, and during the first days of the Second Battle of El Alamein stayed in reserve in the southern part of the line. On 28 October the 151st Brigade was moved north and with the 152nd Brigade came under command of the 2nd New Zealand Division for Operation Supercharge. Early on 2 November the three battalions advanced through the smoke and dust of the bombardment which reduced visibility to 50 yards and facing scattered German resistance reached their objective by the dawn. Here they witnessed the destruction of 9th Armoured Brigade and were subject to German shelling before being relieved on the evening of 3 November, having lost nearly 400 men.
The 50th Division returned to the front line when the Eighth Army reached the Mareth Line in February 1943. On the night of 20/21 March the 8th and 9th battalions attacked, crossing the wadi and fighting the dug in Italians of the Young Fascist Division, with the 6th battalion the tanks of 50th R.T.R. following The tanks were unable to cross the wadi that night, however the next night after the 6th battalion and the 5th battalion East Yorkshire Regiment reinforced the penetration, some 40 tanks were able to cross. On 22 March the Germans counterattacked with the 15th Panzer Division and the infantry battalions were forced to withdraw, crossing back over the wadi at first light on 23 March. The 6th battalion, which started the battle with a strength of only ~300 of all ranks, was reduced to 65 unwounded men by the end of the battle, the 8th and 9th were in a similar condition. Shortly after the division was withdrawn from the front and sent to Alexandria.
On 3 January 1943 the 16th Battalion landed at Algiers with the 139th Brigade of the 46th Infantry Division, part of the British First Army. It moved into Tunisia it fought at the first battle of Sedjenane, where they were forced to withdraw by 4 March after losing nearly half their number. First Army's offensive was resumed in April and on 22 April the 16th Battalion attacked the hill of Sidi Barka held by men of the Herman Goering Division, after gaining a false crest instead of the summit, the battalion held on through mortar bombardment until the Germans pulled out the next night.
With the defeat of the Germans in North Africa the 6th 8th and 9th battalions were withdrawn to Alexandria, reinforced and trained in amphibious techniques for the invasion of Sicily. The 16th Battalion, after taking part in the victory parade in Tunis, was sent to Algiers for training.
In March 1943 a second incarnation of the 18th Battalion was raised at Genefia in Egypt from convalescents of the other D.L.I. battalions as the infantry component of 36th Beach Brick.
Arriving back in Africa in June 1943 the 1st battalion was moved to Syria where it was attached to the 10th Indian Infantry Division. The battalion was chosen to be sent to invade the island of Kos, the first company arriving on 16 September but not until the end of the month was the whole battalion on the island, during which time German bombing was increasing. After 10 days of fighting paratroopers and other German forces the remaining men of the battalion were taken off the island by the SBS on 13 October. The battalion was gradually rebuilt from the 129 officers and men who assembled at Genefia at the end of October, and retrained and reinforced until at full strength by the end of March 1944. In April the battalion was deployed to Alexandria to contain a mutiny by the Greek Brigade, but by the end of the month had set sail for Italy.
Burma 1941–45
The 2nd battalion was sent to India in April 1942 with the 2nd Division, arriving in June. For some months it was trained in Jungle fighting and in amphibious assault methods. Later in that year the 6th brigade was made an independent formation. The brigade fought in the Arakan early 1943 at Donbiak on the Mayu peninsular with the brigade making little progress against strong Japanese positions. It was forced to withdraw when the Japanese cut off the peninsular at Indin bridge, the brigade fought its way out, arriving back in India in May. After more amphibious training in the rest of 1943 and early 1944 the 2nd Division was sent relieve Kohima in April 1944. Here the 2nd battalion fought on Garrison Hill and F.S.D. Ridge in late April and early May while overlooked by the guns of the Japanese on Kuki Piquet. Withdrawn to Diampaur in early May the battalion could only muster three companies of two platoons each. By June the battalion was taking its turn as the lead of the advance, with supporting armour, along the Imphal road, when its 'A' company made contact with the lead elements of the 5th Indian Infantry Division on 22 June and the siege of Imphal was lifted: The Division was rested until December when it continued its advance into central Burma encountering light but continual resistance. The 6th brigade was in reserve when Mandaly was taken, after which the battalion was returned to India and reacquainted with its previous amphibious training for the attack on Rangoon, in the event they entered the undefended city on 13 May. The battalion was withdrawn back to India in September 1945 to prepare for occupation duties in Japan.
Sicily, Italy and Greece 1943–45
The 151st brigade was chosen as an assault brigade for the Allied invasion of Sicily on 10 July 1943 with the 6th and 9th battalions leading. Due to poor weather both landed late and in the wrong place but against light resistance. After advancing inland and breaking up attacks from the 54th (Napoli) Division on 12 July, the Durham battalions were ordered to Primosole bridge after its capture by British Paratroopers of the 1st Parachute Brigade arriving on 15 July after a forced march of 25 miles and the paratroopers had been forced from the bridge. After 2 days of ferocious battle against men of the 1st Fallschirmjager Division the bridge was retaken at a cost of 500 casualties to the brigade. After entering Catania on 5 August after the Germans withdrew the advance northward was contested in a landscape of terraced hillsides and stone walls. With the end of resistance in Sicily the brigade rested and was informed it was to return to Britain in October.
The 16th battalion landed in Italy at Salerno as part of British X Corps, attached to US Fifth Army, on 9 September in the second wave, and defended the perimeter of the beach-head until 15 September. The 18th battalion was also part of the landings at Salerno (with two companies) in its role as a beach group. The 16th battalion fought toward, and entered Naples on 6 October, then on 12 October made a silent crossing of the River Volturno reaching its first objective before the Germans noticed. It held the bridgehead it established for 8 days until relieved. The battalion took part in the forcing of the Winter Line, at the end of October at the Bernhardt line, (after which it was reinforced by drafts from the regiment's 70th battalion) and in January 1944 forcing the main Gustav line. In February the 46th Division was withdrawn for rest and retraining to Egypt and Palestine, where the battalion aided the civil authorities during a riot in Tel-Aviv. Returning to Italy in July, it fought hard on the Gothic Line advancing along the road to Gemmano in early September and crossed the Cosina Canal in November. In December the battalion was sent to Greece as part of the efforts to keep the peace and then to forestall a communist take over. Initially deployed to Athens, a platoon accidentally occupied the Acropolis after turning left instead of right. It became involved in fighting ELAS at Phaleron and in January 1945, Patras. The battalion returned to Italy in April 1945, but did not see action.
Meanwhile, the 1st battalion had returned to Italy in May 1944 the where it joined the 10th Indian Infantry Brigade in the 10th Indian Infantry Division and by 19 May was back in the line north of Ortona. Transferred to the Tiber valley in June, it fought toward the Gustav Line until September, then was transferred once more to the Adriatic coast fighting though the Gothic Line when it was relieved in February 1945. Returning to the Adriatic coast in April it crossed the Sillaro on 15 April, the battalion heard news of the Armistice while in billets in Ferrara.
France and Germany 1944–45
The 50th Division with its 151st brigade was withdrawn to Britain in October 1943 to be trained for the Normandy landings, General Montgomery had wanted veteran divisions to be part of the invasion. The news that it was to be an assault division was not universally well received by the other ranks. The brigade landed in the second wave on Gold Beach King sector on which the 18th battalion was also present in its capacity as the infantry of a reserve beach group. Advancing inland they faced the grenadiers of the Panzer Lehr Division in the bocage around St Pierre, Verrieres and Tilley-sur-Seulles throughout mid June.
The 10th and 11th battalions were landed with the 49th Infantry Division on 10 June and were committed to the attempt to outflank Caen. The 70th brigade with support of the tanks of the Sherwood Rangers Yeomanry captured Rauray (11th battalion) and the high ground beyond (10th battalion) on 27–28 June. The German counter-attack by troops of II SS Panzer Corps was held by the 11th and Tyneside Scottish battalions after such hard fighting that Lord Haw Haw called the division the Polar Bear Butchers (referencing their formation sign). After some days rest and reinforcement the five D.L.I. battalions in Normandy were briefly together when the 70th brigade relieved the 151st brigade around Tilley-Sur-Seulles on 7 July. Later in the month the brigade was transferred to the east of Caen and covered the right flank of Operation Spring. Advancing to Mezidon on the River Dives after the German defeat at Falaise, the brigade fought its last action on 18 August, after which the brigade (as a second line formation) received news it was to be disbanded to reinforce other units of the Second Army.
The 151st brigade advanced in line with the other advances made by the allies in July and by early August was attacking hills south of St.Pierre la Vielle on what was to become the northern edge of the Falaise pocket. After the break out from Normandy the division crossed the Seine on 29 August and reached the Belgian border on 6 September. After a brief rest in Brussels the brigade was tasked to cross the Albert canal in the wake of the 69th brigade, and take the village of Gheel. After holding a series of counter-attacks the 15th Division entered the village on 12 September without a shot being fired, as the Germans had retreated. In October the division was moved to the 'Island', the low-lying ground between the Wall and the Lower Rhine north of Eindhoven. After a short operation to expand the bridgehead the brigade garrisoned the area in the early winter. In December, due to its heavy losses, the 50th Division was broken up to reinforce other formations, the 6th and 8th battalions were reduced to a training cadres of time expired men and returned to Britain.
The 9th battalion was reinforced and transferred to 7th Armoured Division, 131st Infantry Brigade, as a motorised battalion fighting at the Roer Triangle in January 1945 and the town of Ibbenbüren in March. The battalion ended the war near Hamburg.
The 18th battalion had been serving as lines of communications troops of 21st Army Group, however one company fought the Germans during an attack from besieged Calais in February 1945, the battalion was disbanded at Calais in August 1945.
Home Front 1939–45
Some battalions raised by the regiment were destined not to leave Britain. A Home Defence battalion, the 13th, was formed from the Durham Group (No. 41) National Defence Company in December 1939. It divided in September 1940, producing the 2/13th (Home Defence) battalion which was renamed as the 18th battalion in March 1941. The 1/13th battalion then re-joined the 18th battalion to form the 30th battalion in November 1941 applying the numbering used nationally for 'B' category fitness battalions. In 1942 it was briefly organised as a field force unit (a standard army battalion with 'A' category fitness men), until it was disbanded in November 1942.
After the Army's evacuation from Dunkirk, 60 so called 'Dunkirk' infantry battalions were raised in the country that summer, three of which were D.L.I., the 14th, 16th and 17th battalions. All three were brigaded in the 206th Independent Infantry Brigade initially in Scotland, and then on the South coast of England. The 14th and 17th were used as a source of trained reinforcements to the front line. In June 1943 the 14th battalion was sent to Durham as a rehabilitation unit for convalescing troops and ex-PoWs where it stayed until the end of the war. The 17th was disbanded in September 1943.
The 15th battalion was raised from the 50th (or 15th ) Holding battalion in October 1940 and took up the role of coastal defence. In November 1941 it was converted to an armoured unit as 155th Regiment of the Royal Armoured Corps, retaining the D.L.I. cap badge on the black beret of the RAC.
The 70th (Young Soldiers) battalion was formed in December 1940 at School Aycliffe near Darlington, for men too young for conscription (20 years at the time). Instead of disbanding when the conscription age was lowered to 18 years in 1942 it was chosen to be a demonstration battalion for the G.H.Q. Battle School at Barnard Castle. The battalion was disbanded in August 1943, over 400 of its men being sent overseas.
On their return from the front line in December 1944 the territorial battalion cadres of the 6th and 8th battalions were sent to Yorkshire and were given the task of training service corps soldiers as infantry until the battalions were placed into suspended animation in January 1946.
Post War
Post war, the 1st battalion was active in the Greek Civil War between January 1946 and June 1948, returning to Britain on 23 July 1948. The 2nd battalion was sent to Singapore from November 1945 to January 1947 when it returned to Burma. By March it was conducting operations against dacoits around Maymyo. Demobilisation had reduced the battalion to 30 men when it returned to Singapore in November and it returned to Britain on 18 February 1948 as a cadre.
The 6th, 8th and 9th territorial battalions were reformed as part of the Territorial Army in March 1947, with the 9th battalion being renamed in July 1948 as the 17th battalion, Parachute Regiment.
On 25 September 1948 the remaining cadre of the 2nd battalion was absorbed into the 1st battalion. The battalion served as part of the Allied occupation forces in Germany, stationed in Dortmund in 1949 and Berlin in 1951. The 2nd battalion was reformed in 1952 and was sent to Germany, substituting for the 1st battalion which had been sent to Korea, the battalions re-amalgamated in 1955.
Korea
While in Germany the battalion learned that it was due for a tour of service in Korea, after leave and training in Britain it arrived in September 1952, and was made part of 28th Commonwealth Brigade of the 1st Commonwealth Division part of the United Nations forces in Korea. During its year there up to 50% of its strength was composed of National Servicemen and resulted in a high turnover of men. After initial training in theatre the battalion was first stationed at Neachon (Point 159) in late September, to be greeted by the Chinese by name on arrival (on this and subsequent movement into the front line, as were other battalions). Here it began the never-ending process of attempting to make its trenches clean and habitable, and began patrolling to dominate no-mans-land. In November two trench raids were mounted to try and capture Chinese soldiers, but these were unsuccessful in spite of reaching the Chinese lines due to defensive fire and the extensive use of dugouts by the Chinese in their trench system.
At the end of December in the cold of a Korean winter, the battalion took over and began repairing the trenches at Point 210, and continued patrolling, they were relieved by the Americans at the end of January.
In early April 1953, after being joined by a draft of 94 Korean soldiers who wore British uniform and the D.L.I. cap badge, the battalion relieved the Americans on Point 355, also known as "little Gibraltar" for its steep sides. The battalion continued to patrol vigorously, encountering Chinese patrols on occasion. On the night of 2 July, to celebrate the Coronation of Queen Elizabeth II, a patrol from A Company staked out the Royal cypher "EIIR" in red and yellow fluorescent aircraft recognition panels about ten metres below the Chinese forward trenches.
At 22:00 hours 27 July, after continued patrolling and ambushes defending the position in the closing stages of the conflict, the battalion buglers sounded "ceasefire". The battalion had lost 24 dead (including 2 attached Koreans) and three missing and 124 wounded. The battalion left Korea in September.
Post Korea
From Korea the 1st battalion was stationed in Egypt, where buglers from the battalion took part in the unveiling of the El-Alamein Memorial on 24 October 1954. The battalion returned to Britain in June 1955.
In 1955 the 3rd and 4th battalions were finally disbanded, they had been in suspended animation since 1919.
During the Suez Crisis the battalion was flown to Aden on 4 November 1956 for possible deployment to Kuwait. Most of the battalion returned in February 1957, except for one company which assisted in repelling a Yemeni incursion in the Wadi Harib area.
On 17 May 1958 a bicentenary parade was held at Brancepeth Castle in the presence of Princess Alexandria of Kent to commemorate the raising of the regiment. Present were the 1st battalion and one company each from the 6th and 8th battalions as well as their massed bands and bugles, and detachments from the 437th Light Anti-Aircraft Regiment R.A. (D.L.I.) T.A., and 463th (7 D.L.I.) Light Anti-Aircraft/Searchlight Regiment R.A. T.A. and the 17th battalion The Parachute Regiment (9 D.L.I.) T.A.. The associated Artillery and Parachute Regiments also provided troops who lined the route from the castle gates to the parade area.
Borneo
While in Hong Kong in June 1965 the battalion was informed it was to be deployed to Borneo as part of Britain's response to the Indonesia–Malaysia confrontation. Here they patrolled the Jungle taking part in the secret 'Claret' operations across the border into Indonesia alongside the Gurkhas and Australians. During one of these operations the D.L.I. suffered its last combat fatality, Pte Thomas Griffiths on 26 February 1966.
Amalgamation
Finally in 1968, whilst the battalion was again serving in Cyprus, it was announced that the Durham Light Infantry would join with three other county light infantry regiments to form one large Regiment, The Light Infantry, it was to be renamed the 4th battalion the Light Infantry. On 12 December 1968 the 1st battalion laid up its colours in a service in Durham Cathedral, attended by Princess Alexandra, the Regiment's last Colonel in Chief, who inspected the battalion and veterans of the D.L.I. Association.
Victoria Cross awards to the D.L.I.
Battle honours
The regiment inherited the battle honours of its predecessor regiments. Due to the number of honours awarded for the First World War, in December 1922 regiments were permitted to select up to 10 honours to be emblazoned on its King's Colour, honours from other conflicts continuing to be displayed on the Regimental Colour. After the Second World War, a further 10 honours were permitted to be added the King's Colour. These are shown below in bold text below.
; Peninsular War
Salamanca, Vittoria, Pyrenees, Nivelle, Orthes, Peninsula
; Crimean War
Alma, Inkerman, Sevastopol
; Anglo-Persian War
Reshire, Bushire, Koosh-Ab, Persia
; New Zealand Wars
New Zealand
; Second Boer War
Relief of Ladysmith, South Africa 1899–1902
; First World War
Aisne 1914 '18, Armentières 1914, Ypres 1915 '17 '18, Gravenstafel, St. Julien, Frezenberg, Bellewaarde, Hooge 1915, Loos, Somme 1916, '18, Albert 1916, '18, Bazentin, Delville Wood, Pozières, Guillemont, Flers-Courcelette, Morval, Le Transloy, Ancre Heights, Arras 1917, '18, Scarpe 1917, Arleux, Hill 70, Messines 1917, Pilckem, Langemarck 1917, Menin Road, Polygon Wood, Broodseinde, Passchendaele, Cambrai 1917, '18, St. Quentin, Rosières, Lys, Estaires, Hazebrouck, Bailleul, Kemmel, Scherpenberg, Marne 1918, Tardenois, Bapaume 1918, Hindenburg Line, Havrincourt, Épéhy, Canal du Nord, St. Quentin Canal, Beaurevoir, Coutrai, Selle, Sambre, France and Flanders 1914–18, Piave, Vittorio Veneto, Italy 1917–18, Macedonia 1916–18, Egypt 1915–16, N.W. Frontier India 1915 1916–17, Archangel 1918–19
; Afghanistan
Afghanistan 1919
; Second World War
Dyle, Arras counterattack, St. Omer-La Bassée, Dunkirk 1940, Villers Bocage, Tilly sur Seulles, Defence of Rauray, St. Pierre La Vielle, Gheel, Roer, Ibbenburen, North-West Europe 1940 '44–45, Syria 1941, Halfaya 1941, Tobruk 1941, Relief of Tobruk, Gazala, Gabr el Fachri, Zt el Mrasses, Mersa Matruh, Point 174, El Alamein, Mareth, Sedjenane I, El Kourzia, North Africa 1940–43, Landing in Sicily, Solarino, Primosole Bridge, Sicily 1943, Salerno, Volturno Crossing, Teano, Monte Camino, Monte Tuga, Gothic Line, Gemmano Ridge, Cosina Canal Crossing, Pergola Ridge, Cesena, Sillaro Crossing, Italy 1943–45, Athens, Greece 1944–45, Cos, Middle East 1943, Malta 1942, Donbaik, Kohima, Mandalay, Burma 1943–45
; Korean War
Korea 1952–53
Colonels
Colonels of the Regiment, from 1881 to 1968
Notable members
D.L.I. Museum and Durham Art Gallery
The D.L.I. Museum () (now closed) was the official museum of the Durham Light Infantry. Located in Durham, England, the museum featured displays about the regiment's history, with an emphasis on World War I and World War II activities. Exhibits included uniforms, weapons, medals, flags, hats, letters, photographs, badges, ceremonial regalia and other artefacts. The museum was located on the first two floors, with the Durham Art Gallery located on the third floor.
In October 2015 Durham County Council announced the closure of the D.L.I. Museum as a cost saving exercise. This decision sparked the formation of a campaign to see the museum saved led by John Richardson.
D.L.I. Memorial
In July 2012, the Durham Light Infantry Association Memorial was dedicated at the National Memorial Arboretum. The service was attended by Princess Alexandra.
Visit the page: Durham Light Infantry for references and further details. You can contribute to this article on Wikipedia.
from Newcastle University (youtube)
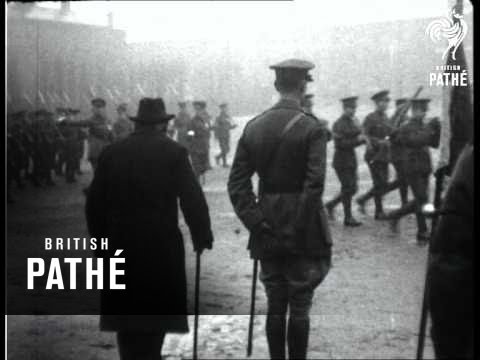
Durham Light Infantry Brigade Aka Inkerman Day Parade Of The Durham Light Infantry (1922)
Pinned by Simon Cotterill
from Flickr (flickr)
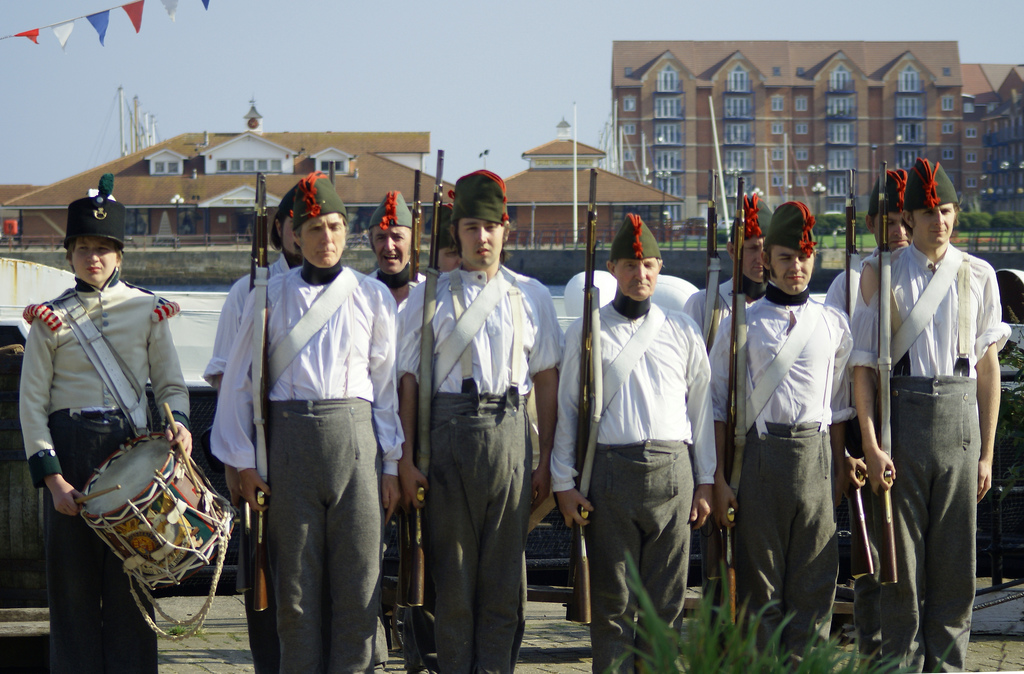
68th Durham Light Infantry Society at Hartlepool's Maritime Experience
Pinned by Simon Cotterill

from Beamish Museum (youtube)
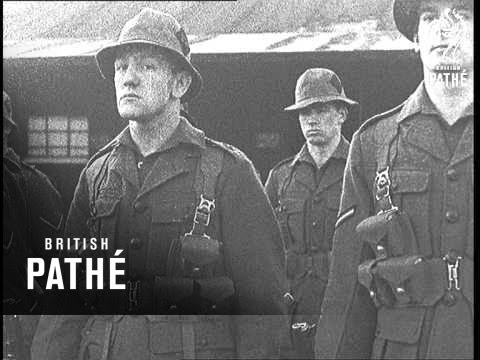
DLI 6th Battallion Training, Steam at Blackhill & Consett - 1908 / 1909
Pinned by Simon Cotterill
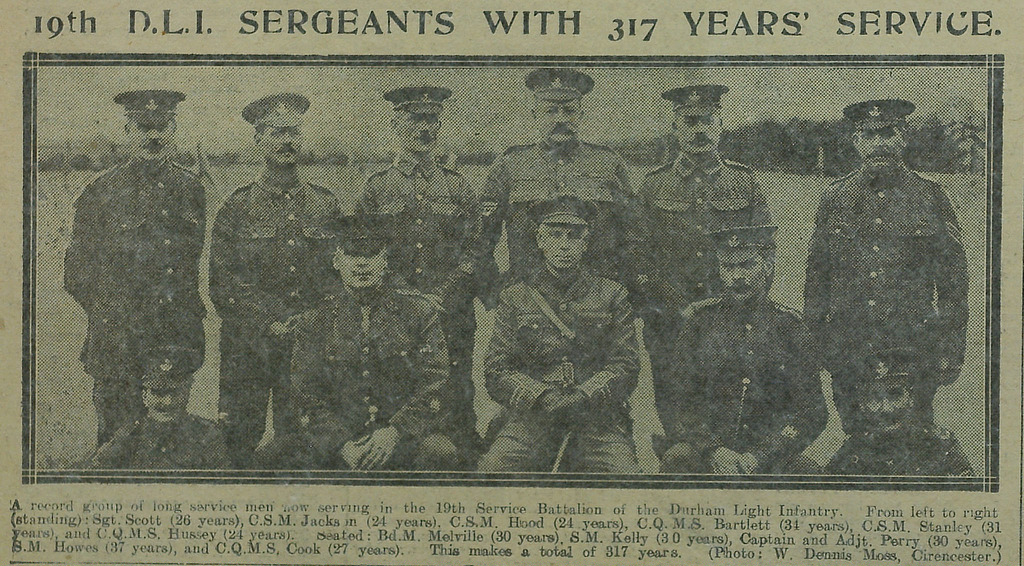
from IllustratedChronicles (flickr)
19th D.L.I. Sergeants With 317 Years' Service
Pinned by Simon Cotterill

from https://en.wikipedia.org/wiki…
Durham Light Infantry
- "The Durham Light Infantry (D.L.I.) was a light infantry regiment of the British Army in existence from 1881 to 1968. It was formed in 1881 under the Childers Reforms by …
Added by
Simon Cotterill
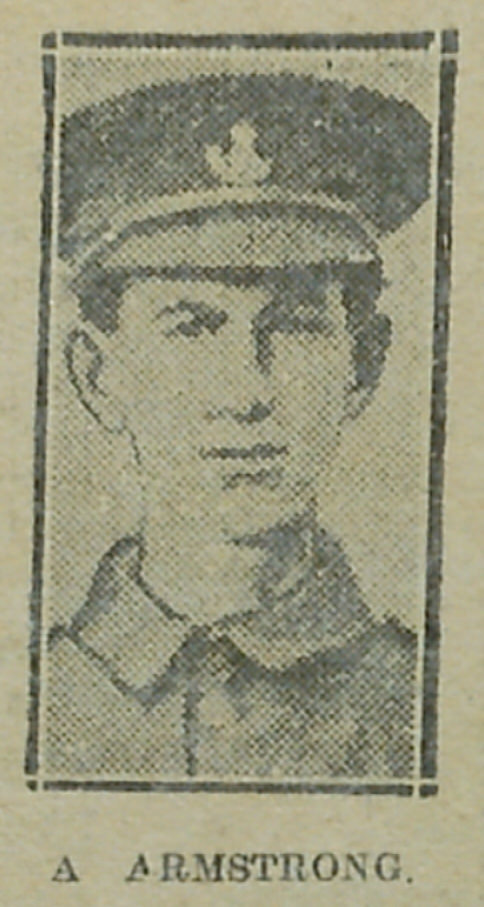
from IllustratedChronicles (flickr)
Abel Armstrong - 9th Durham Light Infantry - Chopwell
Pinned by Simon Cotterill
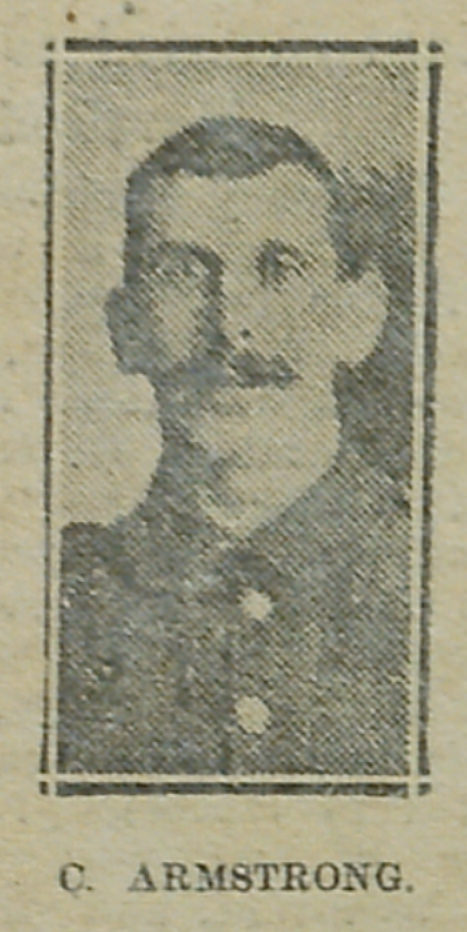
from IllustratedChronicles (flickr)
Clark Armstrong - 9th Durham Light Infantry
Pinned by Simon Cotterill
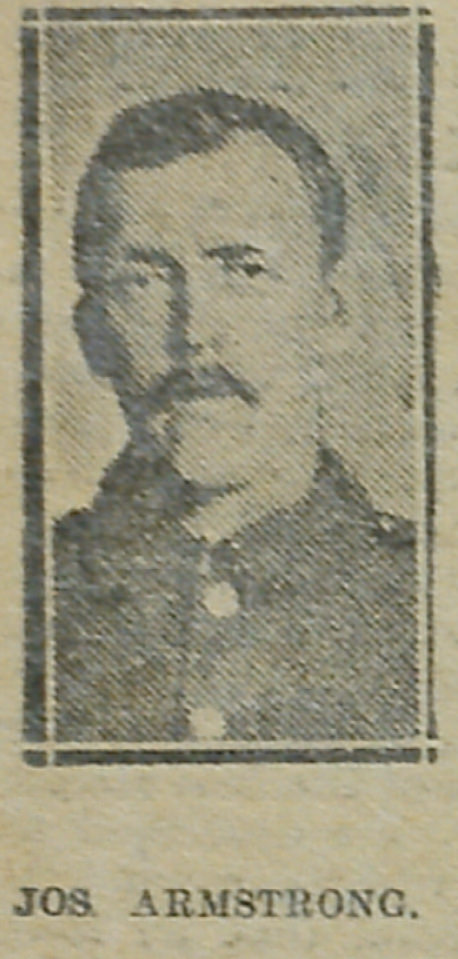
from IllustratedChronicles (flickr)
Joseph Thomas Armstrong - 9th Durham Light Infantry
Pinned by Simon Cotterill
from IllustratedChronicles (flickr)
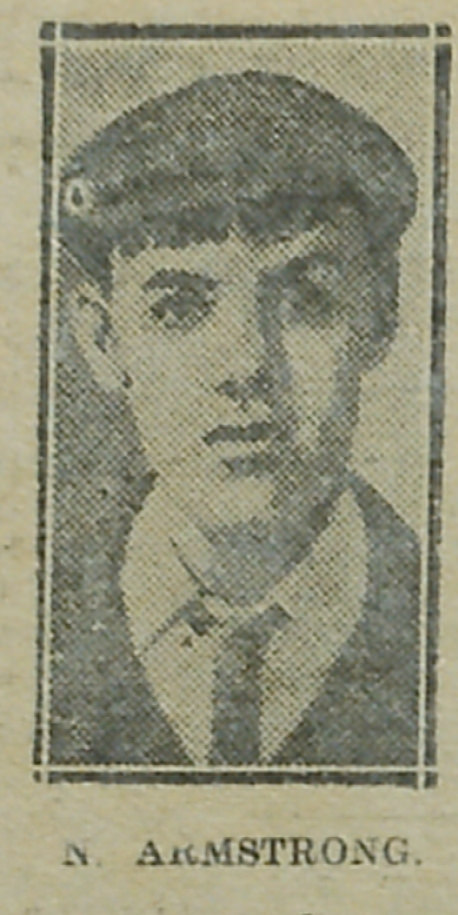
Nicholas Armstrong - 9th Durham Light Infantry - Chopwell
Pinned by Simon Cotterill
from IllustratedChronicles (flickr)
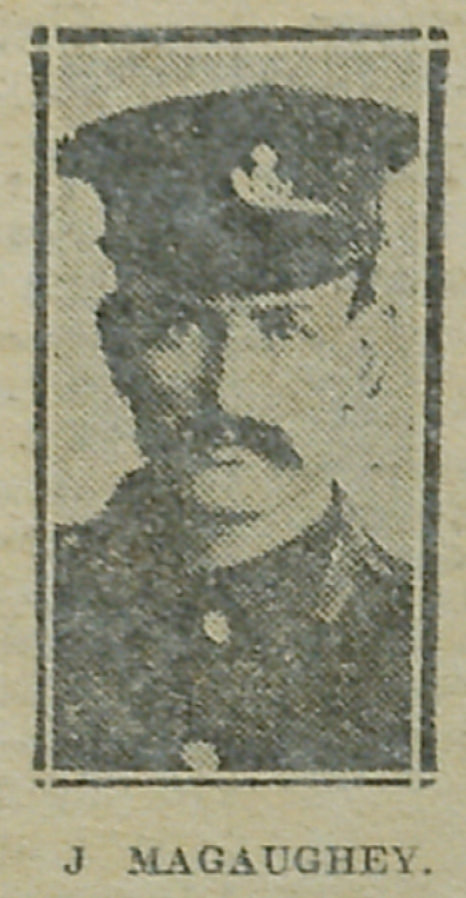
James Magaughey (Maganghey) - 9th Durham Light Infantry
Pinned by Simon Cotterill
from IllustratedChronicles (flickr)
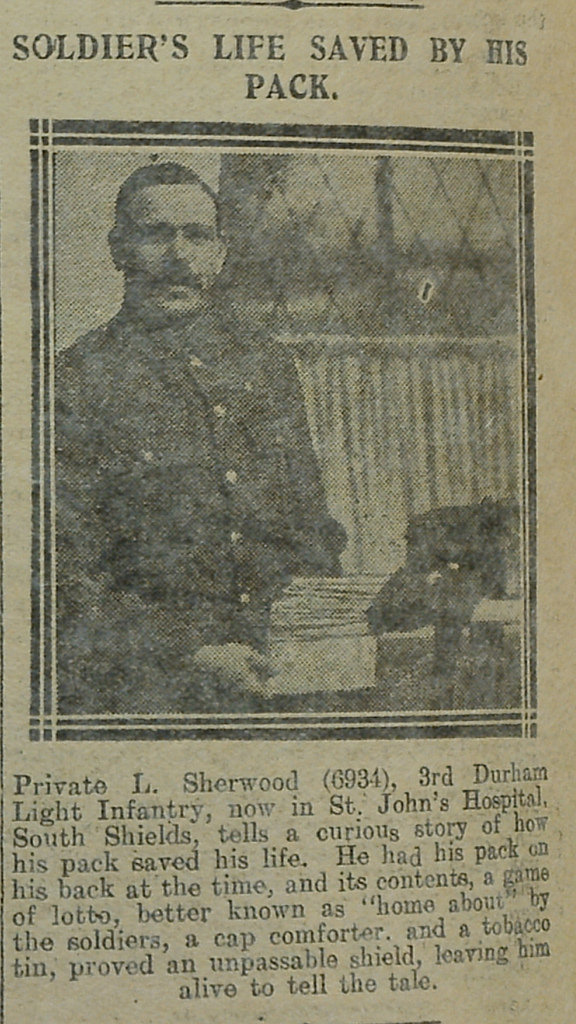
L Sherwood - 3rd Durham Light Infantry
Pinned by Simon Cotterill

from IllustratedChronicles (flickr)
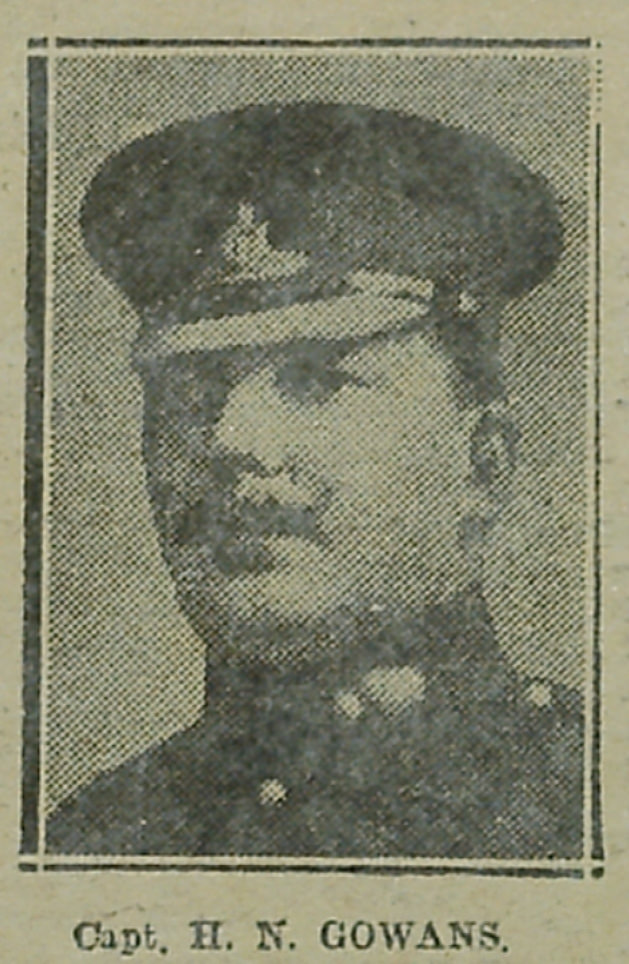
JH Gowans - Durham Light Infantry - South Shields
Pinned by Simon Cotterill
from IllustratedChronicles (flickr)
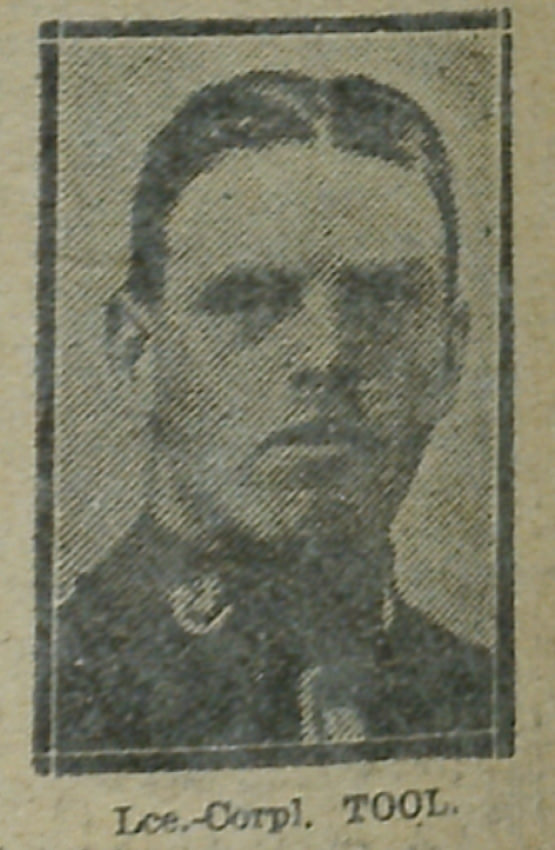
William Tool (Toole) - 7th Battalion Durham Light Infantry - Shotley Bridge
Pinned by Simon Cotterill
from IllustratedChronicles (flickr)
JN Rohers - 8th Durham Light Infantry - Durham City (Killed)
Pinned by Simon Cotterill
from IllustratedChronicles (flickr)
BH Richardson - 8th Durham Light Infantry (Killed)
Pinned by Simon Cotterill
from IllustratedChronicles (flickr)
JT Monkhouse - 6th Durham Light Infantry (Killed)
Pinned by Simon Cotterill

from IllustratedChronicles (flickr)
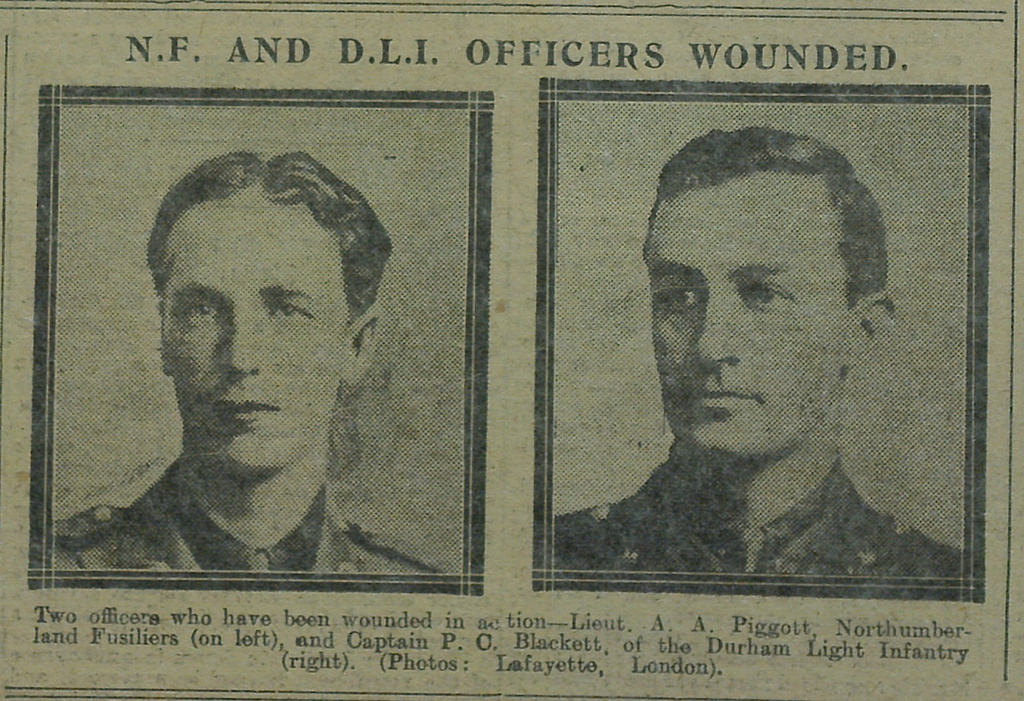
Lieutenant Kirkhouse - 6th Durham Light Infantry - Consett (Wounded)
Pinned by Simon Cotterill
from IllustratedChronicles (flickr)
Major Kenneth JW Lowther to command new 20th (Sunderland) Durham Light Infantry
Pinned by Simon Cotterill
from IllustratedChronicles (flickr)
Eric George Hyden - 11th DLI (Wounded)
Pinned by Simon Cotterill
from IllustratedChronicles (flickr)
Joseph Kelly, Gateshead, killed in action
Pinned by Simon Cotterill
from IllustratedChronicles (flickr)
James Alan Bell - 7th DLI - Sunderland (wounded and gassed)
Pinned by Simon Cotterill
from IllustratedChronicles (flickr)
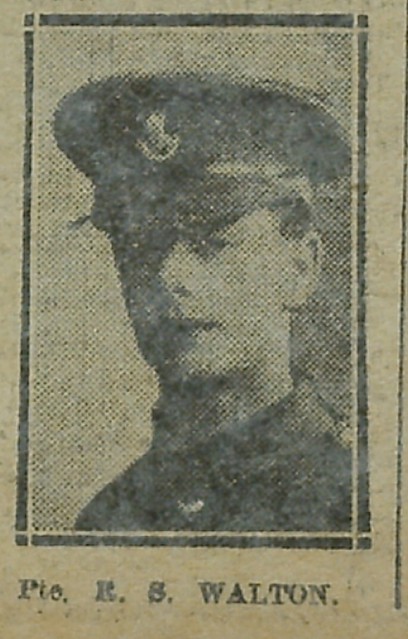
RS Walton - 5th DLI - Darlington (Gassed)
Pinned by Simon Cotterill
Co-Curate Page
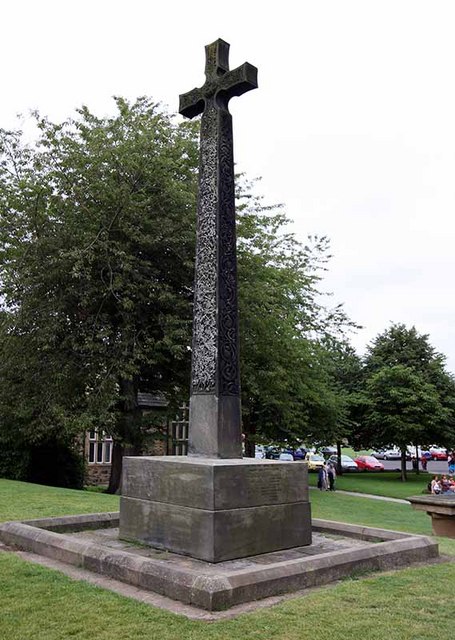
DLI Cross
- Overview Map Street View The stone Celtic-syle cross is located by Durham Cathedral, just south-west of Palace Green. This is a war memorial dedicated to the soldiers of the Durham …

from IllustratedChronicles (flickr)
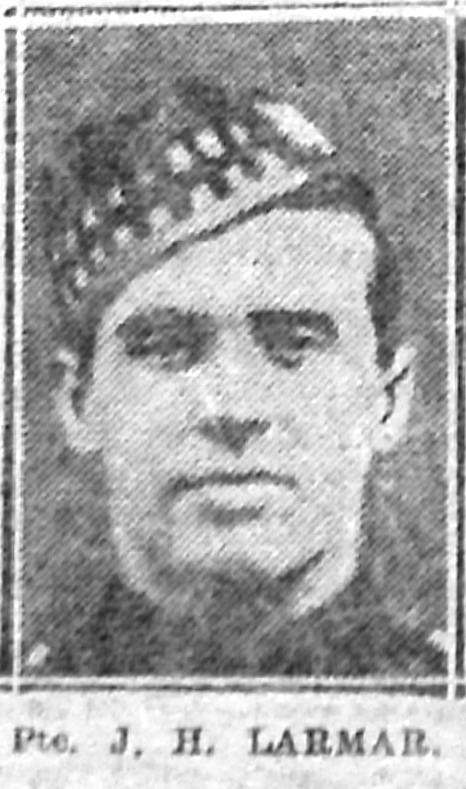
John Howarth Larmar, Easington Lane, killed
Pinned by Simon Cotterill

from IllustratedChronicles (flickr)
FJ Gowans - HMS Queen Mary - South Shields
Pinned by Simon Cotterill

from IllustratedChronicles (flickr)
Dr William Gowans - Father - South Shields
Pinned by Simon Cotterill
from IllustratedChronicles (flickr)
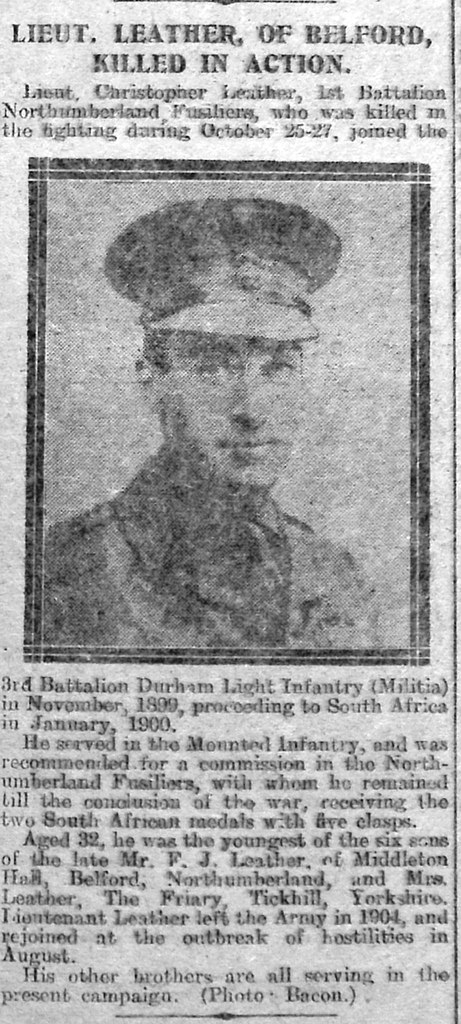
Christopher Leather, Belford, killed in action
Pinned by Simon Cotterill
from IllustratedChronicles (flickr)
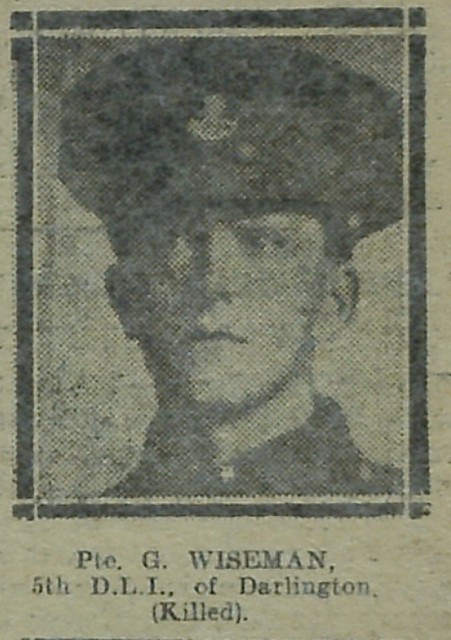
G Wiseman - 5th DLI - Darlington (Killed)
Pinned by Simon Cotterill

from IllustratedChronicles (flickr)
M Hailes - 9th DLI - Winlaton (Killed)
Pinned by Simon Cotterill
from IllustratedChronicles (flickr)
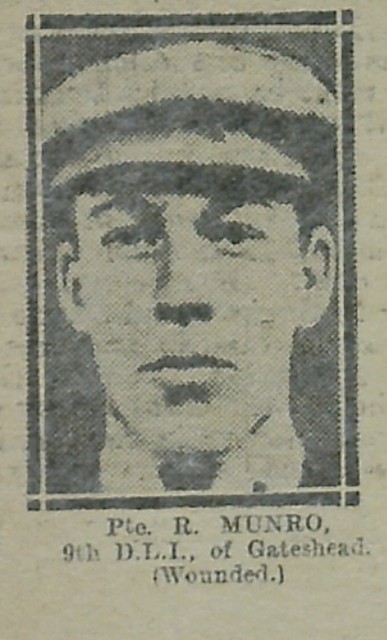
R Munro - 9th DLI - Gateshead (Wounded)
Pinned by Simon Cotterill
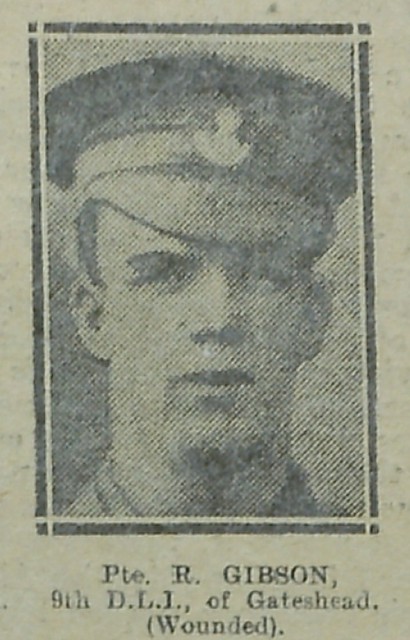
from IllustratedChronicles (flickr)
R Gibson - 9th DLI - Gateshead (Wounded)
Pinned by Simon Cotterill
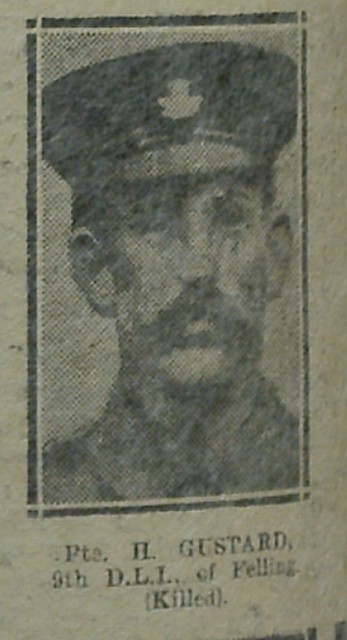
from IllustratedChronicles (flickr)
H Gustard - 9th DLI - Felling (Killed)
Pinned by Simon Cotterill
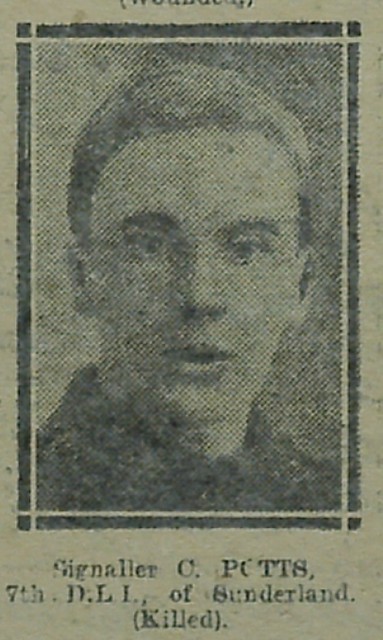
from IllustratedChronicles (flickr)
C Potts - 7th DLI - Sunderland (Killed)
Pinned by Simon Cotterill
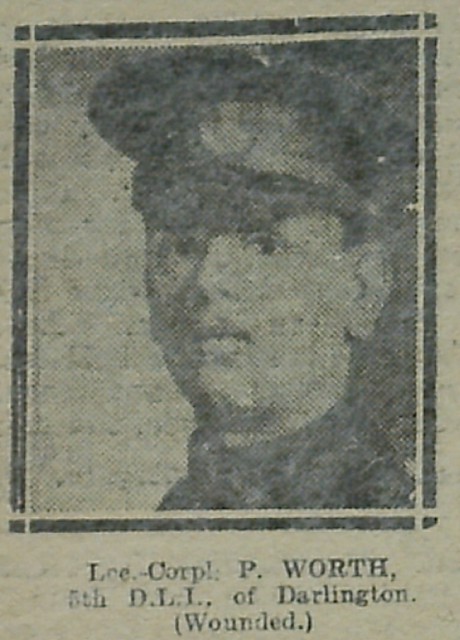
from IllustratedChronicles (flickr)
P Worth - 5th DLI - Darlington (Wounded)
Pinned by Simon Cotterill
from IllustratedChronicles (flickr)
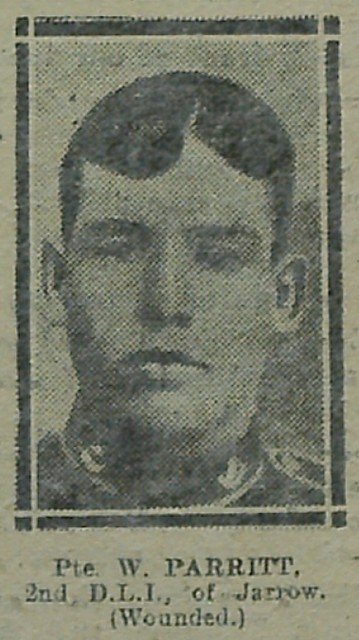
W Parritt - 2nd DLI - Jarrow (Wounded)
Pinned by Simon Cotterill

from IllustratedChronicles (flickr)
J Thornton - 5th DLI - Dawdon (Killed)
Pinned by Simon Cotterill
from IllustratedChronicles (flickr)
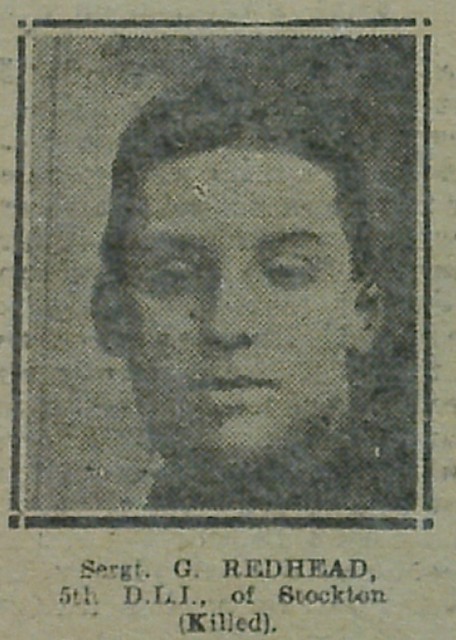
G Redhead - 5th DLI - Stockton (Killed)
Pinned by Simon Cotterill
from IllustratedChronicles (flickr)
R Graham - 5th DLI - Sunderland (Killed)
Pinned by Simon Cotterill

from IllustratedChronicles (flickr)
W Ritchie - 10th DLI - Dawdon (Killed)
Pinned by Simon Cotterill
from IllustratedChronicles (flickr)
William Brown - 7th DLI (Died of wounds)
Pinned by Simon Cotterill
from IllustratedChronicles (flickr)
G Bradshaw - 8th? DLI - Gateshead (Wounded)
Pinned by Simon Cotterill
from IllustratedChronicles (flickr)
JT Cant - 2nd DLI - Kirk Merrington (Killed)
Pinned by Simon Cotterill
from IllustratedChronicles (flickr)
W Dobson - 2nd DLI - Ferryhill (Killed)
Pinned by Simon Cotterill

from IllustratedChronicles (flickr)
T Turner - 10th DLI - Newcastle (Killed)
Pinned by Simon Cotterill
from IllustratedChronicles (flickr)
S Bolam - 10th DLI - Gateshead (Killed)
Pinned by Simon Cotterill
from IllustratedChronicles (flickr)
Dennis Darby - 10th DLI - Nettlersworth (Wounded)
Pinned by Simon Cotterill

from IllustratedChronicles (flickr)
G Stones - DLI - Wingate (Died of Wounds)
Pinned by Simon Cotterill
from IllustratedChronicles (flickr)
H Dunn - 10th DLI - Gateshead (Killed)
Pinned by Simon Cotterill

from IllustratedChronicles (flickr)
J Tyreman - 5th DLI - Coxhow (Wounded)
Pinned by Simon Cotterill
from IllustratedChronicles (flickr)
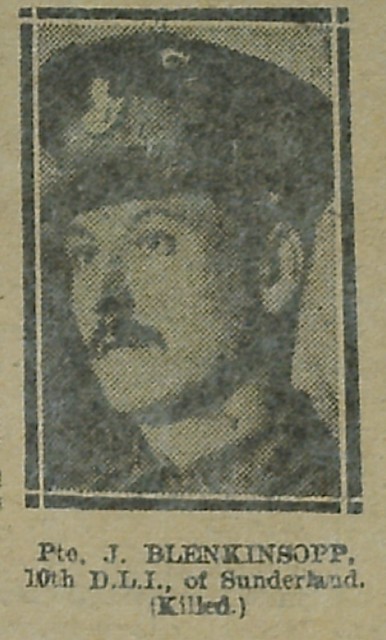
J Blenkinsopp - 10th DLI - Sunderland (Killed)
Pinned by Simon Cotterill
from IllustratedChronicles (flickr)
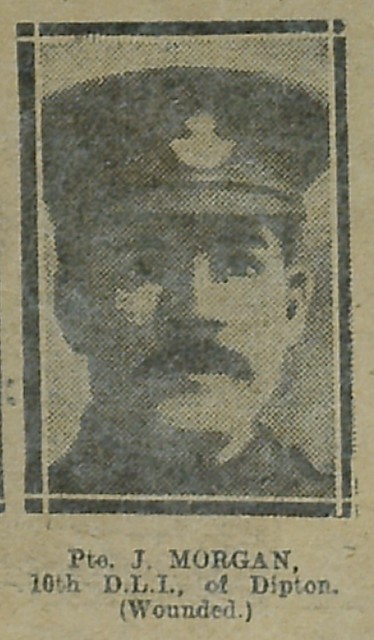
J Morgan - 10th DLI - Dipton (Wounded)
Pinned by Simon Cotterill
from IllustratedChronicles (flickr)
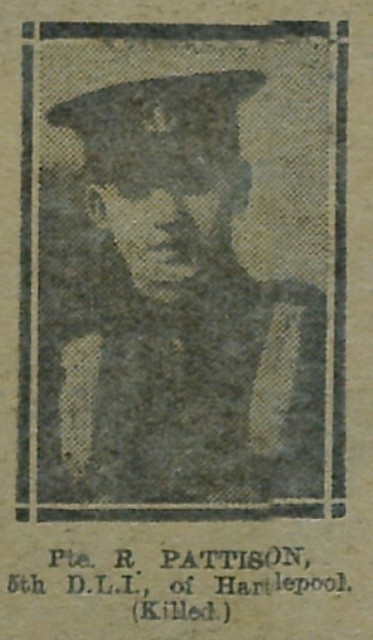
R Pattison - 5th DLI - Hartlepool (Killed)
Pinned by Simon Cotterill
from IllustratedChronicles (flickr)
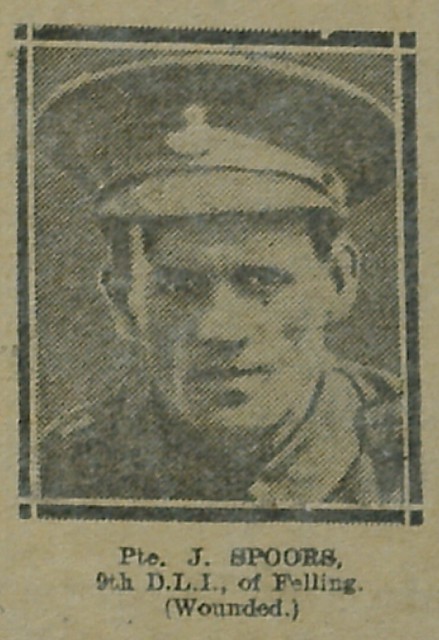
J Spoors - 9th DLI - Felling (Wounded)
Pinned by Simon Cotterill

from IllustratedChronicles (flickr)
E Tennant - 5th DLI - Hordon (Wounded)
Pinned by Simon Cotterill
from IllustratedChronicles (flickr)
J Scott - 9th DLI - Swalwell (Wounded)
Pinned by Simon Cotterill

from IllustratedChronicles (flickr)
A Armbruster - 10th DLI - Sunderland (Wounded)
Pinned by Simon Cotterill
from IllustratedChronicles (flickr)
D Makin - 16th DLI - Wallsend (Wounded)
Pinned by Simon Cotterill
from IllustratedChronicles (flickr)
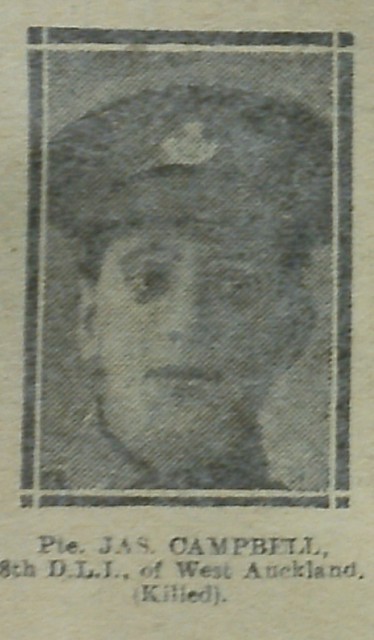
James Campbell - 8th DLI - Wesk Auckland (Killed)
Pinned by Simon Cotterill

from IllustratedChronicles (flickr)
A Todd - DLI - West Hartlepool (Wounded)
Pinned by Simon Cotterill
from IllustratedChronicles (flickr)
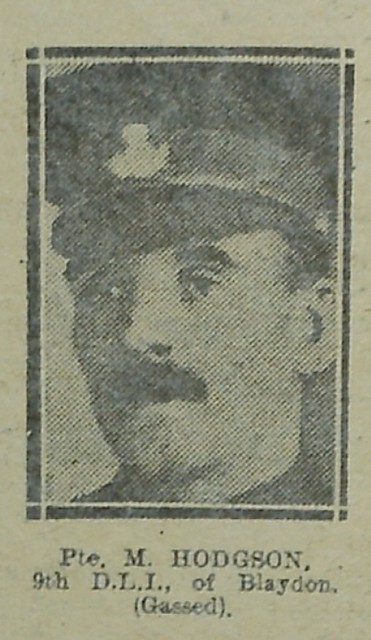
M Hodgson - 9th DLI - Blaydon (Gassed)
Pinned by Simon Cotterill
from IllustratedChronicles (flickr)
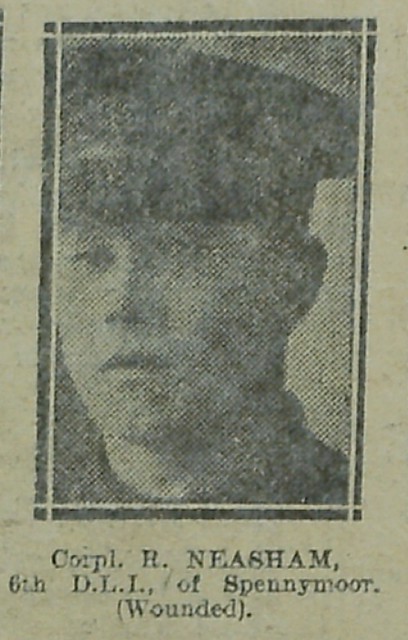
R Neasham - 6th DLI - Spennymoor (Wounded)
Pinned by Simon Cotterill
from IllustratedChronicles (flickr)
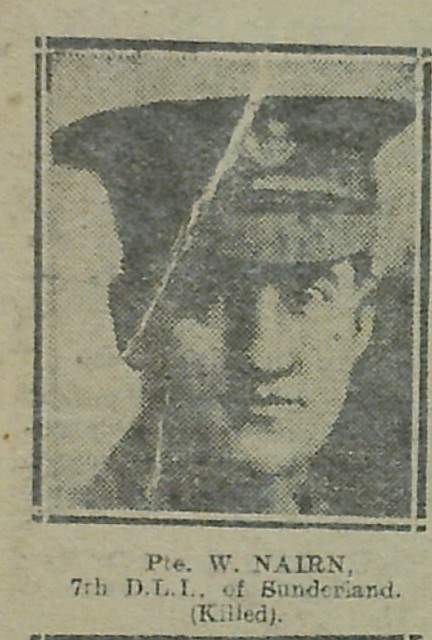
W Nairn - 7th DLI - Sunderland (Killed)
Pinned by Simon Cotterill
from IllustratedChronicles (flickr)
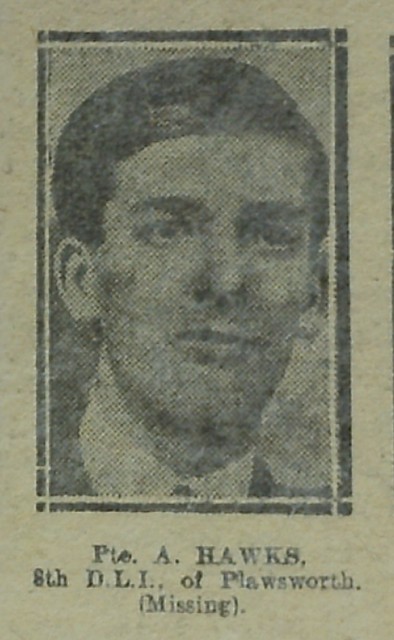
A Hawks - 8th DLI - Plawsworth (Missing)
Pinned by Simon Cotterill

from IllustratedChronicles (flickr)
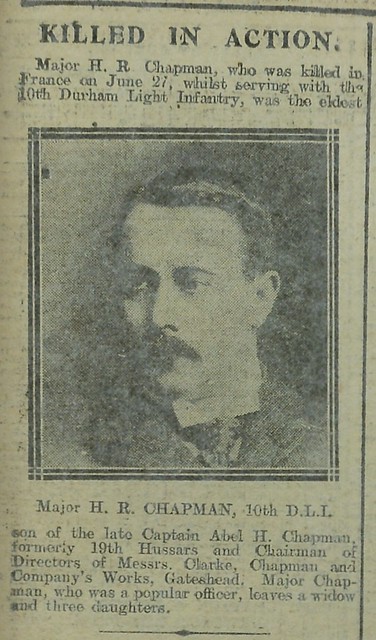
HH Chapman - 10th DLI (Killed in action)
Pinned by Simon Cotterill
from IllustratedChronicles (flickr)
Joe May - 9th DLI - Gateshead (Wounded)
Pinned by Simon Cotterill

from IllustratedChronicles (flickr)
A Dickens - 7th DLI - Consett (Wounded)
Pinned by Simon Cotterill
from IllustratedChronicles (flickr)
W Gibbons - 8th DLI - Waterhouses (Killed)
Pinned by Simon Cotterill
from IllustratedChronicles (flickr)
D Crathorne - 6th DLI - Wingate (Wounded)
Pinned by Simon Cotterill
from IllustratedChronicles (flickr)
T McHugh - 10th DLI - Gateshead (Killed)
Pinned by Simon Cotterill
from IllustratedChronicles (flickr)
J Cowan - 8th DLI - Perkinsville (Gassed)
Pinned by Simon Cotterill
from IllustratedChronicles (flickr)
T Jackway - 7th DLI - Sunderland (Killed)
Pinned by Simon Cotterill

from IllustratedChronicles (flickr)
A Davies - 5th DLI - Stockton (Missing)
Pinned by Simon Cotterill
from IllustratedChronicles (flickr)
S Maddison - 8th DLI - West Stanley (Died of Wounds)
Pinned by Simon Cotterill
from IllustratedChronicles (flickr)
R Knotts - 8th DLI - Blaydon (Wounded)
Pinned by Simon Cotterill
from IllustratedChronicles (flickr)
W Taylor - 11th DLI - Portobello (Killed)
Pinned by Simon Cotterill
from IllustratedChronicles (flickr)
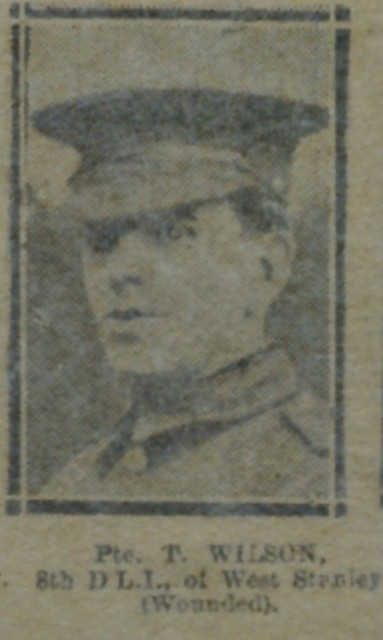
T Wilson - 8th DLI - West Stanley (Wounded)
Pinned by Simon Cotterill
from IllustratedChronicles (flickr)
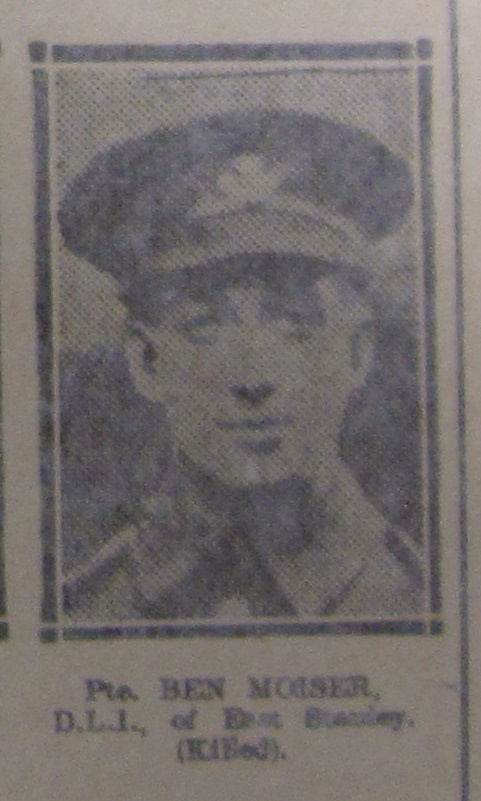
Ben Moiser - DLI - East Stanley (Killed)
Pinned by Simon Cotterill
from IllustratedChronicles (flickr)
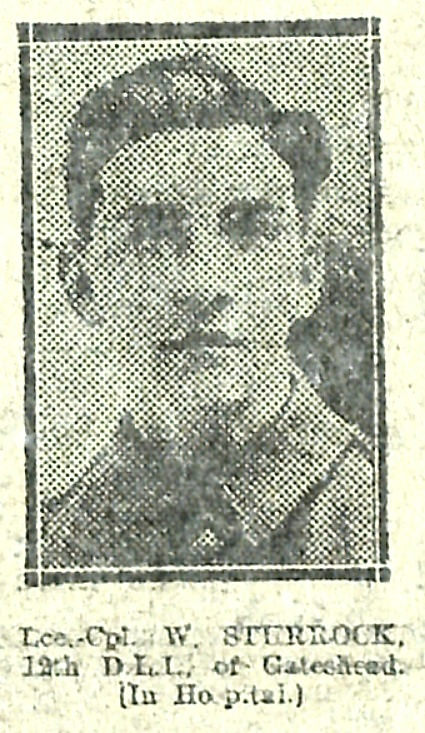
W Sturrock - 12th DLI - Gateshead (In Hospital)
Pinned by Simon Cotterill
from IllustratedChronicles (flickr)
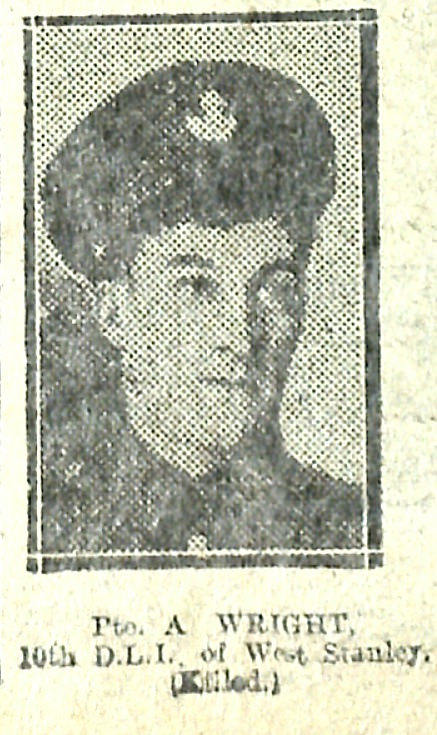
A Wright - 10th DLI - West Stanley (Killed)
Pinned by Simon Cotterill
from IllustratedChronicles (flickr)
William Lashwood - 15th DLI - Murton Coll (Missing)
Pinned by Simon Cotterill
from IllustratedChronicles (flickr)
TS Carr - 10th DLI - Catchgate (Killed)
Pinned by Simon Cotterill
from IllustratedChronicles (flickr)
Robert Watt - DLI - Hartlepool (Killed)
Pinned by Simon Cotterill
from IllustratedChronicles (flickr)
E Holloway - 9th DLI - Gateshead (Killed)
Pinned by Simon Cotterill
from IllustratedChronicles (flickr)
TW Ward - 8th DLI - Willington (Gassed)
Pinned by Simon Cotterill
from IllustratedChronicles (flickr)
R Weatherstone - 9th DLI - Stargate (Wounded)
Pinned by Simon Cotterill
from IllustratedChronicles (flickr)
J McMahon - 2nd DLI - Hartlepool (Killed)
Pinned by Simon Cotterill
from IllustratedChronicles (flickr)
Thomas Stoddart - 11th DLI - Metal Bridge (Wounded)
Pinned by Simon Cotterill
from IllustratedChronicles (flickr)
J Hunter - 18th DLI - Sacriston (Wounded)
Pinned by Simon Cotterill
from IllustratedChronicles (flickr)
D Brannon - 15th DLI - Wallsend (Wounded)
Pinned by Simon Cotterill
from IllustratedChronicles (flickr)
John E Forster - 15th DLI - Ewe Hill (Wounded)
Pinned by Simon Cotterill
from IllustratedChronicles (flickr)
W Willby - 15th DLI - Cornforth Lane (Wounded)
Pinned by Simon Cotterill

from IllustratedChronicles (flickr)
Edgar Pell - 15th DLI - Ewe Hill (Wounded)
Pinned by Simon Cotterill
from IllustratedChronicles (flickr)
W Farrow - 9th DLI - Stella (In Hospital)
Pinned by Simon Cotterill

from IllustratedChronicles (flickr)
Thomas Cook - 14th DLI - ?ingthorne (Killed)
Pinned by Simon Cotterill
from IllustratedChronicles (flickr)
George Davis - 19th DLI - Murton Colliery (Wounded)
Pinned by Simon Cotterill
from IllustratedChronicles (flickr)
P McBride - 6th DLI - Consett (Killed)
Pinned by Simon Cotterill
from IllustratedChronicles (flickr)
E Thompson - 15th DLI - Leeholme (Wounded)
Pinned by Simon Cotterill
from IllustratedChronicles (flickr)
J Sanderson - 14th DLI - Byker (Missing)
Pinned by Simon Cotterill
from IllustratedChronicles (flickr)
W Gillens - 8th DLI - Ludworth (Wounded)
Pinned by Simon Cotterill
from IllustratedChronicles (flickr)
Henry Stringer - 13th DLI - Page Bank (Killed)
Pinned by Simon Cotterill
from IllustratedChronicles (flickr)
P Mathewson - 15th DLI - Murton Colliery (Wounded)
Pinned by Simon Cotterill
from IllustratedChronicles (flickr)
Moses Jones - 9th DLI - Hamsterley Colliery (Wounded)
Pinned by Simon Cotterill

from IllustratedChronicles (flickr)
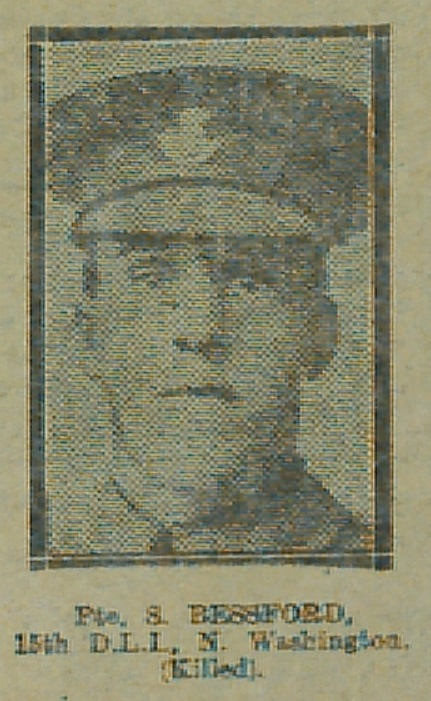
S Bessford - 15th DLI - Washington (Killed)
Pinned by Simon Cotterill
from IllustratedChronicles (flickr)
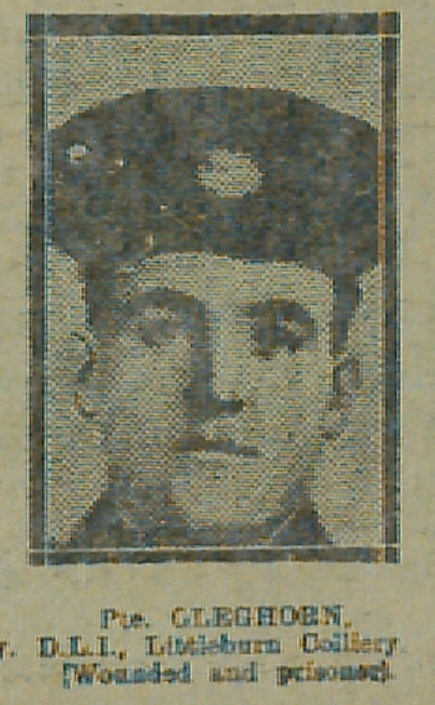
Pte Cleghorn - DLI - Littleburn Colliery (Wounded and prisoner)
Pinned by Simon Cotterill
from IllustratedChronicles (flickr)
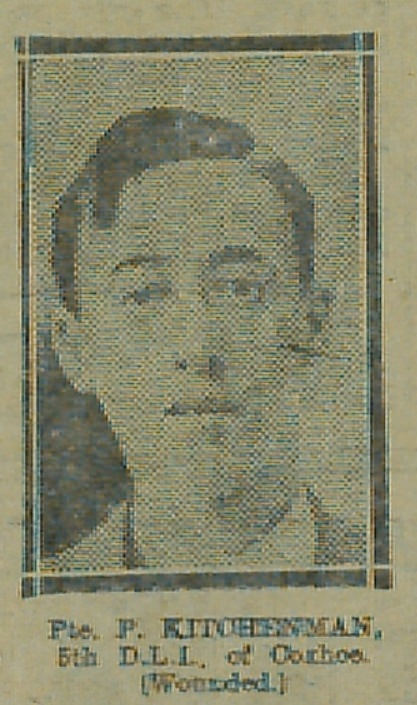
P Kitchenman - 5th DLI - Coxhoe (Wounded)
Pinned by Simon Cotterill
from IllustratedChronicles (flickr)
M Hand - 2nd DLI - Middlesbrough (Wounded)
Pinned by Simon Cotterill
from IllustratedChronicles (flickr)
H Craggs - 13th DLI - Newcastle (Wounded)
Pinned by Simon Cotterill
from IllustratedChronicles (flickr)
Oliver Redshaw - 14th DLI - Blackhill (Killed)
Pinned by Simon Cotterill
from IllustratedChronicles (flickr)
W Porthouse - 15th DLI - Jarrow (Wounded)
Pinned by Simon Cotterill
from IllustratedChronicles (flickr)
J McGowan - DLI - Middlesbrough (Prisoner of War)
Pinned by Simon Cotterill
from IllustratedChronicles (flickr)
T Patterson - 14th DLI - Blyth (Gassed)
Pinned by Simon Cotterill
from IllustratedChronicles (flickr)
C Heslop - 10th DLI - Gateshead (Wounded)
Pinned by Simon Cotterill

from IllustratedChronicles (flickr)
F Reid - 9th DLI - Gateshead (Wounded)
Pinned by Simon Cotterill

from IllustratedChronicles (flickr)
G Davidson - 14th DLI - Gateshead (Wounded)
Pinned by Simon Cotterill
from IllustratedChronicles (flickr)
?? Bradford? - 14th DLI - Dunston (Wounded)
Pinned by Simon Cotterill
from IllustratedChronicles (flickr)
William ? - 14th DLI - Blaydon (Wounded)
Pinned by Simon Cotterill

from IllustratedChronicles (flickr)
GR Simpson - 14th DLI - Shotton (Died of wounds)
Pinned by Simon Cotterill
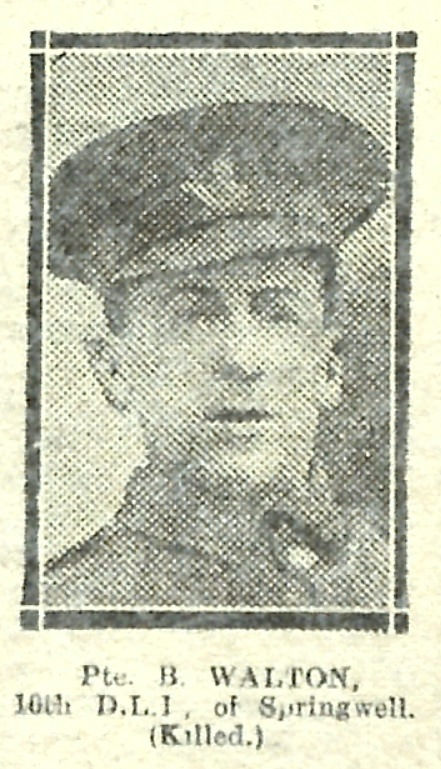
from IllustratedChronicles (flickr)
B Walton - 16th DLI - Springwell (Killed)
Pinned by Simon Cotterill
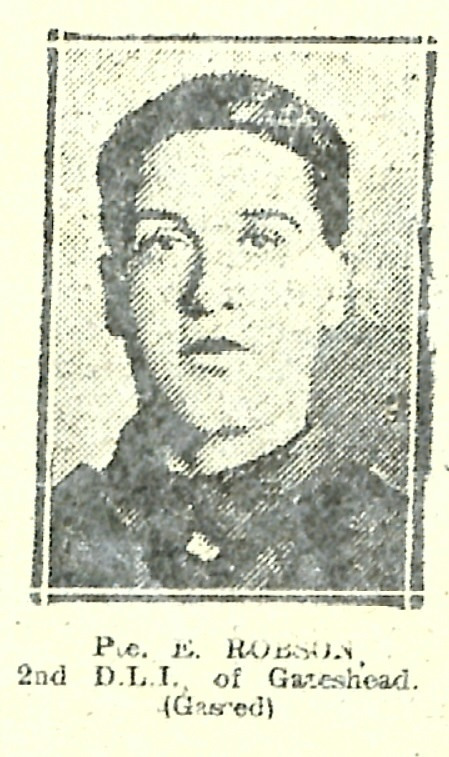
from IllustratedChronicles (flickr)
E Robson - 2nd DLI- Gateshead (Gassed)
Pinned by Simon Cotterill
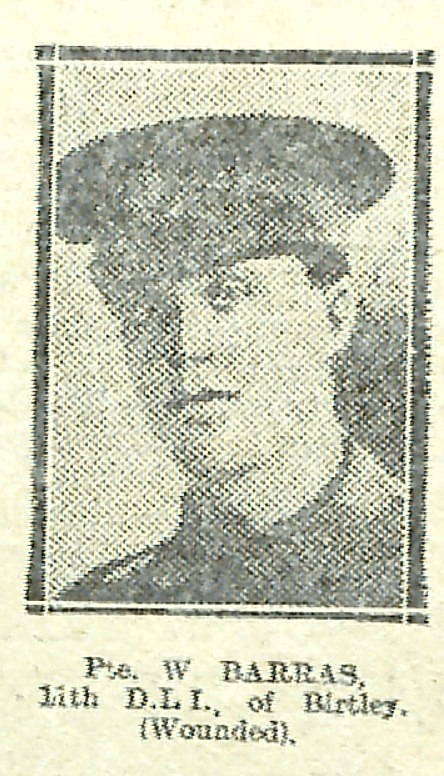
from IllustratedChronicles (flickr)
W Barras - 11th DLI - Birtley (Wounded)
Pinned by Simon Cotterill

from IllustratedChronicles (flickr)
TW Whaley - 12th DLI - Blackhill (Killed)
Pinned by Simon Cotterill
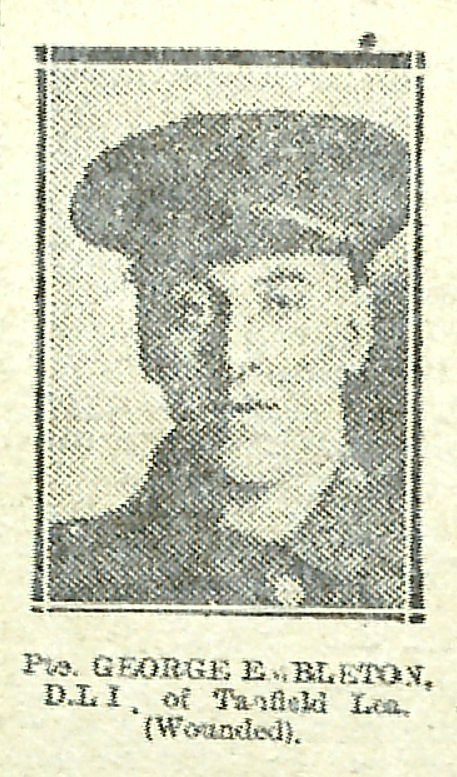
from IllustratedChronicles (flickr)
George Embleton - DLI - Tanfield Lea (Wounded)
Pinned by Simon Cotterill
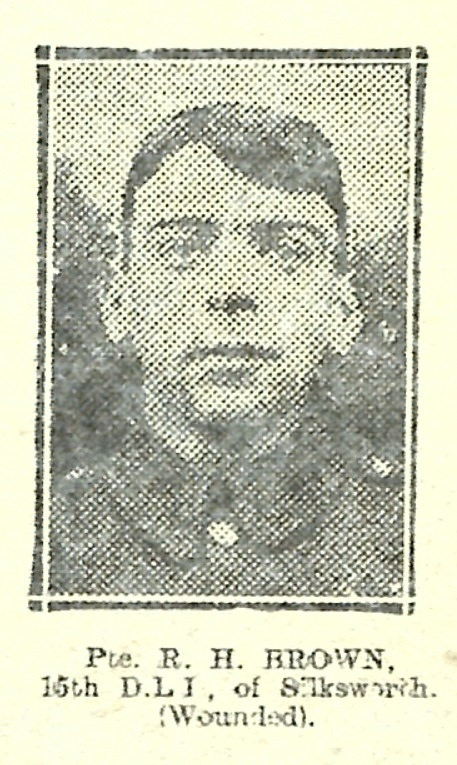
from IllustratedChronicles (flickr)
RH Brown - 15th DLI - Silksworth (Wounded)
Pinned by Simon Cotterill
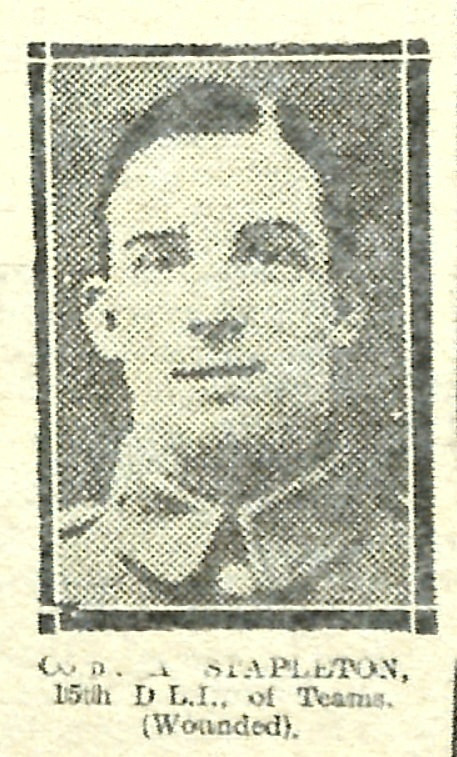
from IllustratedChronicles (flickr)
? Stapleton - 15th DLI - Teams (Wounded)
Pinned by Simon Cotterill
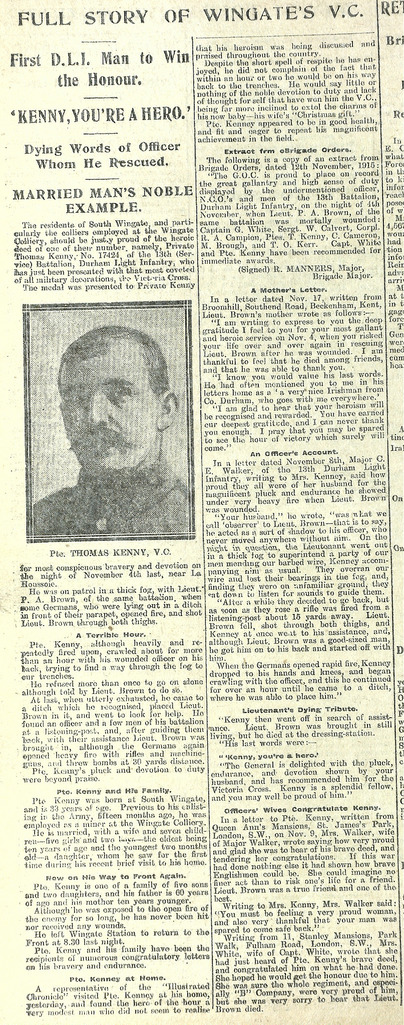
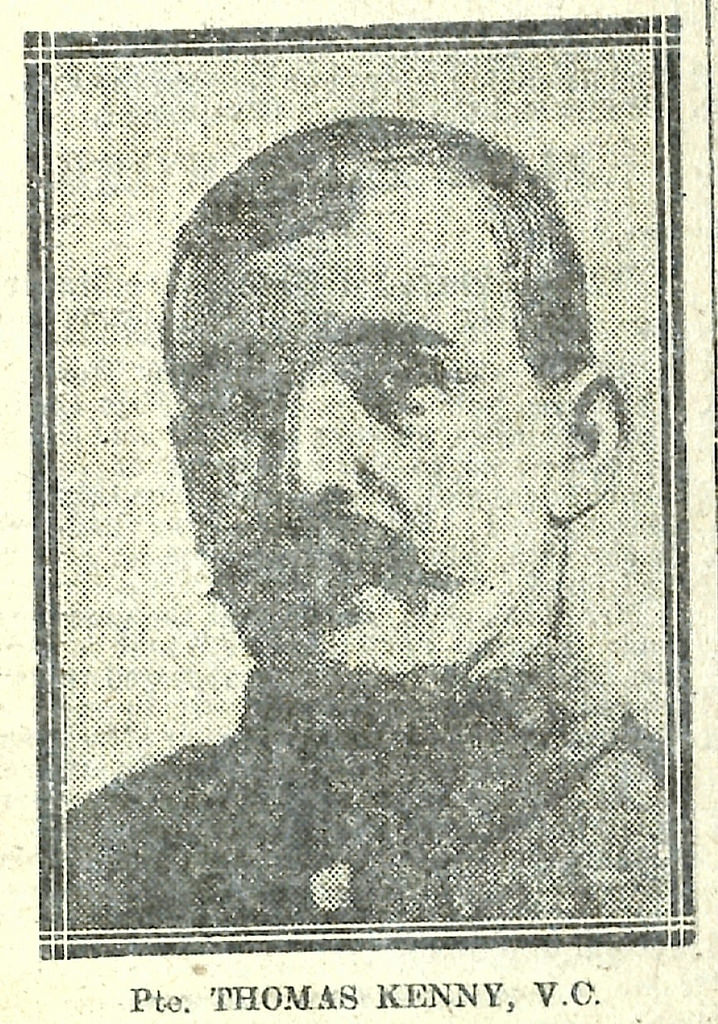
from IllustratedChronicles (flickr)
F Turrell - 18th DLI - Gateshead (Wounded)
Pinned by Simon Cotterill
from IllustratedChronicles (flickr)
E Towers - 15th DLI - Evenwood (Wounded and Missing)
Pinned by Simon Cotterill
from IllustratedChronicles (flickr)
J Huscroft - 11th DLI - Felling (Wounded)
Pinned by Simon Cotterill

from IllustratedChronicles (flickr)
F Newman - DLI - Birtley (Died in hospital)
Pinned by Simon Cotterill
from IllustratedChronicles (flickr)
G Walton - 11th DLI - Springwell (In hospital)
Pinned by Simon Cotterill
from IllustratedChronicles (flickr)
J Todd - 13th DLI - Silksworth (Missing)
Pinned by Simon Cotterill
from IllustratedChronicles (flickr)
W Peel - 2nd DLI - Middlesbrough (Killed)
Pinned by Simon Cotterill
from IllustratedChronicles (flickr)
J Wright - DLI - Tanfield Lea (Killed)
Pinned by Simon Cotterill
from IllustratedChronicles (flickr)
James Sharp - 12th DLI - Silksworth (In hospital)
Pinned by Simon Cotterill
from IllustratedChronicles (flickr)
T Turnbull - DLI - Langley Moor (Wounded)
Pinned by Simon Cotterill
from IllustratedChronicles (flickr)
J Grundy - 15th DLI - Silksworth (Missing)
Pinned by Simon Cotterill

from IllustratedChronicles (flickr)
George Hope - 15th DLI - West Cornforth (Wounded)
Pinned by Simon Cotterill
from IllustratedChronicles (flickr)
LC Blinkiron - DLI - Fence Houses (Prisoner of War)
Pinned by Simon Cotterill
from IllustratedChronicles (flickr)
J Stephenson - 11th DLI - Byker (Killed)
Pinned by Simon Cotterill
from IllustratedChronicles (flickr)
R Percival - 10th DLI - Addison Colliery (Wounded)
Pinned by Simon Cotterill
from IllustratedChronicles (flickr)
G Walton - 8th DLI - Tanhills (Wounded)
Pinned by Simon Cotterill
from IllustratedChronicles (flickr)
Sam Ashcroft - 14th DLI - Leamside (Killed)
Pinned by Simon Cotterill
from IllustratedChronicles (flickr)
LC McKenny - 14th DLI - Stanley (Wounded)
Pinned by Simon Cotterill
from IllustratedChronicles (flickr)
W Robson - 8th DLI - Birtley (Wounded)
Pinned by Simon Cotterill
from IllustratedChronicles (flickr)
R Mulvenny - 15th DLI - Sunderland (Wounded)
Pinned by Simon Cotterill
from IllustratedChronicles (flickr)
Joseph Renwick - 15th DLI - ?dworth (Wounded)
Pinned by Simon Cotterill
from IllustratedChronicles (flickr)
T Common - 9th DLI - Dunston (Wounded)
Pinned by Simon Cotterill
from IllustratedChronicles (flickr)
J Maddison - 11th DLI - Birtley (Wounded)
Pinned by Simon Cotterill
from IllustratedChronicles (flickr)
Alfred Jones - 15th DLI - Murton Colliery (Wounded)
Pinned by Simon Cotterill
from IllustratedChronicles (flickr)
R Grayson - 10th DLI - Wrekenton (Wounded)
Pinned by Simon Cotterill
from IllustratedChronicles (flickr)
G Cowell - 11th DLI - Birtley (Killed)
Pinned by Simon Cotterill
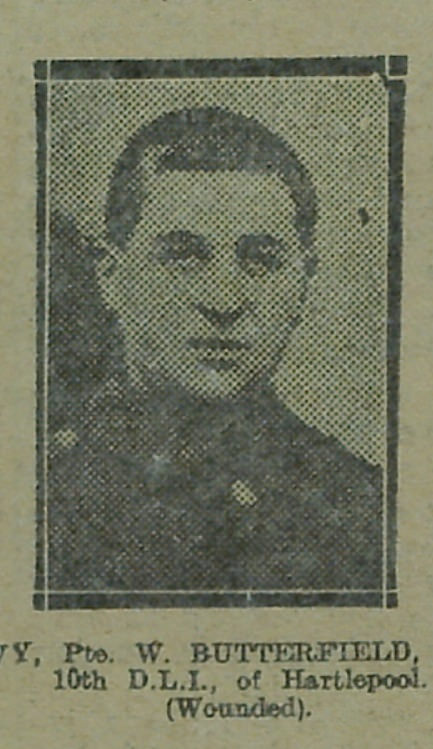
from IllustratedChronicles (flickr)
W Butterfield - 10th DLI - Hartlepool (Wounded)
Pinned by Simon Cotterill
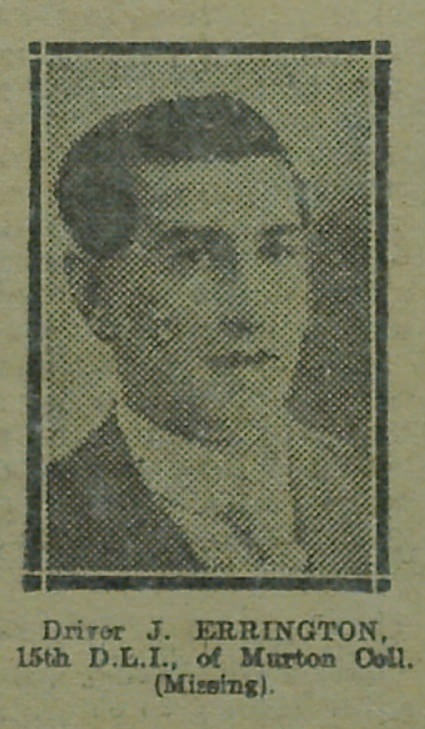
from IllustratedChronicles (flickr)
J Errington - 15th DLI - Murton Colliery (Missing)
Pinned by Simon Cotterill

from IllustratedChronicles (flickr)
WH Wilby - 14th DLI - Cornforth Lane (Missing)
Pinned by Simon Cotterill
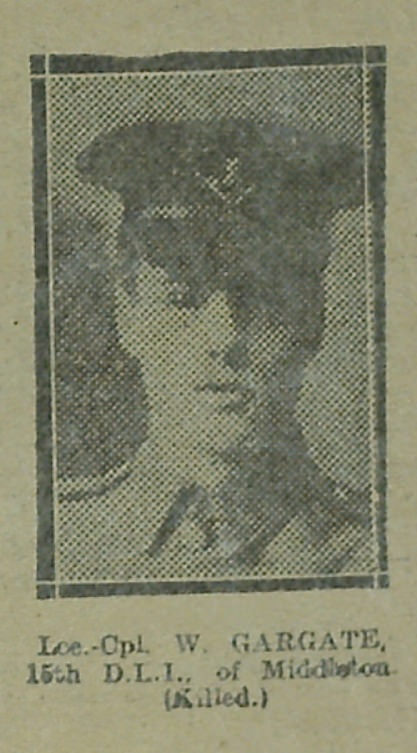
from IllustratedChronicles (flickr)
W Gargate - 15th DLI - Middleton (Killed)
Pinned by Simon Cotterill

from IllustratedChronicles (flickr)
W Carter - 1?th DLI - Birtley (Wounded)
Pinned by Simon Cotterill
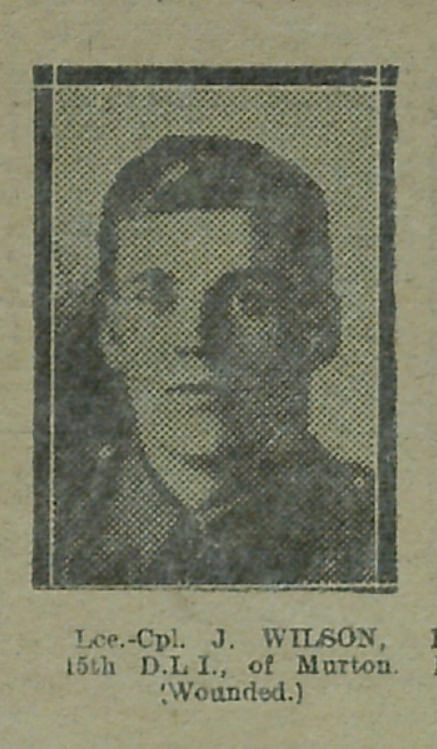
from IllustratedChronicles (flickr)
J Wilson - 15th DLI - Murton (Wounded)
Pinned by Simon Cotterill
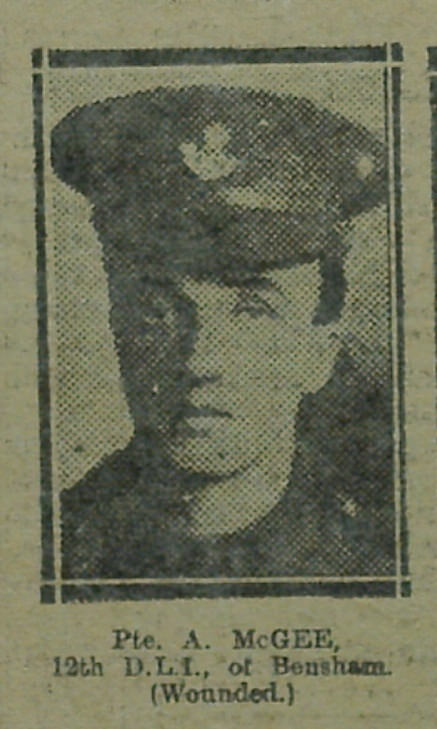
from IllustratedChronicles (flickr)
A McGee - 19th DLI - Bensham (Wounded)
Pinned by Simon Cotterill
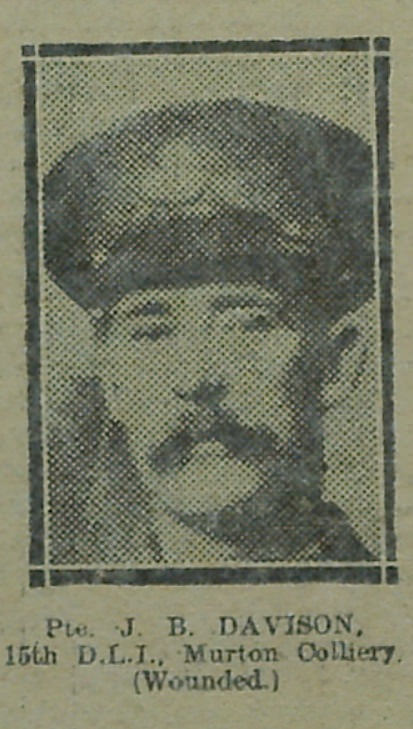
from IllustratedChronicles (flickr)
JB Davidson - 15th DLI - Murton Colliery (Wounded)
Pinned by Simon Cotterill
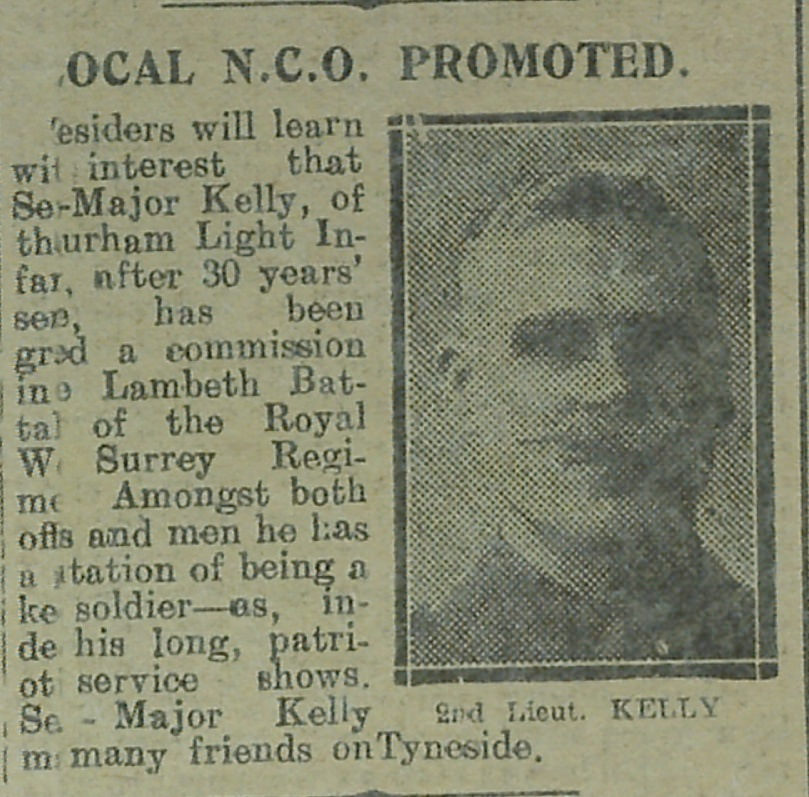
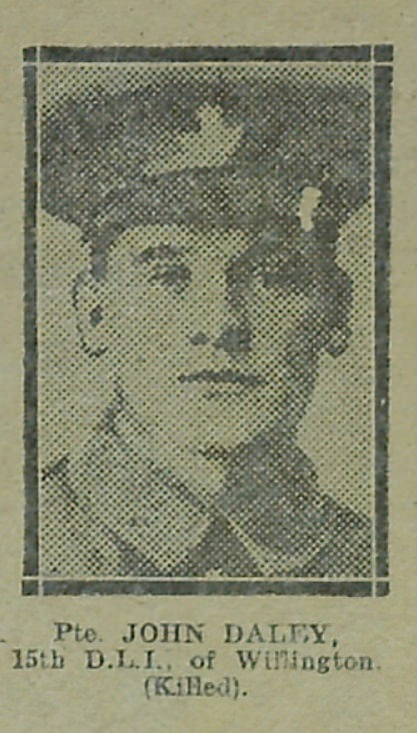
from IllustratedChronicles (flickr)
John Daley - 15th DLI - Willington (Killed)
Pinned by Simon Cotterill
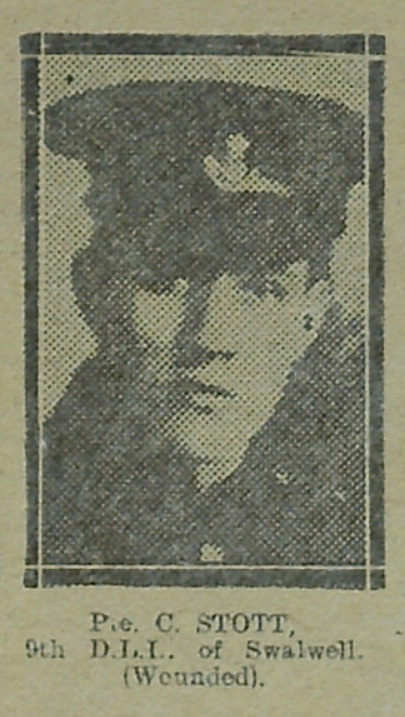
from IllustratedChronicles (flickr)
C Stott - 9th DLI - Swalwell (Wounded)
Pinned by Simon Cotterill
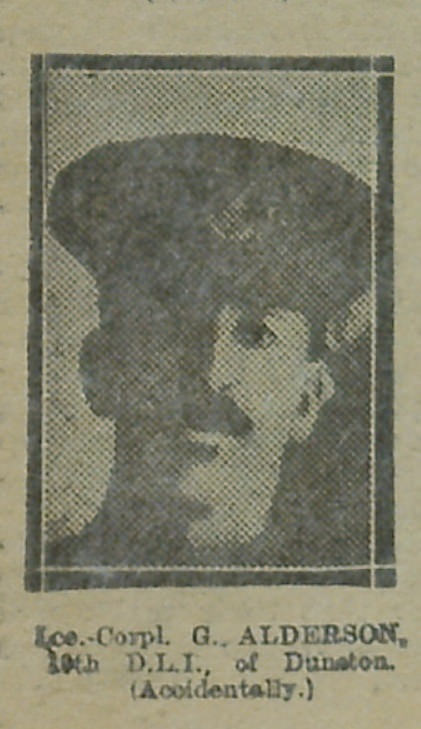
from IllustratedChronicles (flickr)
G Alderson - 10th DLI - Dunston (Accidentally)
Pinned by Simon Cotterill
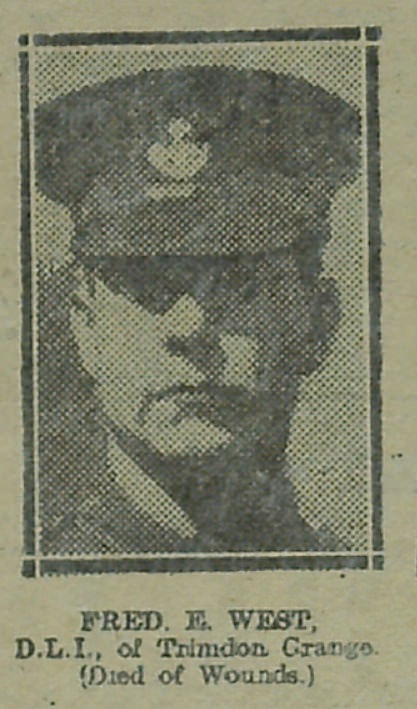
from IllustratedChronicles (flickr)
Fred E West - DLI - Trimdon Grange (Died of Wounds)
Pinned by Simon Cotterill

from IllustratedChronicles (flickr)
T Irving - 9th DLI - Heworth (Wounded)
Pinned by Simon Cotterill
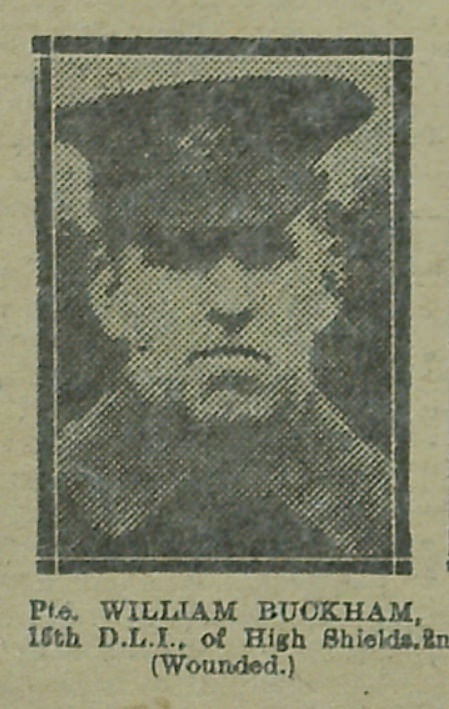
from IllustratedChronicles (flickr)
William Buckham - 15th DLI - High Shields (Wounded)
Pinned by Simon Cotterill
from IllustratedChronicles (flickr)
H Pyle - 13th DLI - Whickham (Wounded)
Pinned by Simon Cotterill
from IllustratedChronicles (flickr)
Albert Dawson - 9th DLI - Bewick Main (Killed)
Pinned by Simon Cotterill
from IllustratedChronicles (flickr)
John Turner - 15th DLI - Leasingthrone (Wounded)
Pinned by Simon Cotterill
from IllustratedChronicles (flickr)
G Potts - 15th DLI - Murton Colliery (Missing)
Pinned by Simon Cotterill
from IllustratedChronicles (flickr)
JW Adamson - 15th DLI - Murton Colliery (Wounded)
Pinned by Simon Cotterill
from IllustratedChronicles (flickr)
EW Toft - 15th DLI - Murton Colliery (Gassed)
Pinned by Simon Cotterill
from IllustratedChronicles (flickr)
J Lowes - 13th DLI - Murton Colliery (Wounded)
Pinned by Simon Cotterill
from IllustratedChronicles (flickr)
G Chisholm - 15th DLI - Murton Colliery (Wounded)
Pinned by Simon Cotterill
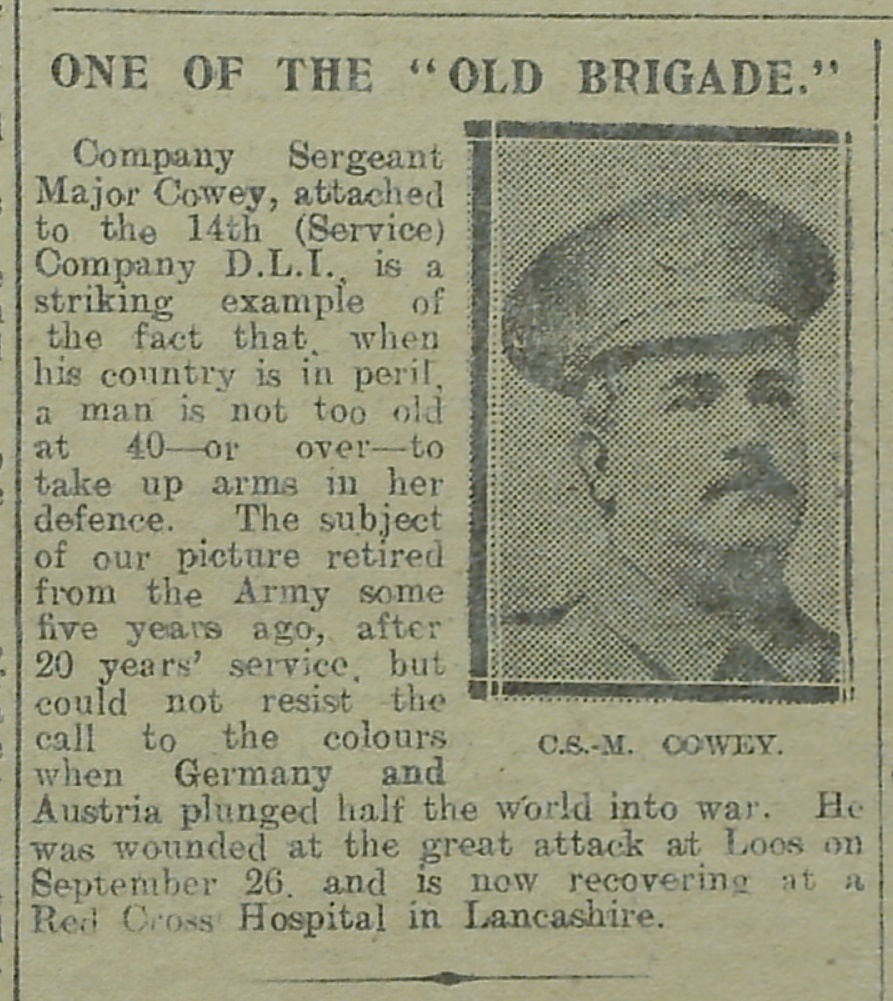
from IllustratedChronicles (flickr)
Robert Husband - 15th DLI - Murton (Wounded)
Pinned by Simon Cotterill
from IllustratedChronicles (flickr)
W Garrett - 15th DLI - Murton Colliery (Wounded)
Pinned by Simon Cotterill

from IllustratedChronicles (flickr)
E Taylor - 14th DLI - Murton Colliery (Wounded)
Pinned by Simon Cotterill
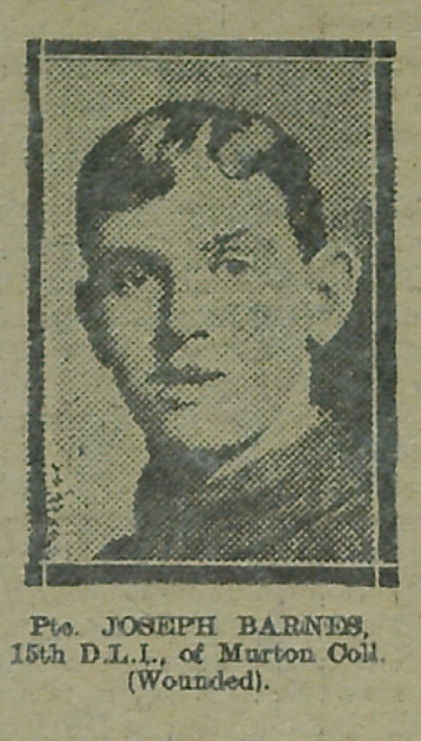
from IllustratedChronicles (flickr)
Joseph Barnes - 15th DLI - Murton Colliery (Wounded)
Pinned by Simon Cotterill
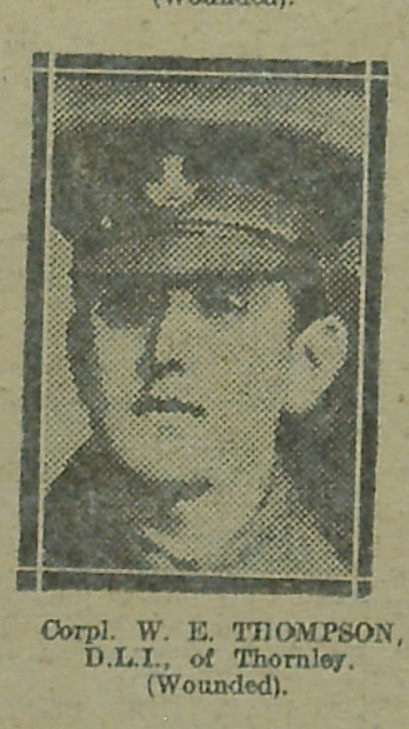
from IllustratedChronicles (flickr)
WE Thompson - DLI - Thornley (Wounded)
Pinned by Simon Cotterill
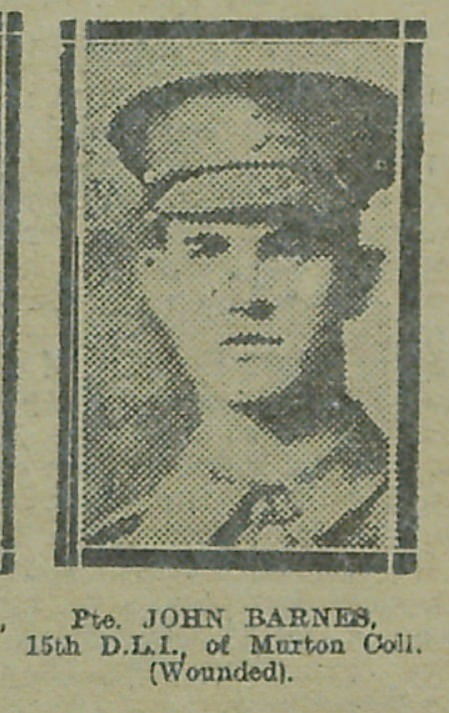
from IllustratedChronicles (flickr)
John Barnes - 15th DLI - Murton Colliery (Wounded)
Pinned by Simon Cotterill
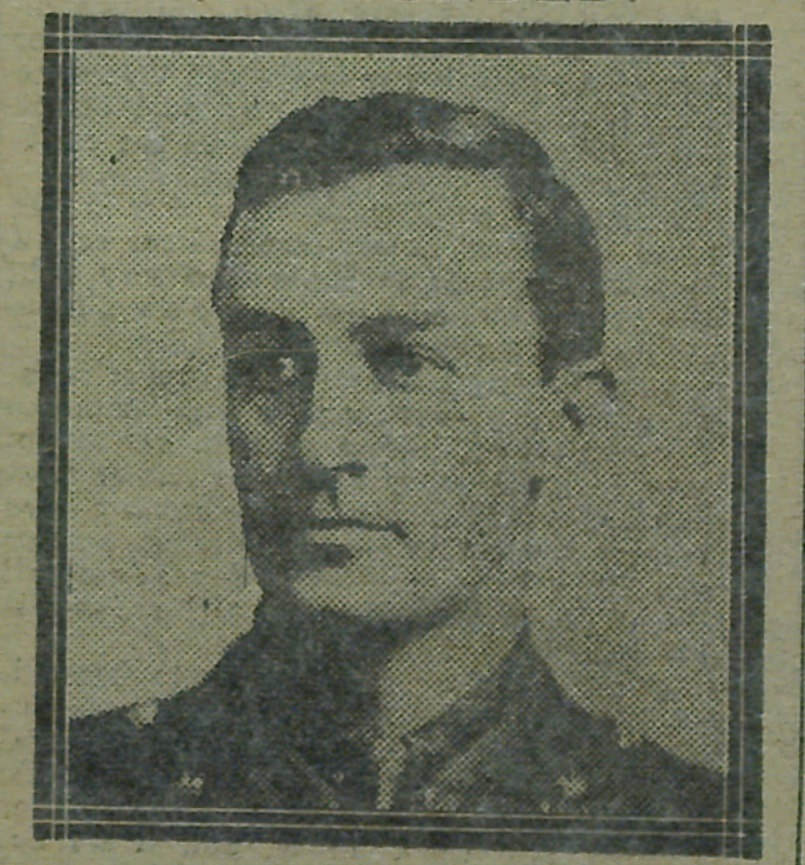
from IllustratedChronicles (flickr)
H Small - 5th DLI - Gateshead (Wounded)
Pinned by Simon Cotterill
from IllustratedChronicles (flickr)
E Faley - 14th DLI - Lemington (Gassed)
Pinned by Simon Cotterill

from IllustratedChronicles (flickr)
A Murray - 15th DLI - Ludworth (Wounded)
Pinned by Simon Cotterill
from IllustratedChronicles (flickr)
T Watson - 10th DLI - Gateshead (Wounded)
Pinned by Simon Cotterill
from IllustratedChronicles (flickr)
R Hobbs - 15th DLI - Burnhope (Gassed)
Pinned by Simon Cotterill
from IllustratedChronicles (flickr)
F Reidy - 11th DLI - Gateshead (Wounded)
Pinned by Simon Cotterill
from IllustratedChronicles (flickr)
B Burns - 15th DLI - Tantobie (Wounded)
Pinned by Simon Cotterill
from IllustratedChronicles (flickr)
W Tague - 14th DLI - Witton Park (Killed)
Pinned by Simon Cotterill
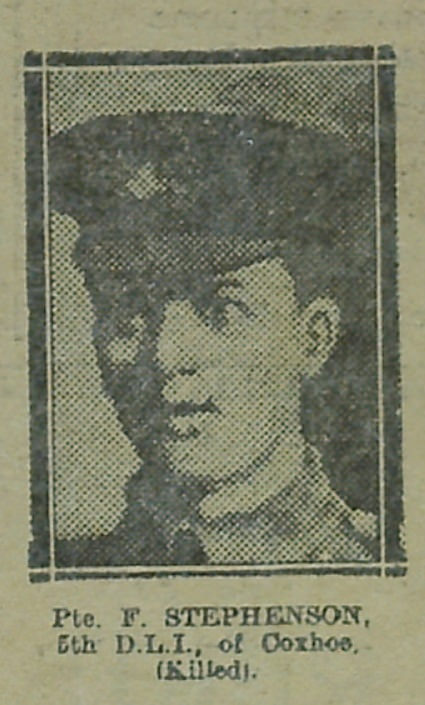
from IllustratedChronicles (flickr)
F Stephenson - 5th DLI - Coxhoe (Killed)
Pinned by Simon Cotterill
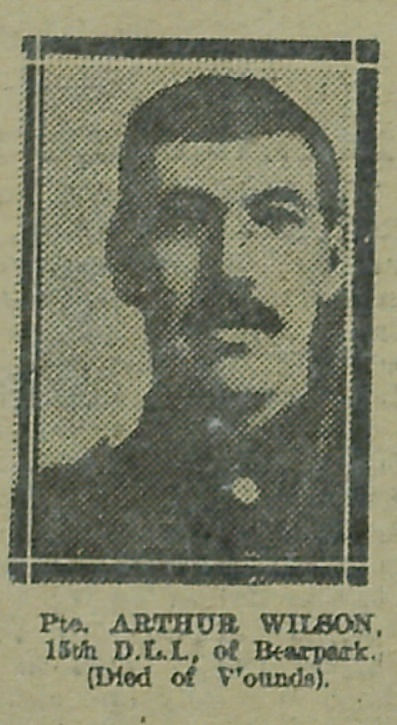
from IllustratedChronicles (flickr)
Arthur Wilson - 15th DLI - Bearpark (Died of Wounds)
Pinned by Simon Cotterill
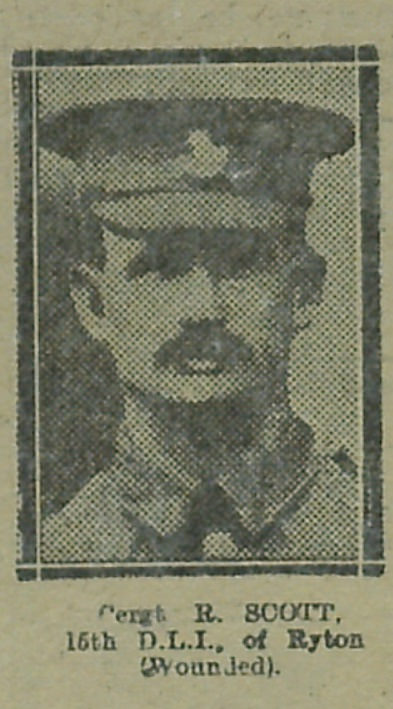
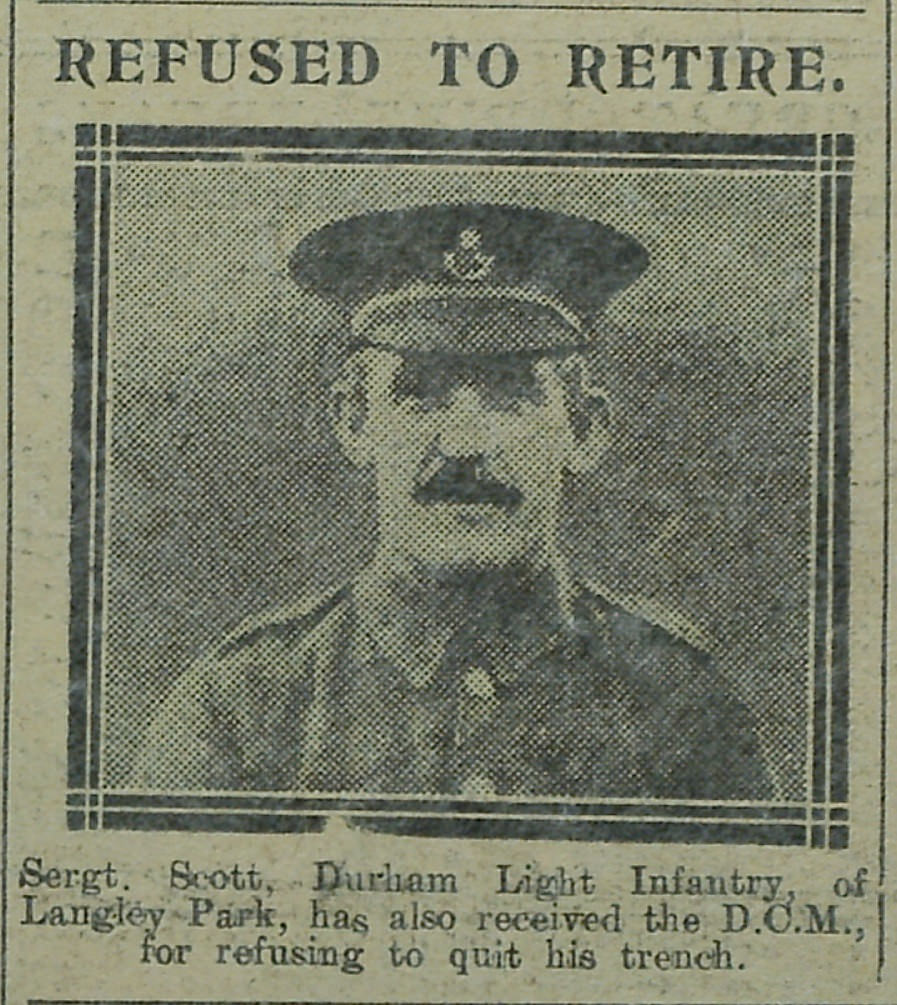
from IllustratedChronicles (flickr)
A Thomas - 15th DLI - Darlington (Wounded)
Pinned by Simon Cotterill
from IllustratedChronicles (flickr)
A Whitwham - 15th DLI - Tantobie (Wounded)
Pinned by Simon Cotterill
from IllustratedChronicles (flickr)
H Hindson - 14th DLI - Tantobie (Wounded)
Pinned by Simon Cotterill
from IllustratedChronicles (flickr)
A Barron - 4th DLI - Perkinsville (Wounded)
Pinned by Simon Cotterill
from IllustratedChronicles (flickr)
S Moore - 15th DLI - Gateshead (Wounded)
Pinned by Simon Cotterill
from IllustratedChronicles (flickr)
J Richmond - 16th DLI - Leeholme (Wounded)
Pinned by Simon Cotterill
from IllustratedChronicles (flickr)
J Cranston - 8th DLI - Tantobie (Wounded)
Pinned by Simon Cotterill
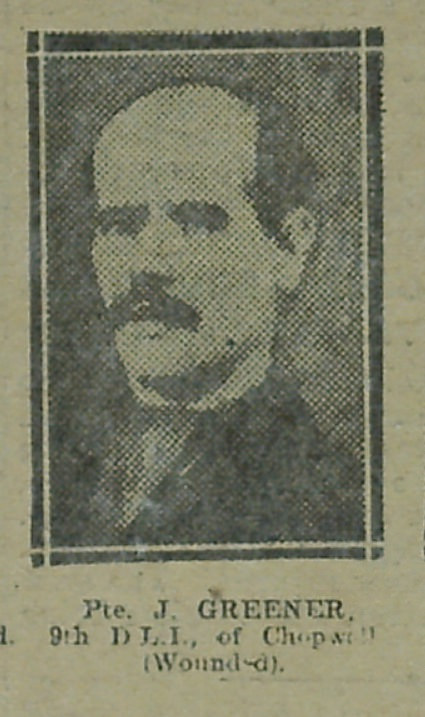
from IllustratedChronicles (flickr)
J Greener - 9th DLI - Chopwell (Wounded)
Pinned by Simon Cotterill
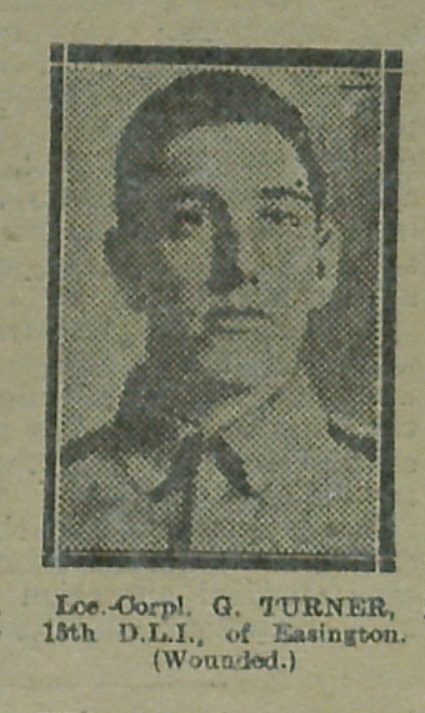
from IllustratedChronicles (flickr)
G Turner - 13th DLI - Easington (Wounded)
Pinned by Simon Cotterill
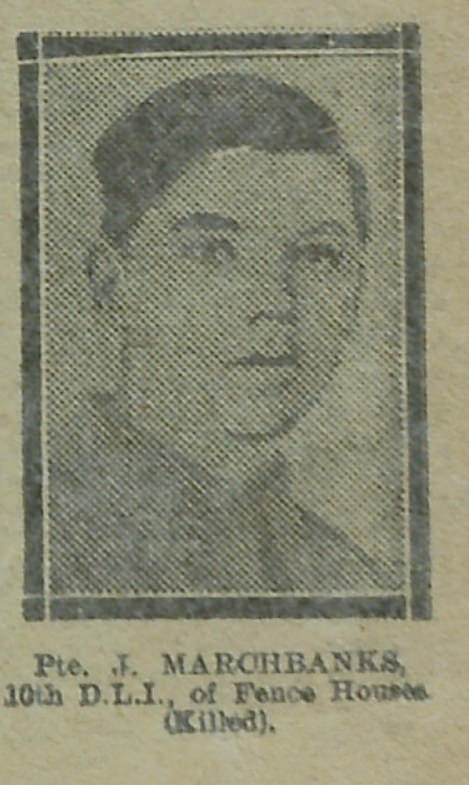
from IllustratedChronicles (flickr)
J Marchbanks - 10th DLI - Fence Houses (Killed)
Pinned by Simon Cotterill
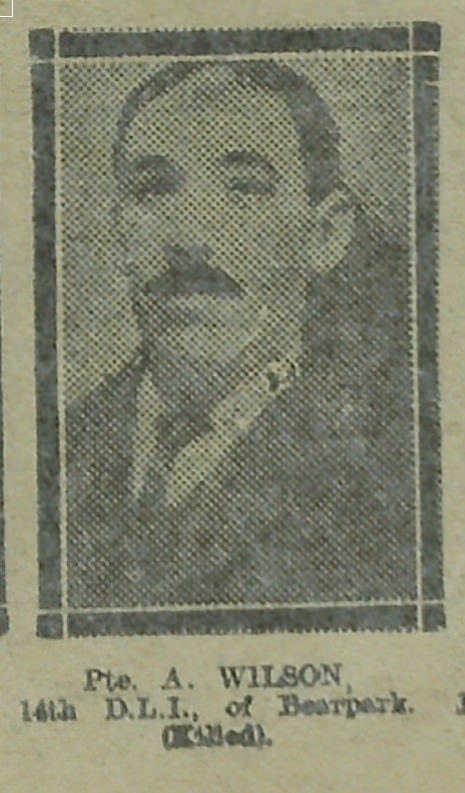
from IllustratedChronicles (flickr)
A Wilson - 14th DLI - Bearpark (Killed)
Pinned by Simon Cotterill
from IllustratedChronicles (flickr)
W Jardine - 11th DLI - Walbottle (Wounded)
Pinned by Simon Cotterill
from IllustratedChronicles (flickr)
WM Scott - 10th DLI - Springwell (Wounded)
Pinned by Simon Cotterill
from IllustratedChronicles (flickr)
RW Dawson - 2nd DLI - Gilesgate Moor (Killed)
Pinned by Simon Cotterill
from IllustratedChronicles (flickr)
R Fogg - 15th DLI - Silksworth (Wounded)
Pinned by Simon Cotterill
from IllustratedChronicles (flickr)
A King - 15th DLI - Washington (Wounded)
Pinned by Simon Cotterill
from IllustratedChronicles (flickr)
Luke Thompson - 14th DLI - West Stanley (Wounded)
Pinned by Simon Cotterill
from IllustratedChronicles (flickr)
John Skinner - 15th DLI - Murton Colliery (Wounded)
Pinned by Simon Cotterill
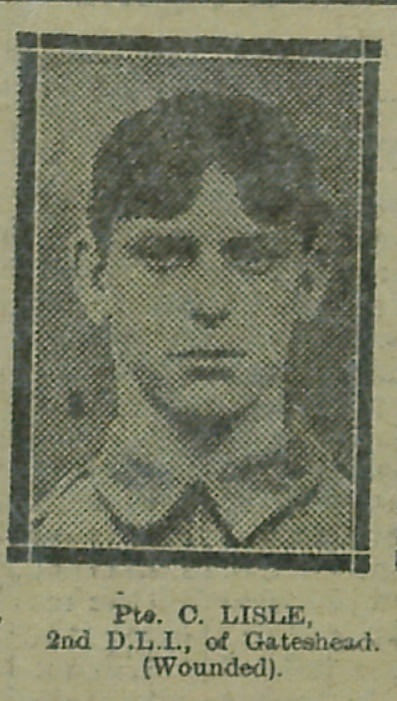
from IllustratedChronicles (flickr)
C Lisle - 2nd DLI - Gateshead (Wounded)
Pinned by Simon Cotterill
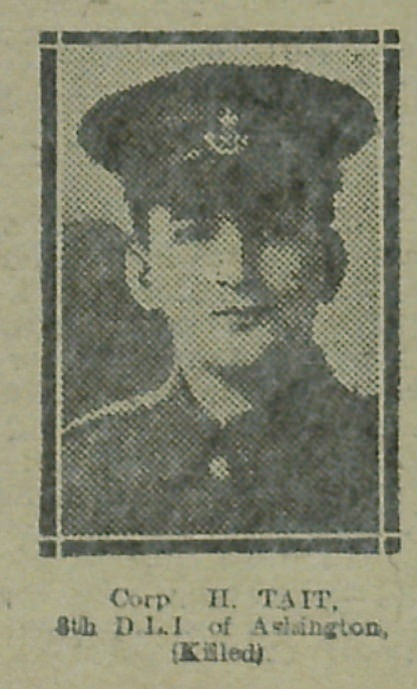
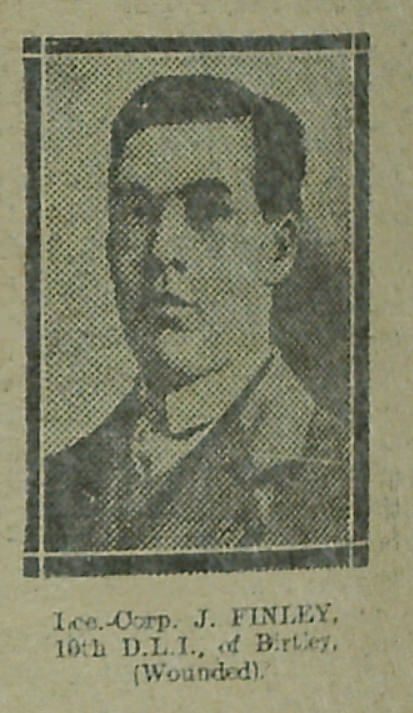
from IllustratedChronicles (flickr)
J Finley - 10th DLI - Birtley (Wounded)
Pinned by Simon Cotterill
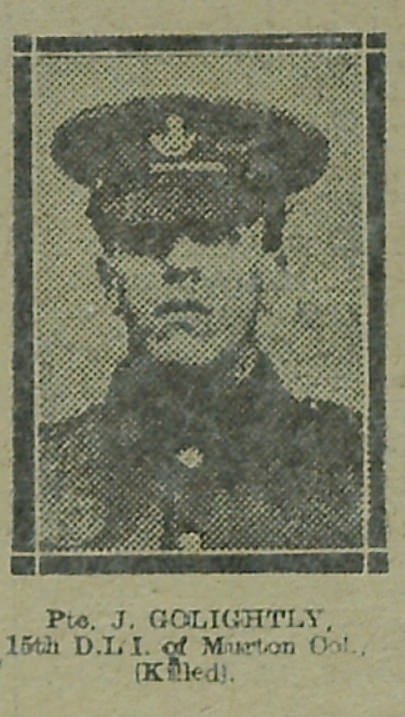
from IllustratedChronicles (flickr)
J Golightly - 15th DLI - Murton Colliery (Killed)
Pinned by Simon Cotterill
from IllustratedChronicles (flickr)
J Cairns - 14th DLI - Felling (Wounded)
Pinned by Simon Cotterill
from IllustratedChronicles (flickr)
Pte Raine - 6th DLI - Low Etherley (Wounded)
Pinned by Simon Cotterill
from IllustratedChronicles (flickr)
Thomas Glendinning - 2nd DLI - Grangetown (Wounded)
Pinned by Simon Cotterill
from IllustratedChronicles (flickr)
D Barron - 14th DLI - Sunderland (Wounded)
Pinned by Simon Cotterill
from IllustratedChronicles (flickr)
C Arkley - 10th DLI - Silksworth (Killed)
Pinned by Simon Cotterill

from IllustratedChronicles (flickr)
J Curtain - 15th DLI - Penshaw (Wounded)
Pinned by Simon Cotterill
from IllustratedChronicles (flickr)
Norman Hickman - 14th DLI - Hetton Downs (Wounded)
Pinned by Simon Cotterill
from IllustratedChronicles (flickr)
T Scott - 14th DLI - Sunderland (Wounded)
Pinned by Simon Cotterill
from IllustratedChronicles (flickr)
William Northey - 15th DLI - Grangetown (Wounded)
Pinned by Simon Cotterill
from IllustratedChronicles (flickr)
G Davison - 14th DLI - Nova Scotia (Wounded)
Pinned by Simon Cotterill
from IllustratedChronicles (flickr)
M Sugden - 2nd DLI - Felling (Wounded)
Pinned by Simon Cotterill
from IllustratedChronicles (flickr)
P Watson - 14th DLI - Sunderland (Wounded)
Pinned by Simon Cotterill
from IllustratedChronicles (flickr)
A Hunter - 8th DLI - Easington (Missing)
Pinned by Simon Cotterill
from IllustratedChronicles (flickr)
J Carr - 2nd DLI - Nettlesworth (Wounded)
Pinned by Simon Cotterill
from IllustratedChronicles (flickr)
O Clewes - 15th DLI - Sacriston (Wounded)
Pinned by Simon Cotterill
from IllustratedChronicles (flickr)
James Mercer -7th DLI - Grangetown (Missing)
Pinned by Simon Cotterill
from IllustratedChronicles (flickr)
J Brown - 8th DLI - Sacriston (Killed)
Pinned by Simon Cotterill
from IllustratedChronicles (flickr)
E Wright - 14th DLI - Sacriston (Wounded)
Pinned by Simon Cotterill
from IllustratedChronicles (flickr)
J Brown - 8th DLI - Sacriston (Killed)
Pinned by Simon Cotterill
from IllustratedChronicles (flickr)
C Holmes - 16th DLI - Edmondsley (Wounded)
Pinned by Simon Cotterill
from IllustratedChronicles (flickr)
E Hanson - 15th DLI - Coxhoe (Wounded)
Pinned by Simon Cotterill
from IllustratedChronicles (flickr)
L Storey - 14th DLI - Gateshead (Wounded)
Pinned by Simon Cotterill
from IllustratedChronicles (flickr)
JJ Mills - 6th DLI - Witton Park (Wounded)
Pinned by Simon Cotterill
from IllustratedChronicles (flickr)
R Rhymer - 2nd DLI - Edmondsley (Wounded)
Pinned by Simon Cotterill
from IllustratedChronicles (flickr)
P Newton - 9th DLI - Blaydon (Wounded)
Pinned by Simon Cotterill
from IllustratedChronicles (flickr)
G Walker - 15th DLI - Gateshead (Wounded)
Pinned by Simon Cotterill
from IllustratedChronicles (flickr)
G McLeod - 16th DLI - Gateshead (Wounded)
Pinned by Simon Cotterill
from IllustratedChronicles (flickr)
J Hutchinson - 2nd DLI - Durham (WOunded)
Pinned by Simon Cotterill
from IllustratedChronicles (flickr)
T Marsden - 15th DLI - Silksworth (Wounded)
Pinned by Simon Cotterill
from IllustratedChronicles (flickr)
M Richardson - 10th DLI - Gateshead (Wounded)
Pinned by Simon Cotterill

from IllustratedChronicles (flickr)
M Gallagher - 15th DLI - Silksworth (Wounded)
Pinned by Simon Cotterill
from IllustratedChronicles (flickr)
TH Pattison - 15th DLI - Silksworth (Wounded)
Pinned by Simon Cotterill
from IllustratedChronicles (flickr)
William Keers - 15th DLI - Hordern Colliery (Wounded)
Pinned by Simon Cotterill

from IllustratedChronicles (flickr)
C Fisher - 15th DLI - Kelloe (Wounded)
Pinned by Simon Cotterill
from IllustratedChronicles (flickr)
E McSherry - 6th DLI - Morpeth (Wounded)
Pinned by Simon Cotterill
from IllustratedChronicles (flickr)
Bugler Fairgrief - 15th DLI - Silksworth (Wounded)
Pinned by Simon Cotterill
from IllustratedChronicles (flickr)
James Leach - 15th DLI - Silksworth (Wounded)
Pinned by Simon Cotterill
from IllustratedChronicles (flickr)
James Goss - 15th DLI - Springwell (Wounded)
Pinned by Simon Cotterill
from IllustratedChronicles (flickr)
R Nutter - 15th DLI - Silksworth (Wounded)
Pinned by Simon Cotterill
from IllustratedChronicles (flickr)
Joseph Allen - DLI - Silksworth (Wounded)
Pinned by Simon Cotterill

from IllustratedChronicles (flickr)
W Gilroy - 10th DLI - Gateshead (Wounded)
Pinned by Simon Cotterill
from IllustratedChronicles (flickr)
Jospeh Allen - DLI - Silksworth (Wounded)
Pinned by Simon Cotterill
from IllustratedChronicles (flickr)
J McLaughlin - 14th DLI - Gateshead (Wounded)
Pinned by Simon Cotterill
from IllustratedChronicles (flickr)
F Wilson - 8th DLI - Cambois (Wounded)
Pinned by Simon Cotterill
from IllustratedChronicles (flickr)
R Bolam - DLI - Gateshead (Wounded ??)
Pinned by Simon Cotterill

from IllustratedChronicles (flickr)
JW Spence - DLI - Butterknowe (Wounded)
Pinned by Simon Cotterill

from IllustratedChronicles (flickr)
H Dyke - 2nd DLI - Edmondsley (Wounded)
Pinned by Simon Cotterill
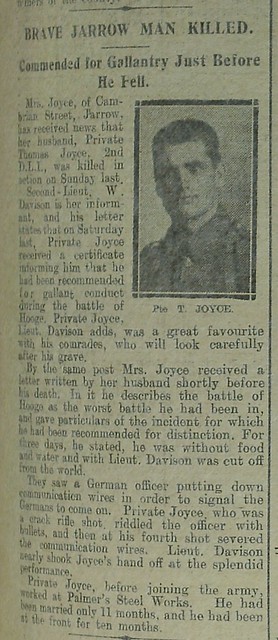
from IllustratedChronicles (flickr)
P Boyle - 10th DLI - Blackhill (Killed)
Pinned by Simon Cotterill
from IllustratedChronicles (flickr)
J Walker - 10th DLI - Sacriston (Wounded)
Pinned by Simon Cotterill

from IllustratedChronicles (flickr)
H Rossiter - 2nd DLI - Rainton (Wounded)
Pinned by Simon Cotterill
from IllustratedChronicles (flickr)
R Davison - 9th DLI - Blaydon (Wounded)
Pinned by Simon Cotterill

from IllustratedChronicles (flickr)
T Mullighan - 26th DLI - Gateshead (Killed)
Pinned by Simon Cotterill
from IllustratedChronicles (flickr)
J Cuthbertson - 10th DLI - Blackhill (Wounded)
Pinned by Simon Cotterill
from IllustratedChronicles (flickr)
F Watson - 10th DLI - Sunderland (Killed)
Pinned by Simon Cotterill
from IllustratedChronicles (flickr)
C Johnson - 2nd DLI - St Peter's (Wounded)
Pinned by Simon Cotterill

from IllustratedChronicles (flickr)
B Olsen - 3rd DLI - Gateshead (Wounded)
Pinned by Simon Cotterill
from IllustratedChronicles (flickr)
G Kier - 10th DLI - St Peter's (Wounded)
Pinned by Simon Cotterill
from IllustratedChronicles (flickr)
A Armstrong - 10th DLI - Fence Houses (Wounded)
Pinned by Simon Cotterill
from IllustratedChronicles (flickr)
James Henderson - 10th DLI - Hamsterley Colliery (Killed)
Pinned by Simon Cotterill
from IllustratedChronicles (flickr)
M Robson - 10th DLI - Hexham (Wounded)
Pinned by Simon Cotterill
from IllustratedChronicles (flickr)
T Johnson - 2nd DLI - Crawcrook (Wounded)
Pinned by Simon Cotterill
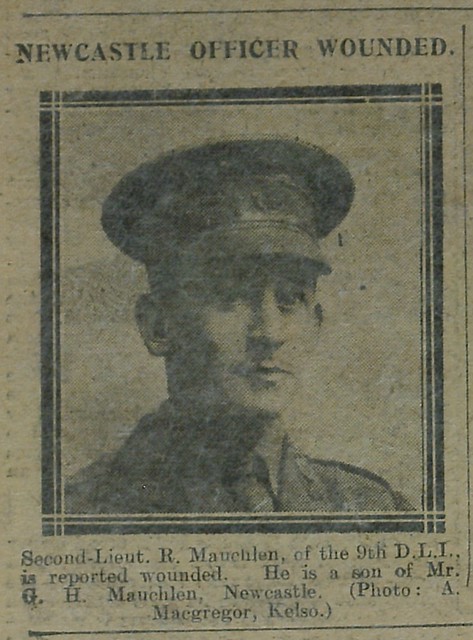
from IllustratedChronicles (flickr)
R Mauchlan - 9th DLI - Newcastle (Wounded)
Pinned by Simon Cotterill


from IllustratedChronicles (flickr)
W Lanerick - 10th DLI - Ferry Hill (Wounded)
Pinned by Simon Cotterill

from IllustratedChronicles (flickr)
P Wright - 6th DLI - Consett (Missing)
Pinned by Simon Cotterill
from IllustratedChronicles (flickr)
J Wright - 8th DLI - Felling (Missing)
Pinned by Simon Cotterill
from IllustratedChronicles (flickr)
J Wilson - 8th DLI - Perkinsville (Gassed)
Pinned by Simon Cotterill
from IllustratedChronicles (flickr)
J Wilson - 8th DLI - Newcastle (Gassed)
Pinned by Simon Cotterill

from IllustratedChronicles (flickr)
G Wilson - 8th DLI - Hamsteels (Wounded)
Pinned by Simon Cotterill
from IllustratedChronicles (flickr)
E Wilkinson - 9th DLI - Gateshead (Wounded)
Pinned by Simon Cotterill
from IllustratedChronicles (flickr)
T Williams - 9th DLI - Felling (Gassed)
Pinned by Simon Cotterill

from IllustratedChronicles (flickr)
J Watson - 8th DLI - New Shildon (Wounded and prisoner)
Pinned by Simon Cotterill
from IllustratedChronicles (flickr)
E Ward - 5th DLI - Middlesbrough (Wounded)
Pinned by Simon Cotterill
from IllustratedChronicles (flickr)
G Turnbull - 9th DLI - Chopwell (Killed)
Pinned by Simon Cotterill
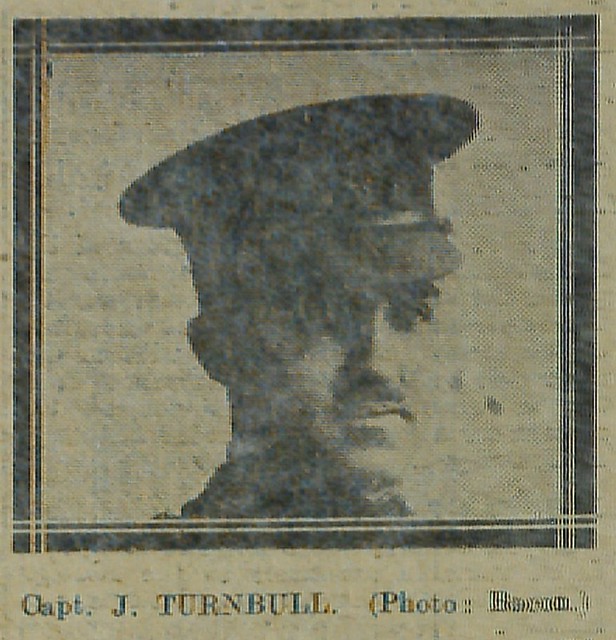

from IllustratedChronicles (flickr)
W Thornton - 7th DLI - Sunderland (Missing)
Pinned by Simon Cotterill
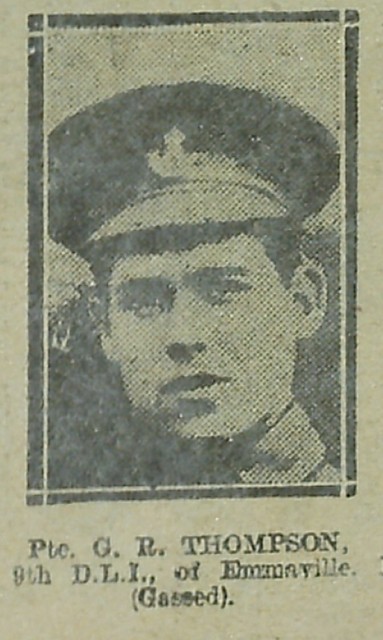
from IllustratedChronicles (flickr)
GR Thompson - 9th DLI - Emmaville (Gassed)
Pinned by Simon Cotterill
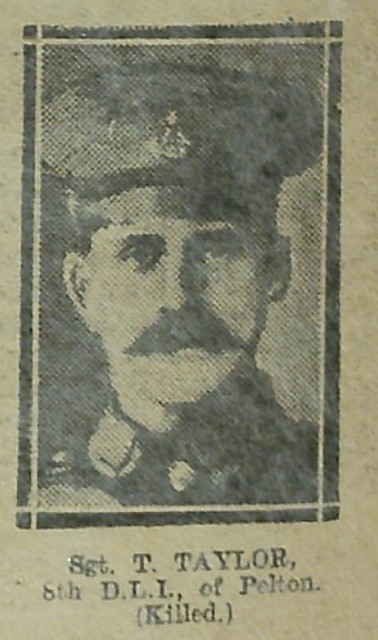

from IllustratedChronicles (flickr)
GW Thompson - 9th DLI - Swallwell (Wounded)
Pinned by Simon Cotterill
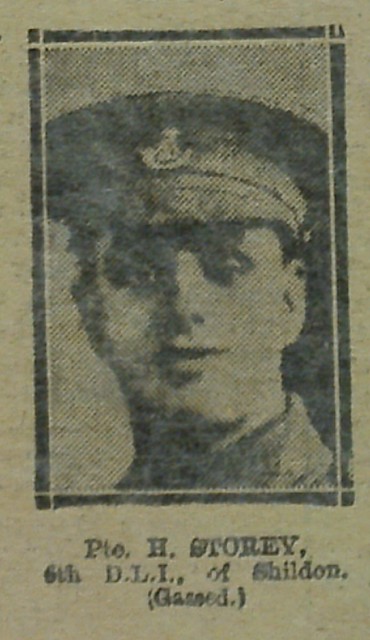
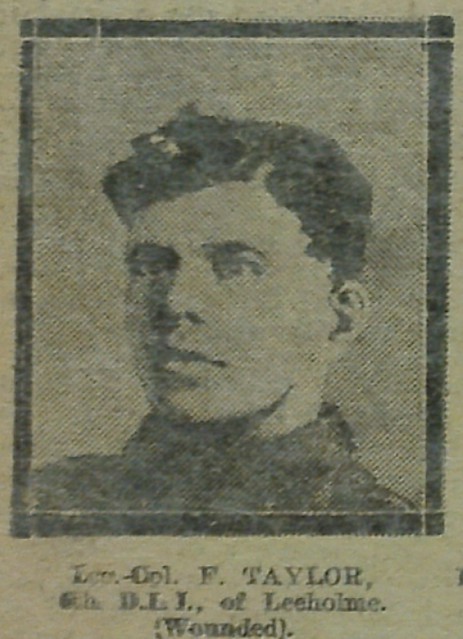
from IllustratedChronicles (flickr)
F Taylor - 8th DLI - Leeholme (Wounded)
Pinned by Simon Cotterill
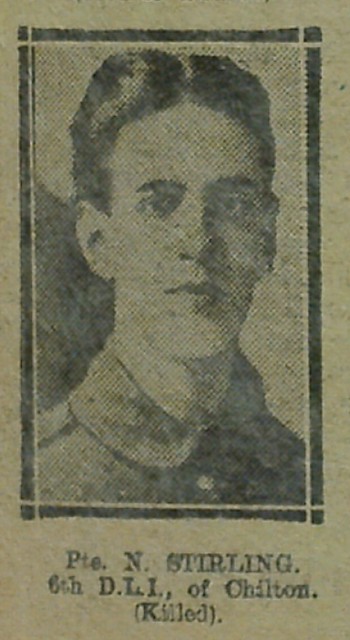
from IllustratedChronicles (flickr)
N Stirling - 6th DLI - Chilton (Killed)
Pinned by Simon Cotterill
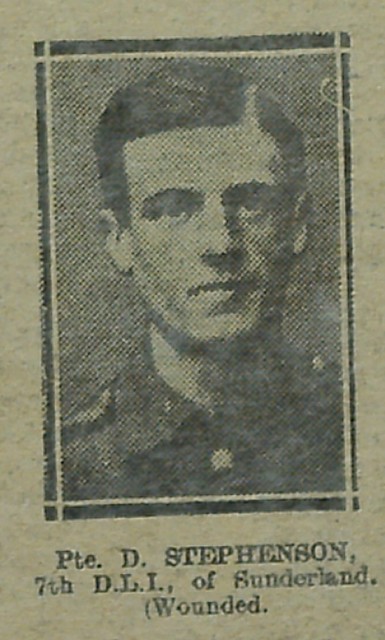
from IllustratedChronicles (flickr)
D Stephenson - 7th DLI - Sunderland (Wounded)
Pinned by Simon Cotterill
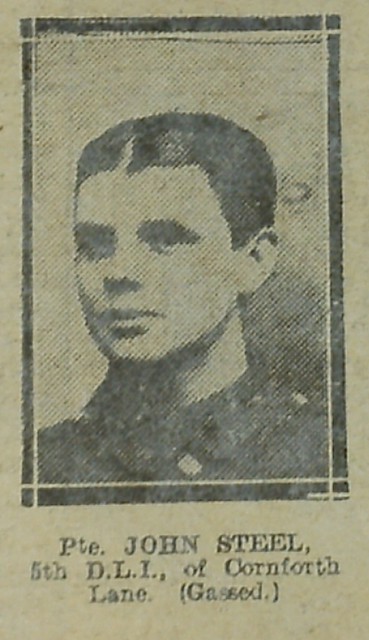
from IllustratedChronicles (flickr)
John Steel - 5th DLI - Cornforth Lane (Gassed)
Pinned by Simon Cotterill
from IllustratedChronicles (flickr)
T Smith - 9th DLI - Gateshead (Wounded)
Pinned by Simon Cotterill
from IllustratedChronicles (flickr)
E Slater - 6th DLI - Hunwick (Wounded)
Pinned by Simon Cotterill
from IllustratedChronicles (flickr)
J Smurthwaite - 8th DLI - Shincliffe Colliery (Prisoner of War)
Pinned by Simon Cotterill
from IllustratedChronicles (flickr)
J Sinclair - 8th DLI - Gainford (Prisoner of War)
Pinned by Simon Cotterill
from IllustratedChronicles (flickr)
B Sallas - 7th DLI - Gateshead (Killed)
Pinned by Simon Cotterill
from IllustratedChronicles (flickr)
B Robinson - 8th DLI - Walker (Wounded)
Pinned by Simon Cotterill

from IllustratedChronicles (flickr)
C Riseborough - 8th DLI - Bede College (Prisoner of War)
Pinned by Simon Cotterill

from IllustratedChronicles (flickr)
K Robinson - 9th DLI - Garesfield (Wounded)
Pinned by Simon Cotterill
from IllustratedChronicles (flickr)
T Raper - 8th DLI - Langley Park (Missing)
Pinned by Simon Cotterill
from IllustratedChronicles (flickr)
G Reed - 7th DLI - Sunderland (Wounded)
Pinned by Simon Cotterill
from IllustratedChronicles (flickr)
W Ramsden - 6th DLI - Consett (Wounded)
Pinned by Simon Cotterill
from IllustratedChronicles (flickr)
J Powton - 2nd DLI - Blucher Colliery (Wounded)
Pinned by Simon Cotterill
from IllustratedChronicles (flickr)
F Potts - 7th DLI - Sunderland (Wounded)
Pinned by Simon Cotterill
from IllustratedChronicles (flickr)
Thomas Pooley - 8th DLI - Sunnyside (Killed)
Pinned by Simon Cotterill
from IllustratedChronicles (flickr)
R Phillipson - 9th DLI - Stella (Gassed)
Pinned by Simon Cotterill

from IllustratedChronicles (flickr)
C Pattison - 8th DLI - Fence Houses (Gassed)
Pinned by Simon Cotterill
from IllustratedChronicles (flickr)
T Oliver - 8th DLI - Fence Houses (Killed)
Pinned by Simon Cotterill
from IllustratedChronicles (flickr)
W Morrow - 9th DLI - Gateshead (Gassed)
Pinned by Simon Cotterill

from IllustratedChronicles (flickr)
R Nesbitt - 2nd DLI - Gateshead (Wounded)
Pinned by Simon Cotterill
from IllustratedChronicles (flickr)
G Moody - 8th DLI - Witton Gilbert (Killed)
Pinned by Simon Cotterill
from IllustratedChronicles (flickr)
J Moodie - 9th DLI - Gateshead (Gassed)
Pinned by Simon Cotterill
from IllustratedChronicles (flickr)
L Moodie - 9th DLI - Gateshead (Gassed)
Pinned by Simon Cotterill
from IllustratedChronicles (flickr)
F Mohan - 9th DLI - Gateshead (Gassed)
Pinned by Simon Cotterill
from IllustratedChronicles (flickr)
J Miller - 9th DLI - Gateshead (Wounded)
Pinned by Simon Cotterill
from IllustratedChronicles (flickr)
John Merrigan - 8th DLI - Langley Park (Killed)
Pinned by Simon Cotterill
from IllustratedChronicles (flickr)
G McKeown - 9th DLI - Gateshead (Killed)
Pinned by Simon Cotterill
from IllustratedChronicles (flickr)
Joseph May - 8th DLI - Birtley (Killed)
Pinned by Simon Cotterill
from IllustratedChronicles (flickr)
R Martin - 6th DLI - Witton Park (Wounded)
Pinned by Simon Cotterill
from IllustratedChronicles (flickr)
J Malarkey - 8th DLI - Houghton0le-Spring (Wounded and gassed)
Pinned by Simon Cotterill
from IllustratedChronicles (flickr)
Sam Maddison - 8th DLI - West Stanley (Missing)
Pinned by Simon Cotterill
from IllustratedChronicles (flickr)
Adam Lowery - 9th DLI - Newbiggin (Wounded)
Pinned by Simon Cotterill
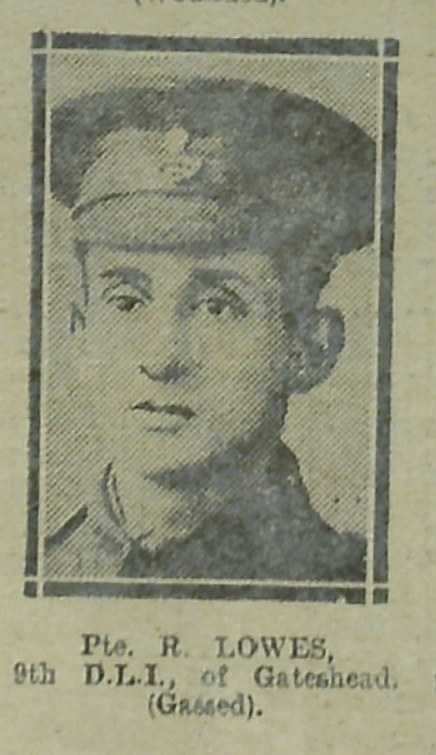
from IllustratedChronicles (flickr)
R Lowes - 9th DLI - Gateshead (Gassed)
Pinned by Simon Cotterill
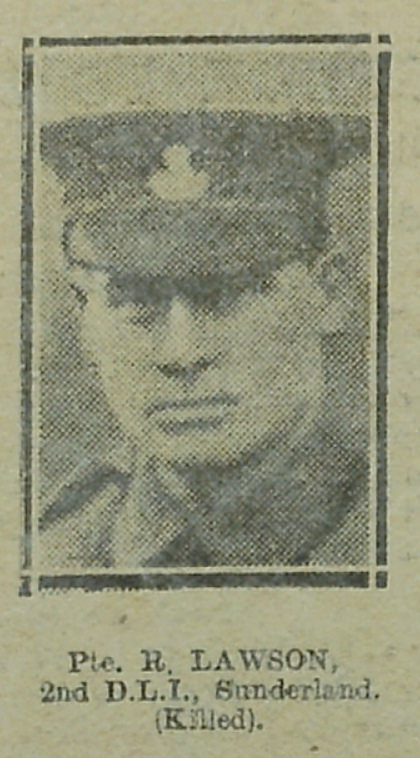
from IllustratedChronicles (flickr)
R Lawson - 2nd DLI - Sunderland (Killed)
Pinned by Simon Cotterill
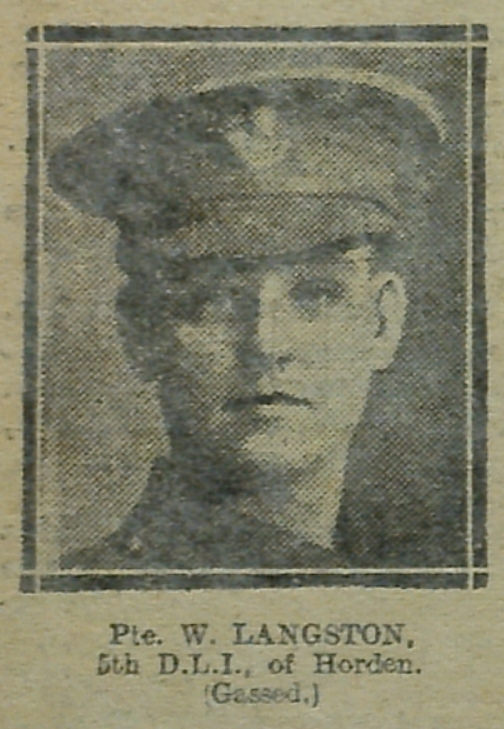
from IllustratedChronicles (flickr)
W Langston - 5th DLI - Horden (Gassed)
Pinned by Simon Cotterill
from IllustratedChronicles (flickr)
JW Kirkwood - 8th DLI - Carrville (Gassed)
Pinned by Simon Cotterill
from IllustratedChronicles (flickr)
H Laverick - 7th DLI - Sunderland (Gassed)
Pinned by Simon Cotterill
from IllustratedChronicles (flickr)
A Jolly - 8th DLI - Easington Col (Wounded)
Pinned by Simon Cotterill
from IllustratedChronicles (flickr)
W Johnstone - 9th DLI - Felling (Wounded)
Pinned by Simon Cotterill
from IllustratedChronicles (flickr)
W Johnson - 8th DLI - Pelton (Prisoner of war)
Pinned by Simon Cotterill
from IllustratedChronicles (flickr)
WAS Johnson - 8th DLI - Pelton (Prisoner of War)
Pinned by Simon Cotterill
from IllustratedChronicles (flickr)
S Johnson - 8th DLI - Pelton (Wounded and prisoner)
Pinned by Simon Cotterill
from IllustratedChronicles (flickr)
S Johnson - 8th DLI - Pelton (Prisoner of War)
Pinned by Simon Cotterill
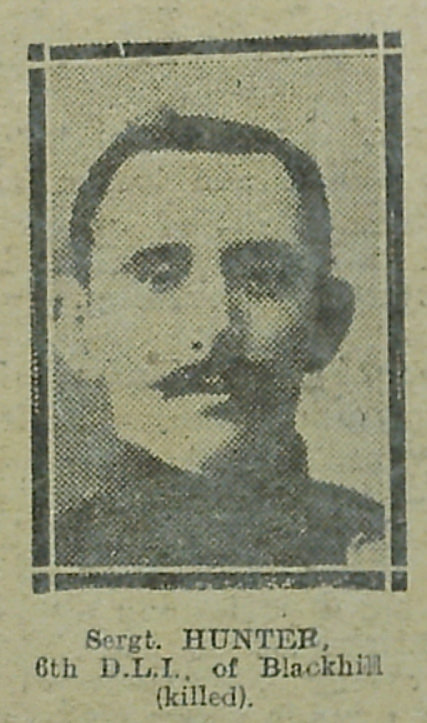
from IllustratedChronicles (flickr)
Sergt Hunter - 6th DLI - Blackhill (killed)
Pinned by Simon Cotterill

from IllustratedChronicles (flickr)
J Houchen - 8th DLI - Sacriston (Missing)
Pinned by Simon Cotterill

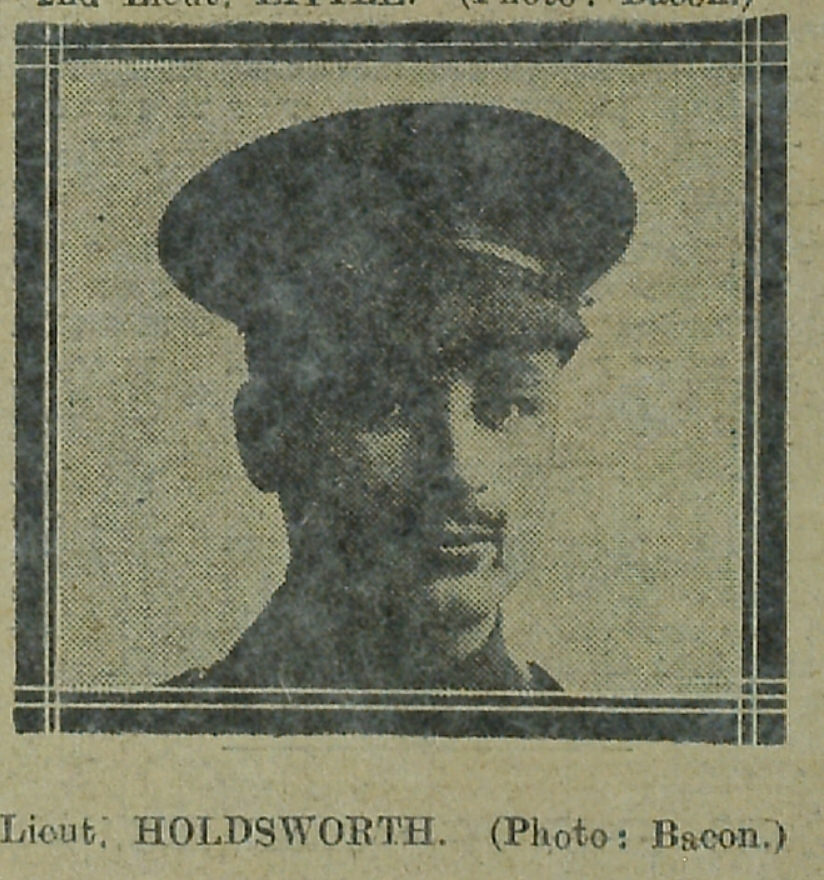

from IllustratedChronicles (flickr)
Major Hines - 7th DLI (Killed in action)
Pinned by Simon Cotterill
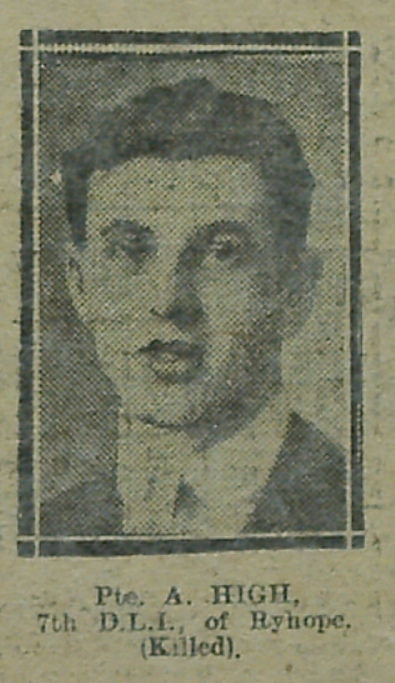
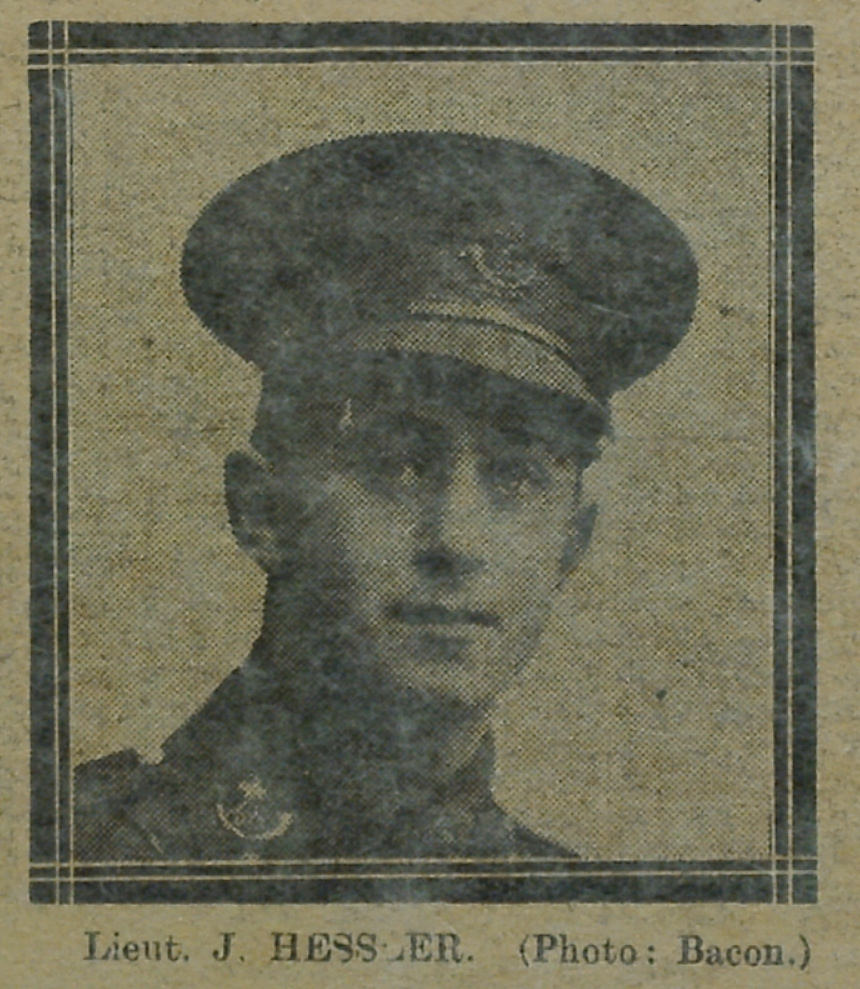
from IllustratedChronicles (flickr)
T Herron - 9th DLI - Winlaton (Killed)
Pinned by Simon Cotterill
from IllustratedChronicles (flickr)
C Heads - 5th DLI - Cornforth (wounded)
Pinned by Simon Cotterill
from IllustratedChronicles (flickr)
W Hayes - 7th DLI - Lemington (Wounded)
Pinned by Simon Cotterill
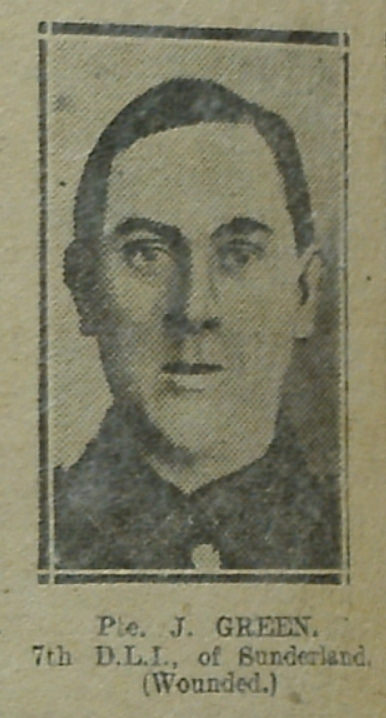
from IllustratedChronicles (flickr)
J Green - 7th DLI - Sunderland (Wounded)
Pinned by Simon Cotterill
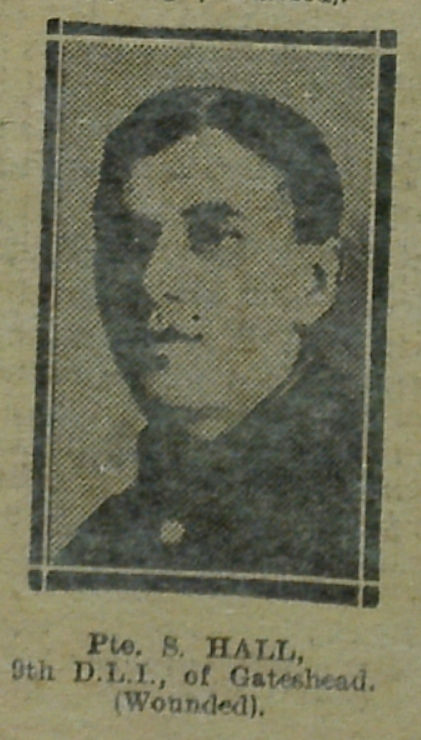
from IllustratedChronicles (flickr)
S Hall - 9th DLI - Gateshead (Wounded)
Pinned by Simon Cotterill
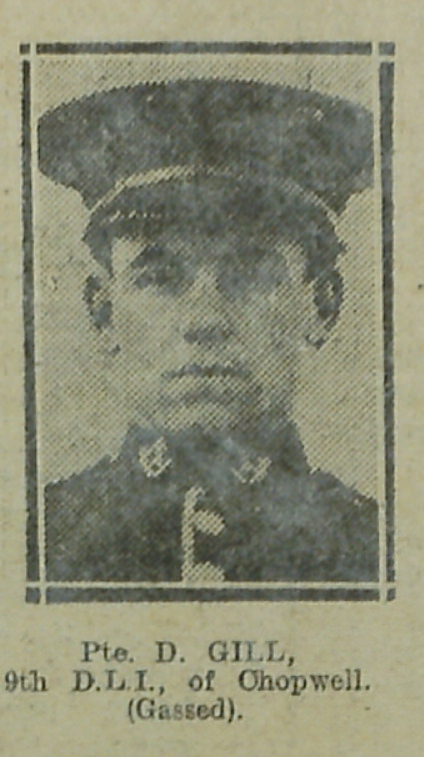
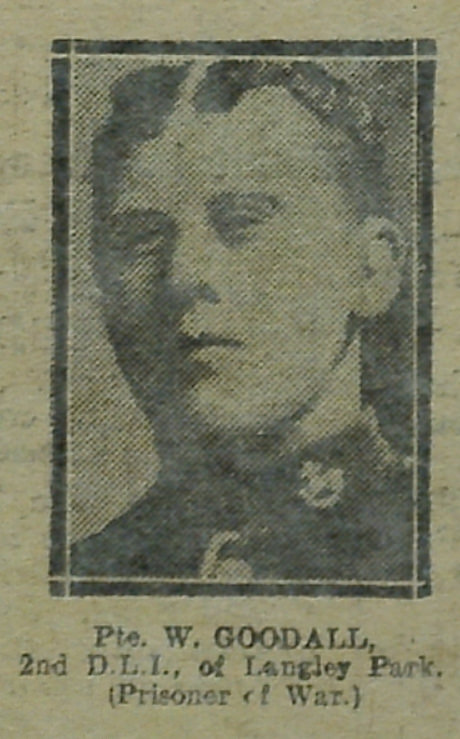
from IllustratedChronicles (flickr)
W Goodall - 2nd DLI - Langley Park (Prisoner of War)
Pinned by Simon Cotterill
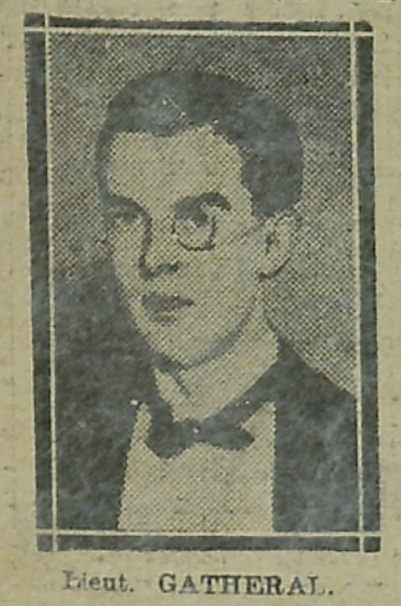
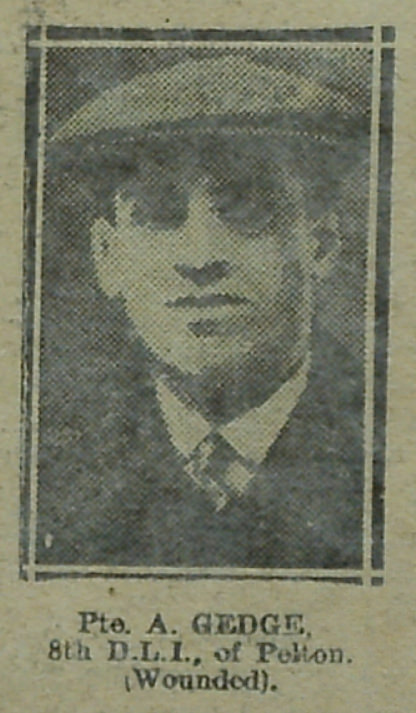
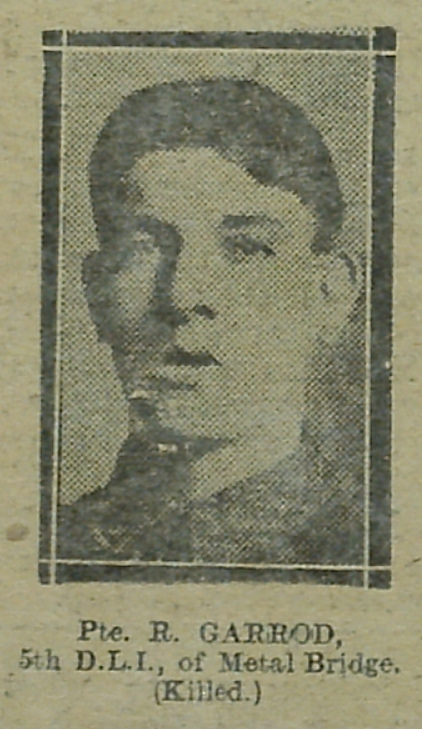
from IllustratedChronicles (flickr)
R Garrod - 5th DLI - Metal Bridge (Killed)
Pinned by Simon Cotterill

from IllustratedChronicles (flickr)
W Gambling - 9th DLI - Gateshead (Wounded)
Pinned by Simon Cotterill
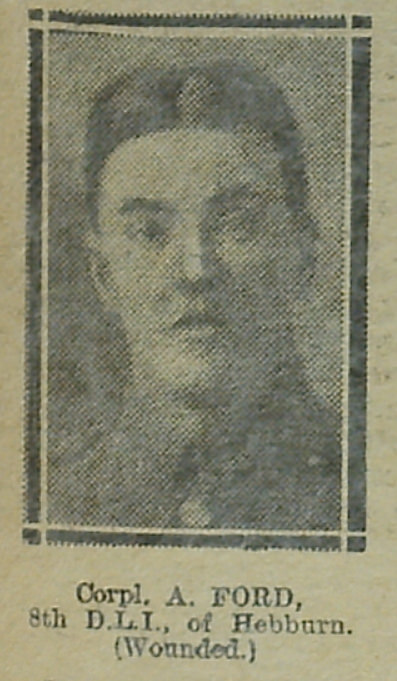
from IllustratedChronicles (flickr)
Robert Forster - DLI - Winlaton (Gassed)
Pinned by Simon Cotterill
from IllustratedChronicles (flickr)
JW Fish - 8th DLI - Cornhill (Prisoner of War)
Pinned by Simon Cotterill
from IllustratedChronicles (flickr)
M Doddy - 9th DLI - Gateshead (Wounded)
Pinned by Simon Cotterill
from IllustratedChronicles (flickr)
John Dixon - 8th DLI - Oxhill Villa (Wounded)
Pinned by Simon Cotterill
from IllustratedChronicles (flickr)
W Davenport - 9th DLI - Gateshead (Wounded)
Pinned by Simon Cotterill
from IllustratedChronicles (flickr)
J Corcoran - 7th DLI - Sunderland (Wounded)
Pinned by Simon Cotterill
from IllustratedChronicles (flickr)
C Colebrook - 6th DLI - Spennymoor (Wounded)
Pinned by Simon Cotterill
from IllustratedChronicles (flickr)
J Chalmers - 9th DLI - Winlaton (Gassed)
Pinned by Simon Cotterill
from IllustratedChronicles (flickr)
J Campbell - 8th DLI - Sacriston (Killed)
Pinned by Simon Cotterill

from IllustratedChronicles (flickr)
R Burdon - 5th DLI - Stockton (Wounded)
Pinned by Simon Cotterill
from IllustratedChronicles (flickr)
J Bramfitt - 5th DLI - Wingate (Wounded)
Pinned by Simon Cotterill
from IllustratedChronicles (flickr)
H Bowman - 8th DLI - Nettlesworth (Wounded)
Pinned by Simon Cotterill
from IllustratedChronicles (flickr)
J Bradley - DLI - Sunderland (Wounded)
Pinned by Simon Cotterill
from IllustratedChronicles (flickr)
W Black - 9th DLI - Chopwell (Wounded)
Pinned by Simon Cotterill
from IllustratedChronicles (flickr)
R Blayney - 8th DLI - Craghead (Wounded)
Pinned by Simon Cotterill
from IllustratedChronicles (flickr)
E Binns - 9th DLI - Gateshead (Wounded)
Pinned by Simon Cotterill
from IllustratedChronicles (flickr)
A Bell - 7th DLI - Sunderland (Wounded)
Pinned by Simon Cotterill
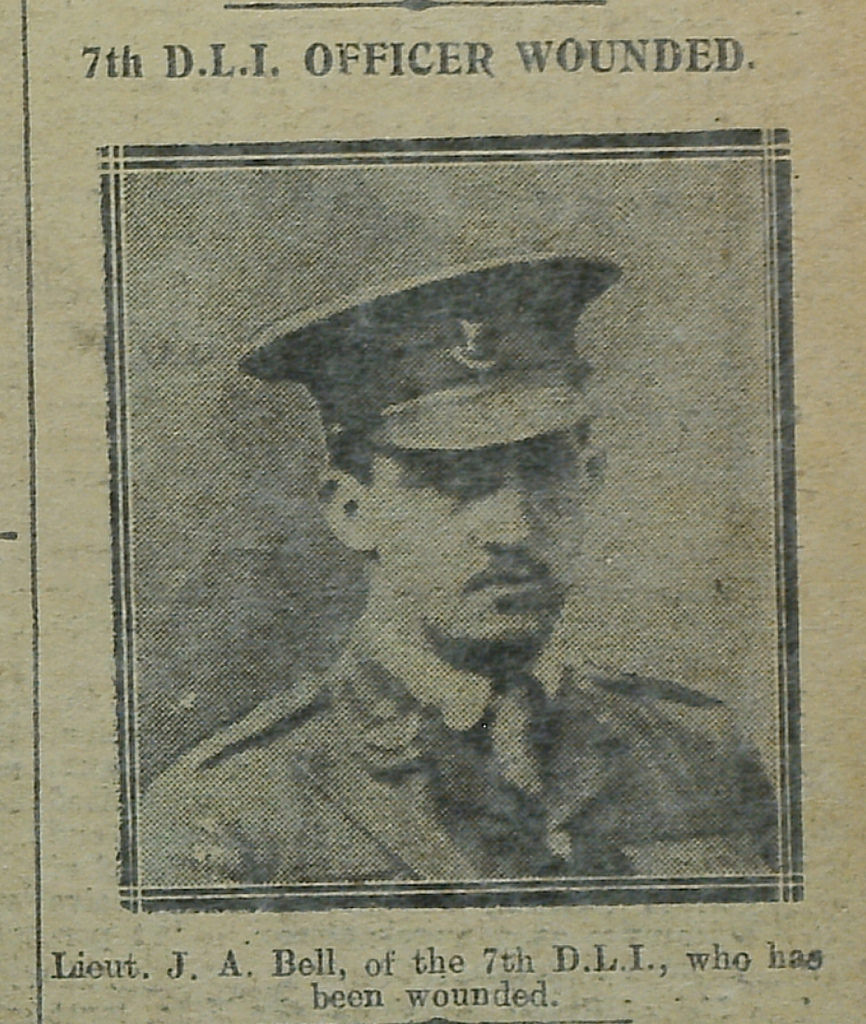
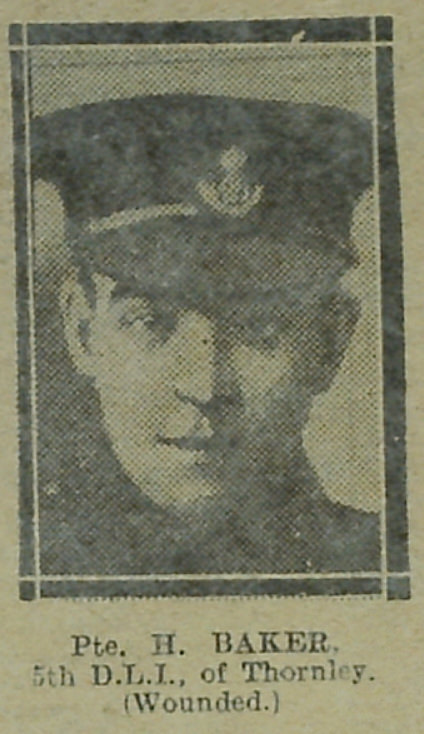
from IllustratedChronicles (flickr)
H Baker - 5th DLI - Thornley (Wounded)
Pinned by Simon Cotterill
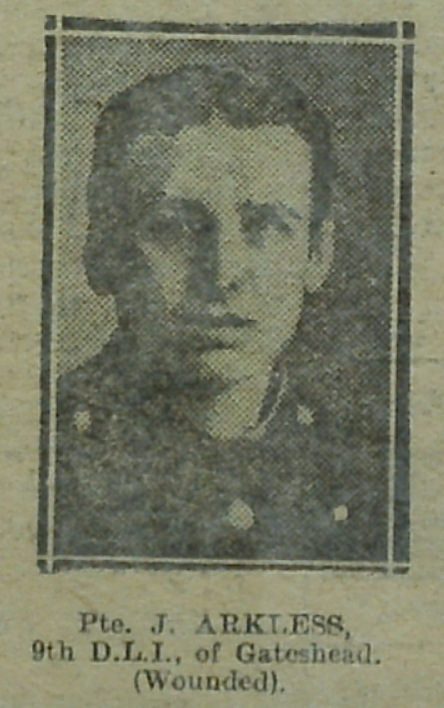
from IllustratedChronicles (flickr)
J Arkless - 9th DLI - Gateshead (Wounded)
Pinned by Simon Cotterill
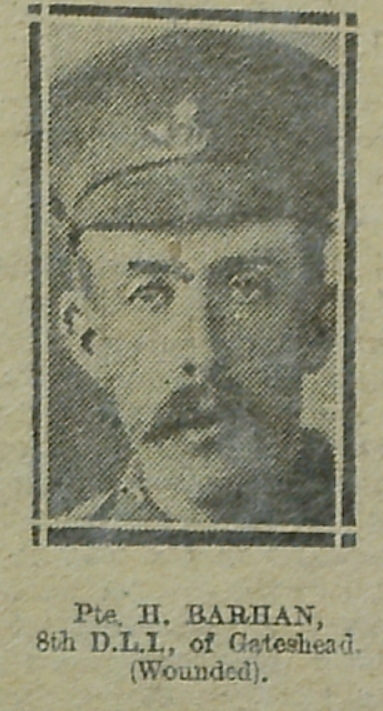
from IllustratedChronicles (flickr)
H Barhan - 8th DLI - Gateshead (Wounded)
Pinned by Simon Cotterill
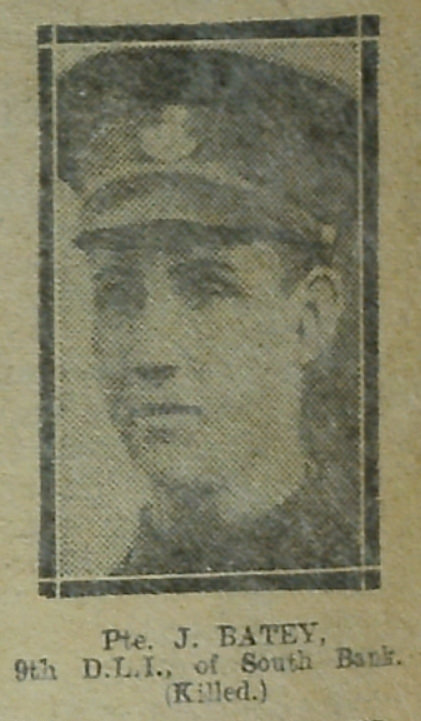
from IllustratedChronicles (flickr)
J Batey - 9th DLI - South Bank (Killed)
Pinned by Simon Cotterill
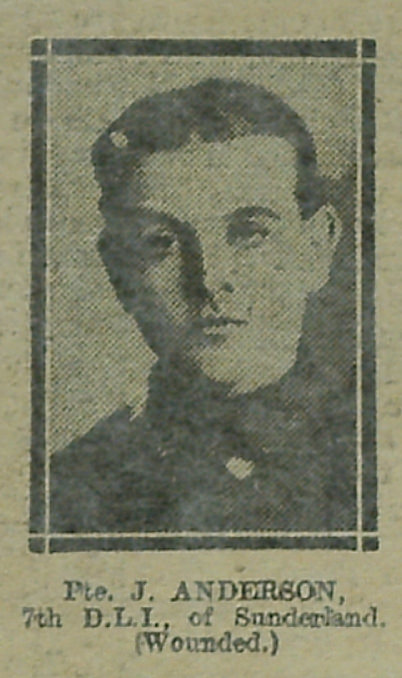
from IllustratedChronicles (flickr)
J Anderson - 7th DLI - Sunderland (Wounded)
Pinned by Simon Cotterill
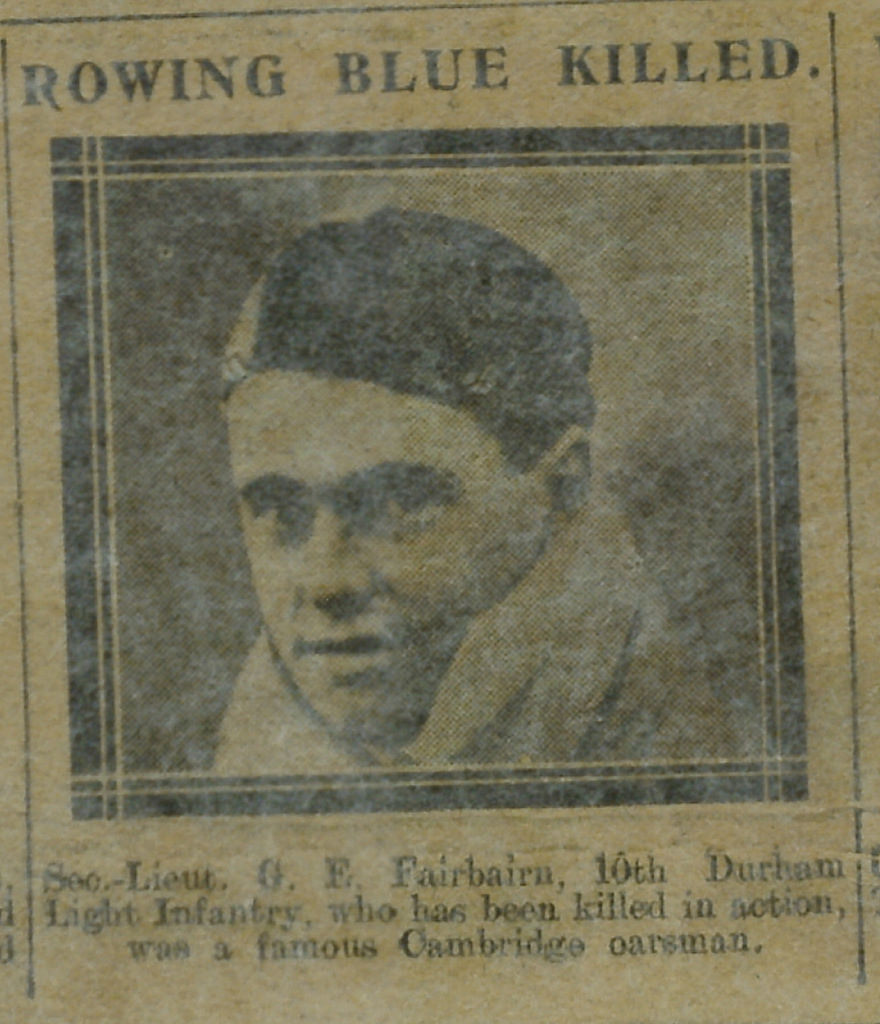
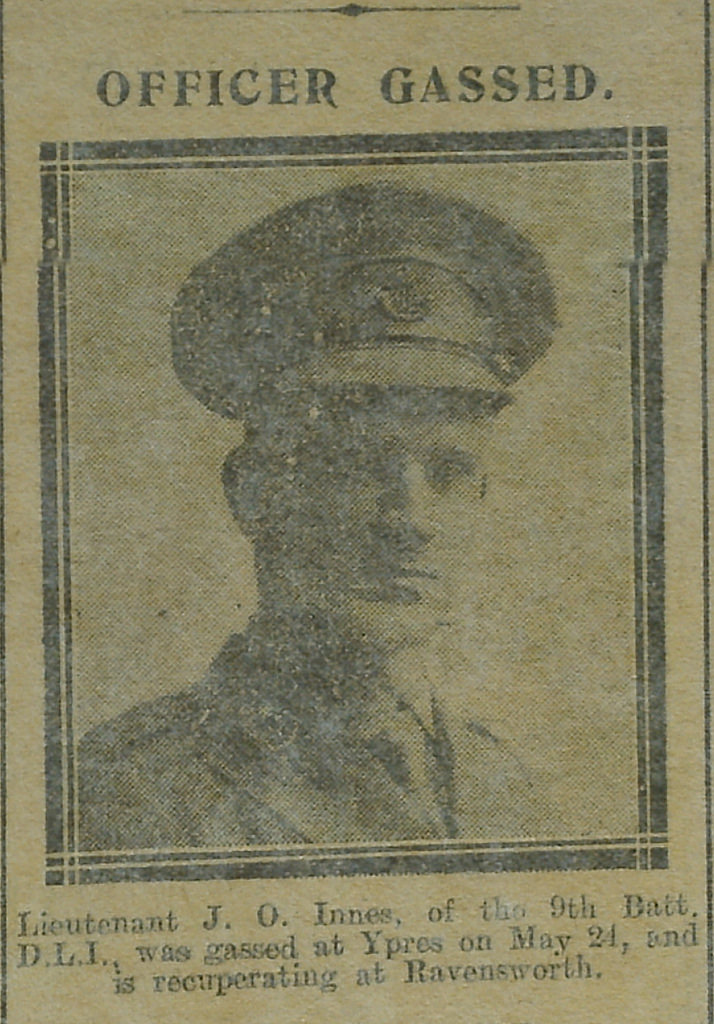
from IllustratedChronicles (flickr)
W Allison - 6th DLI - Consett (Killed)
Pinned by Simon Cotterill
from IllustratedChronicles (flickr)
J Wilson - DLI - Fatfield (Wounded and gassed)
Pinned by Simon Cotterill
from IllustratedChronicles (flickr)
M Usher - 2nd DLI - Sunderland (Killed)
Pinned by Simon Cotterill
from IllustratedChronicles (flickr)
D Bell - 2nd DLI - Sunderland (Killed)
Pinned by Simon Cotterill
from IllustratedChronicles (flickr)
A Browbank - 4th DLI - Consett (Missing)
Pinned by Simon Cotterill
from IllustratedChronicles (flickr)
M Fletcher - 2nd DLI - Byker (Wounded)
Pinned by Simon Cotterill
from IllustratedChronicles (flickr)
J Jackson - 6th DLI - Croxdale (Wounded)
Pinned by Simon Cotterill

from IllustratedChronicles (flickr)
W Askew - 8th DLI - Blackhill (Killed)
Pinned by Simon Cotterill
from IllustratedChronicles (flickr)
T Hodgkins - 5th DLI - Silksworth (Gassed)
Pinned by Simon Cotterill

from IllustratedChronicles (flickr)
A Peacock - 5th DLI - Thornaby (Killed)
Pinned by Simon Cotterill
from IllustratedChronicles (flickr)
N Featherstone - 6th DLI - Thornaby (Killed)
Pinned by Simon Cotterill
from IllustratedChronicles (flickr)
JW Ward - 8th DLI - Craghead (Missing)
Pinned by Simon Cotterill
from IllustratedChronicles (flickr)
F Ayre - 9th DLI - Gateshead (Wounded)
Pinned by Simon Cotterill
from IllustratedChronicles (flickr)
J Wilkinson - 2nd DLI - Gateshead (Killed)
Pinned by Simon Cotterill
from IllustratedChronicles (flickr)
J Cowan - 8th DLI - Perkinsville (Gassed)
Pinned by Simon Cotterill
from IllustratedChronicles (flickr)
W Galloway - 5th DLI - Coxhoe (Wounded)
Pinned by Simon Cotterill
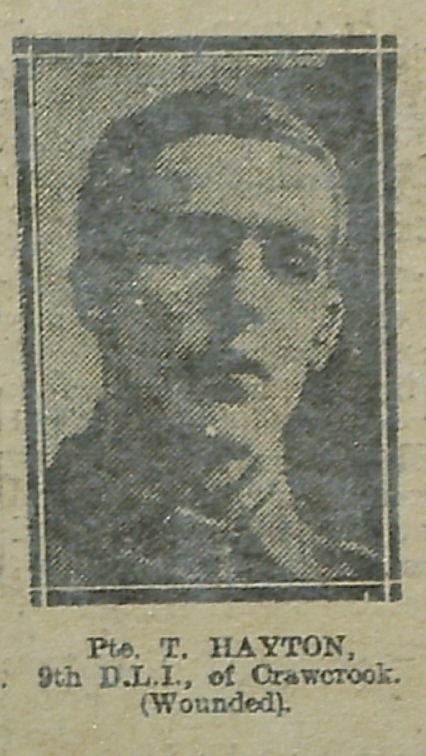
from IllustratedChronicles (flickr)
T Hayton - 9th DLI - Crawcrook (Wounded)
Pinned by Simon Cotterill

from IllustratedChronicles (flickr)
J Smith - 8th DLI - Brandon Colliery (Killed)
Pinned by Simon Cotterill
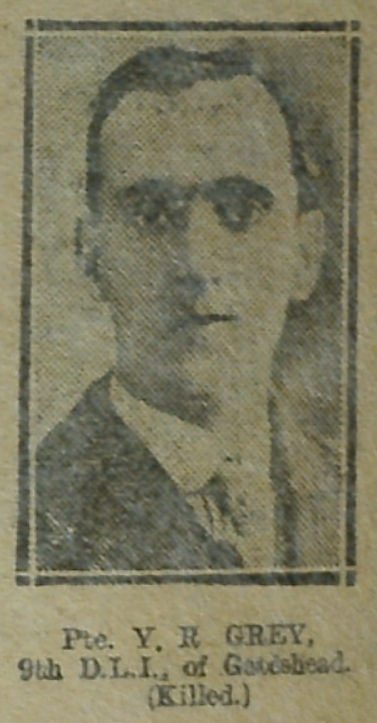
from IllustratedChronicles (flickr)
VR Grey - 9th DLI - Gateshead (Killed)
Pinned by Simon Cotterill

from IllustratedChronicles (flickr)
R Usher - 7th DLI - Sunderland (Wounded and prisoner)
Pinned by Simon Cotterill

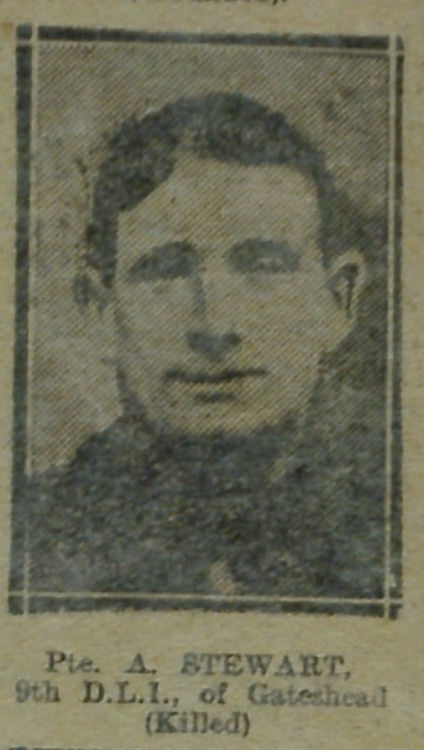
from IllustratedChronicles (flickr)
A Stewart - 9th DLI - Gateshead (Killed)
Pinned by Simon Cotterill
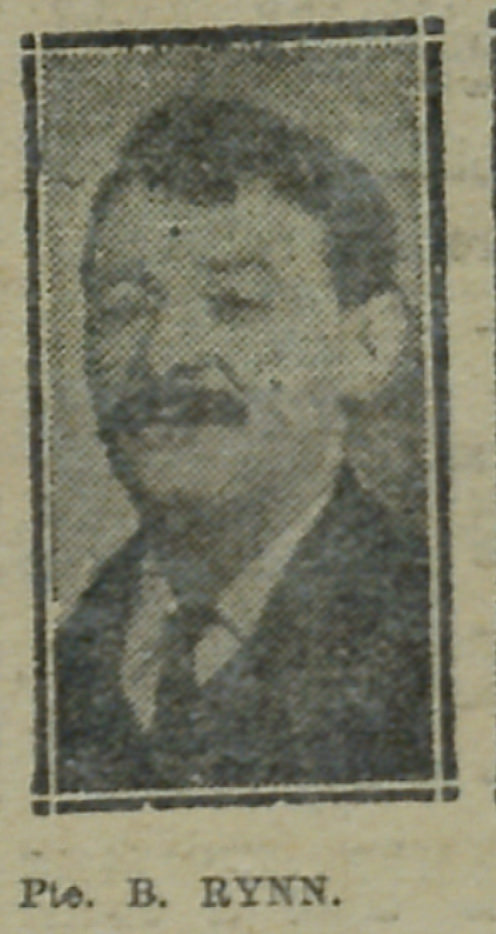
from IllustratedChronicles (flickr)
W Wright - 8th DLI - South Moor (Missing)
Pinned by Simon Cotterill
from IllustratedChronicles (flickr)
J Jackson - 10th DLI - Dudley Colliery (Wounded)
Pinned by Simon Cotterill
from IllustratedChronicles (flickr)
WW Bootes - 8th DLI - Washington (Wounded and prisoner)
Pinned by Simon Cotterill
from IllustratedChronicles (flickr)
HR Brockbanks - 7th DLI - Sunderland (Missing)
Pinned by Simon Cotterill
from IllustratedChronicles (flickr)
AR Thomas - 8th DLI - South Moor (Wounded)
Pinned by Simon Cotterill
from IllustratedChronicles (flickr)
Joseph Lamb - 8th DLI - Sacriston (Prisoner of war)
Pinned by Simon Cotterill
from IllustratedChronicles (flickr)
RA Brewis - 10th DLI - Felling (Wounded)
Pinned by Simon Cotterill
from IllustratedChronicles (flickr)
F Cummins - 10th DLI - Spennymoor (Died of Wounds)
Pinned by Simon Cotterill

from IllustratedChronicles (flickr)
C Castling - 8th DLI - Annfield Plain (Wounded)
Pinned by Simon Cotterill
from IllustratedChronicles (flickr)
W Henson - 8th DLI - Grange Villa (Wounded and Gassed)
Pinned by Simon Cotterill
from IllustratedChronicles (flickr)
Thomas McKeown - 10th DLI - Gateshead (Wounded)
Pinned by Simon Cotterill
from IllustratedChronicles (flickr)
WD Murton - 16th DLI - Gateshead (Wounded)
Pinned by Simon Cotterill
from IllustratedChronicles (flickr)
W Hogan - 2nd DLI - Wallsend (Wounded and prisoner)
Pinned by Simon Cotterill
from IllustratedChronicles (flickr)
James Bell - 10th DLI - Felling (Killed)
Pinned by Simon Cotterill
from IllustratedChronicles (flickr)
Joseph Clark - 10th DLI - Felling (Wounded)
Pinned by Simon Cotterill


from IllustratedChronicles (flickr)
TE Turnbull - 8th DLI - West Hartlepool (Killed)
Pinned by Simon Cotterill
from IllustratedChronicles (flickr)
TA Robson - DLI - Low Fell (In Hospital)
Pinned by Simon Cotterill
from IllustratedChronicles (flickr)
Sergt-Major Davidson DCM - 9th DLI - Greenside (Killed)
Pinned by Simon Cotterill
from IllustratedChronicles (flickr)
HH Tindle - 7th DLI - Sunderland (Wounded)
Pinned by Simon Cotterill
from IllustratedChronicles (flickr)
Ed Cassidy - 7th DLI - Sunderland (Killed)
Pinned by Simon Cotterill
from IllustratedChronicles (flickr)
R Thurloway - 8th DLI - Chester-le-Street (Killed)
Pinned by Simon Cotterill
from IllustratedChronicles (flickr)
CH Harrison - 9th DLI - Gateshead (Killed)
Pinned by Simon Cotterill
from IllustratedChronicles (flickr)
JW Brown - 7th DLI - Sunderland (Killed)
Pinned by Simon Cotterill
from IllustratedChronicles (flickr)
James Hoole - 10th DLI - Wheatley Hill (Wounded)
Pinned by Simon Cotterill

from IllustratedChronicles (flickr)
R Ferguson - 5th DLI - Walker (WOudned and Missing)
Pinned by Simon Cotterill
from IllustratedChronicles (flickr)
A Burns - 7th DLI - Sunderland (Wounded and Prisoner)
Pinned by Simon Cotterill
from IllustratedChronicles (flickr)
J Underwood - 8th DLI - Esh Winning (Wounded)
Pinned by Simon Cotterill
from IllustratedChronicles (flickr)
E Hughes - 5th DLI - Esh Winning (Prisoner of War)
Pinned by Simon Cotterill
from IllustratedChronicles (flickr)
Sergt Coggins - 5th DLI - Stockton (Wounded)
Pinned by Simon Cotterill
from IllustratedChronicles (flickr)
Private McGurk - 9th DLI - Gateshead (Wounded)
Pinned by Simon Cotterill
from IllustratedChronicles (flickr)
TT Clarkson - 8th DLI - Chester Moor (Wounded)
Pinned by Simon Cotterill
from IllustratedChronicles (flickr)
JW Colquhoun - 7th DLI - Sunderland (Wounded and missing)
Pinned by Simon Cotterill

from IllustratedChronicles (flickr)
CJ Bowman - 9th DLI - Netherton (Killed)
Pinned by Simon Cotterill
from IllustratedChronicles (flickr)
James Hickson - 10th DLI - Gateshead (Wounded)
Pinned by Simon Cotterill

from IllustratedChronicles (flickr)
WP Elliott - 10th DLI - Alnwick (Killed)
Pinned by Simon Cotterill
from IllustratedChronicles (flickr)
P Brown - 8th DLI - Chester-le-Street (Missing)
Pinned by Simon Cotterill
from IllustratedChronicles (flickr)
RR Blake - 8th DLI - Thornaby (Killed)
Pinned by Simon Cotterill

from IllustratedChronicles (flickr)
Thomas O'Neill - 8th DLI - Birtley (Missing)
Pinned by Simon Cotterill
from IllustratedChronicles (flickr)
TH Soutter - 10th DLI - Gateshead (Wounded)
Pinned by Simon Cotterill
from IllustratedChronicles (flickr)
JT Hallimand - 5th DLI - Coxhoe (Wounded and Missing)
Pinned by Simon Cotterill
from IllustratedChronicles (flickr)
Thomas Lumley - DLI - South Moor (Wounded)
Pinned by Simon Cotterill

from IllustratedChronicles (flickr)
EB Robinson - 5th DLI - Dunston (Gassed)
Pinned by Simon Cotterill
from IllustratedChronicles (flickr)
James L Herron - 7th DLI - Sunderland (Wounded)
Pinned by Simon Cotterill
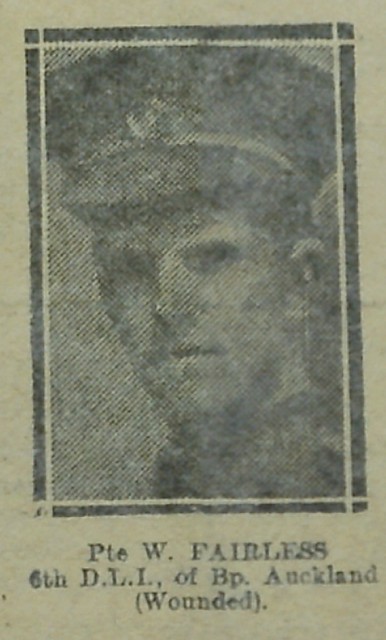
from IllustratedChronicles (flickr)
W Fairless - 6th DLI - Bishop Auckland (Wounded)
Pinned by Simon Cotterill

from IllustratedChronicles (flickr)
James Anderson - 7th DLI - South Shields (Wounded)
Pinned by Simon Cotterill
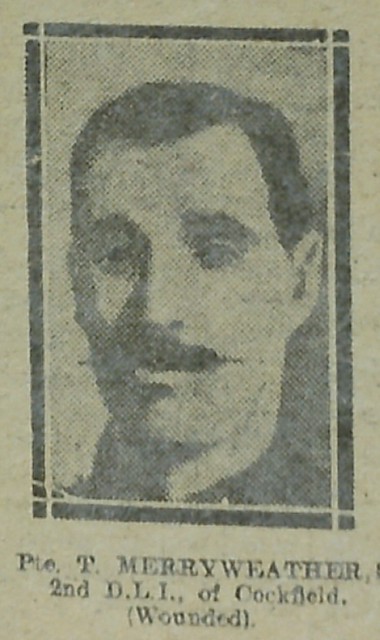
from IllustratedChronicles (flickr)
T Merryweather - 2nd DLI - Cockfield (Wounded)
Pinned by Simon Cotterill
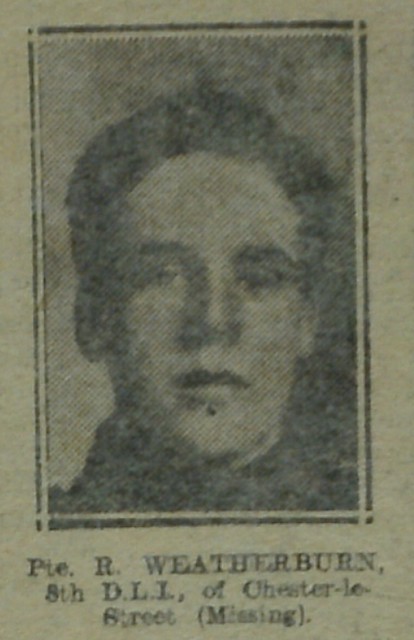
from IllustratedChronicles (flickr)
R Weatherburn - 8th DLI - Chester-le-Street (Missing)
Pinned by Simon Cotterill
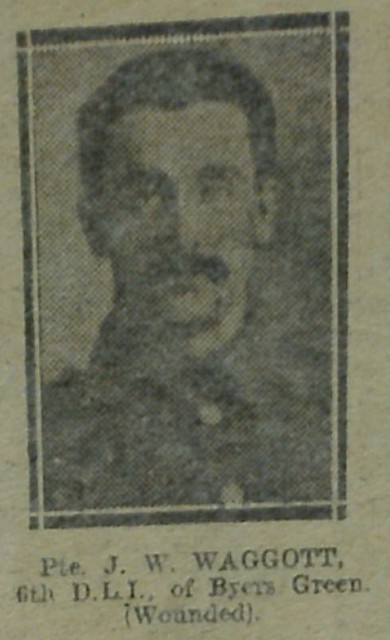
from IllustratedChronicles (flickr)
JW Waggott - 6th DLI - Byers Green (Wounded)
Pinned by Simon Cotterill

from IllustratedChronicles (flickr)
William Brown - 7th DLI - Monkwearmouth (Missing)
Pinned by Simon Cotterill

from IllustratedChronicles (flickr)
A Colter - 9th DLI - Newcastle (Wounded and Gassed)
Pinned by Simon Cotterill
from IllustratedChronicles (flickr)
JW Herring - 8th DLI - Pelton Fell (Wounded)
Pinned by Simon Cotterill
from IllustratedChronicles (flickr)
Private Sroker - DLI - Willington Quay (Killed)
Pinned by Simon Cotterill

from IllustratedChronicles (flickr)
FJ Wilson - 7th DLI - Sunderland (Killed)
Pinned by Simon Cotterill
from IllustratedChronicles (flickr)
F Bell - 9th DLI - Gateshead (Wounded and Gassed)
Pinned by Simon Cotterill
from IllustratedChronicles (flickr)
Joseph Allison - 9th DLI - Felling (Gassed)
Pinned by Simon Cotterill
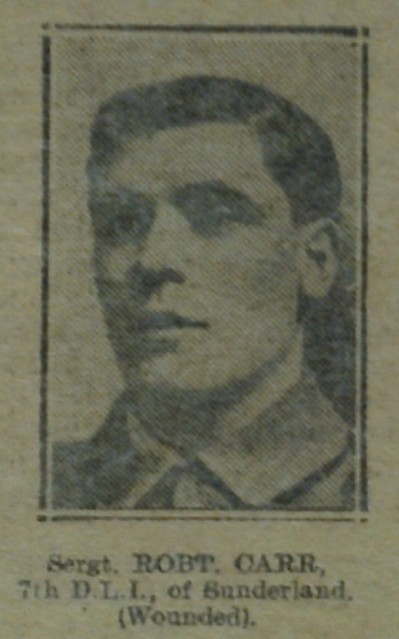
from IllustratedChronicles (flickr)
Robert Carr - 7th DLI - Sunderland (Wounded)
Pinned by Simon Cotterill
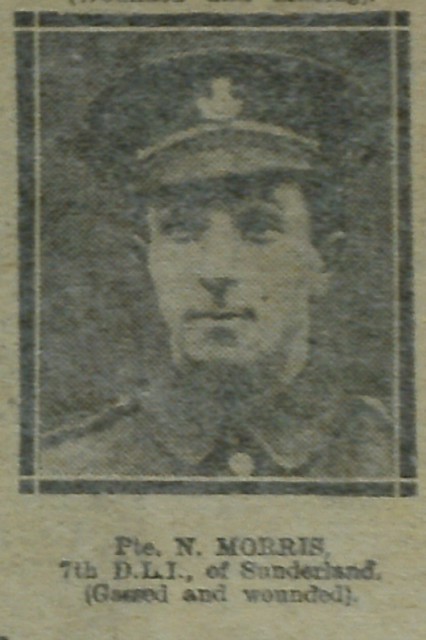
from IllustratedChronicles (flickr)
N Morris - 7th DLI - Sunderland (Gassed and wounded)
Pinned by Simon Cotterill

from IllustratedChronicles (flickr)
W Throp - 8th DLI - Thornley (Prisoner of War)
Pinned by Simon Cotterill
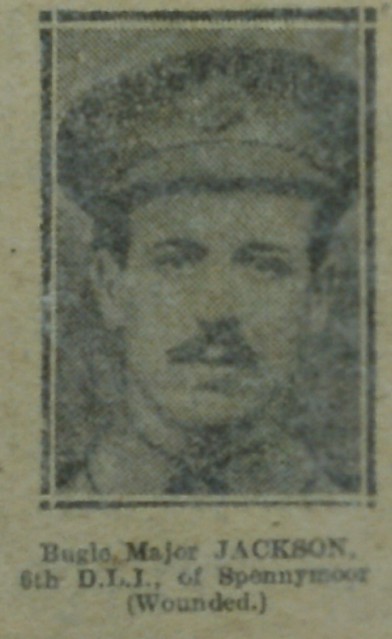
from IllustratedChronicles (flickr)
Bugle Major Jackson - 6th DLI - Spennymoor (Wounded)
Pinned by Simon Cotterill
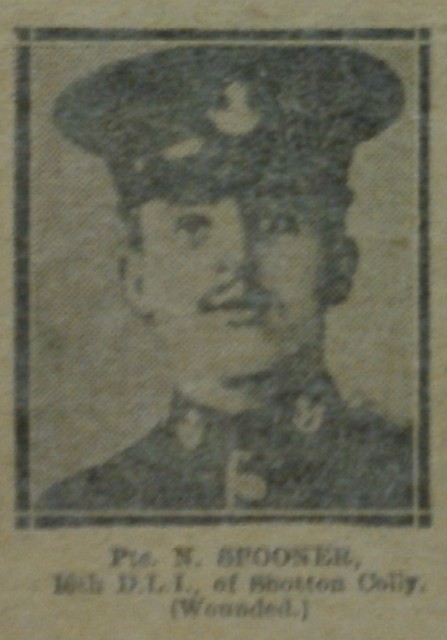
from IllustratedChronicles (flickr)
N Spooner - 16th DLI - Shotton Colliery (Wounded)
Pinned by Simon Cotterill
from IllustratedChronicles (flickr)
George Lumsden - 10th DLI - Byker (Killed)
Pinned by Simon Cotterill
from IllustratedChronicles (flickr)
RC Mole - 8th DLI - West Pelton (Wounded)
Pinned by Simon Cotterill
from IllustratedChronicles (flickr)
Oscar Rompen - DLI - Hetton-le-Hole (Missing)
Pinned by Simon Cotterill
from IllustratedChronicles (flickr)
Pat Hamill - 9th DLI - Blaydon (Wounded)
Pinned by Simon Cotterill
from IllustratedChronicles (flickr)
R Fleming - 2nd DLI - Brandon Colliery (Suffering from shock)
Pinned by Simon Cotterill
from IllustratedChronicles (flickr)
TW Flows - 8th DLI - Wheatley Hill (Wounded)
Pinned by Simon Cotterill
from IllustratedChronicles (flickr)
T Collins - 8th DLI - South Moor (Wounded)
Pinned by Simon Cotterill
from IllustratedChronicles (flickr)
Fred Dent - 4th DLI - Bishop Auckland (Wounded)
Pinned by Simon Cotterill

from IllustratedChronicles (flickr)
Thomas Chilton - 5th DLI - Stockton (Killed)
Pinned by Simon Cotterill
from IllustratedChronicles (flickr)
GW Smith - 9th DLI - Felling (Died of Wounds)
Pinned by Simon Cotterill
from IllustratedChronicles (flickr)
Corpl Ousby - ?th DLI - South Shields (Wounded)
Pinned by Simon Cotterill
from IllustratedChronicles (flickr)
FJ Markwell - 5th DLI - Hartlepool (Killed)
Pinned by Simon Cotterill

from IllustratedChronicles (flickr)
TW Hodgson - 8th DLI - Annfield Plain (Gassed)
Pinned by Simon Cotterill
from IllustratedChronicles (flickr)
J Burn - 8th DLI - Nettlesworth (Missing)
Pinned by Simon Cotterill
from IllustratedChronicles (flickr)
Fred Dixon - 9th DLI - Chopwell (Killed)
Pinned by Simon Cotterill
from IllustratedChronicles (flickr)
W Climpson - 8th DLI - Spennymoor (Wounded and prisoner)
Pinned by Simon Cotterill
from IllustratedChronicles (flickr)
M Lewis - 9th DLI - Gateshead (Wounded)
Pinned by Simon Cotterill
from IllustratedChronicles (flickr)
W Brashier - 7th DLI - Saltmeadows (Died of wounds)
Pinned by Simon Cotterill
from IllustratedChronicles (flickr)
Henry Best - 8th DLI - Edmondley (Killed)
Pinned by Simon Cotterill

from IllustratedChronicles (flickr)
Ralph Watson - 9th DLI - Teams (Wounded)
Pinned by Simon Cotterill
from IllustratedChronicles (flickr)
TW Ledger - 6th DLI - Leadgate (Wounded)
Pinned by Simon Cotterill
from IllustratedChronicles (flickr)
H Leggett - 8th DLI - Alum Waters (Wounded and Prisoner)
Pinned by Simon Cotterill
from IllustratedChronicles (flickr)
Charles Pycroft - 8th DLI - Coxlodge (Wounded)
Pinned by Simon Cotterill

from IllustratedChronicles (flickr)
D Roberts - 8th DLI - Kimblesworth (Prisoner of War)
Pinned by Simon Cotterill
from IllustratedChronicles (flickr)
P Shannon - 6th DLI - Blackhill (Wounded)
Pinned by Simon Cotterill
from IllustratedChronicles (flickr)
Thomas Frazer - 9th DLI - Gateshead (Wounded)
Pinned by Simon Cotterill

from IllustratedChronicles (flickr)
Fred Dixon - 9th DLI - Chopwell (Killed)
Pinned by Simon Cotterill
from IllustratedChronicles (flickr)
WH Davies - 9th DLI - Gateshead (Gassed)
Pinned by Simon Cotterill
from IllustratedChronicles (flickr)
S Wallace - 8th DLI - New Brancpeth (Wounded and Prisoner)
Pinned by Simon Cotterill
from IllustratedChronicles (flickr)
A Coates - ?th DLI - Sunderland (Wounded)
Pinned by Simon Cotterill
from IllustratedChronicles (flickr)
GW Gargett - 8th DLI - Birtley (Gassed)
Pinned by Simon Cotterill
from IllustratedChronicles (flickr)
HH Tindle - 7th DLI - Sunderland (Wounded)
Pinned by Simon Cotterill
from IllustratedChronicles (flickr)
JT Hodgson - 9th DLI - Gateshead (Killed)
Pinned by Simon Cotterill
from IllustratedChronicles (flickr)
RH Watson - 9th DLI - Swalwell (Wounded)
Pinned by Simon Cotterill
from IllustratedChronicles (flickr)
J Wilkinson - 9th DLI - Chopwell (Wounded and gassed)
Pinned by Simon Cotterill
from IllustratedChronicles (flickr)
JC Williams - 9th DLI - Gateshead (Killed)
Pinned by Simon Cotterill
from IllustratedChronicles (flickr)
John Clark - 9th DLI - Swalwell (Wounded)
Pinned by Simon Cotterill
from IllustratedChronicles (flickr)
R Watson - 9th DLI - Swalwell (Wounded)
Pinned by Simon Cotterill
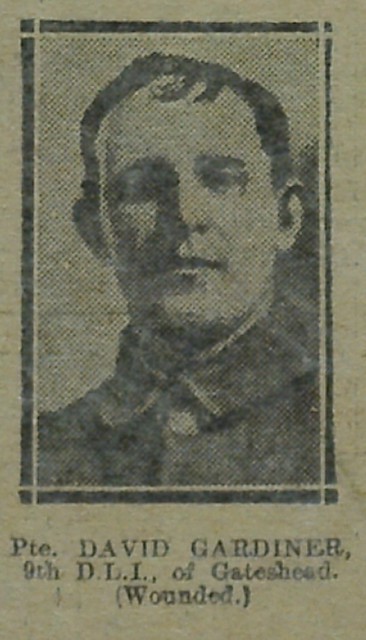
from IllustratedChronicles (flickr)
David Gardiner - 9th DLI - Gateshead (Wounded)
Pinned by Simon Cotterill
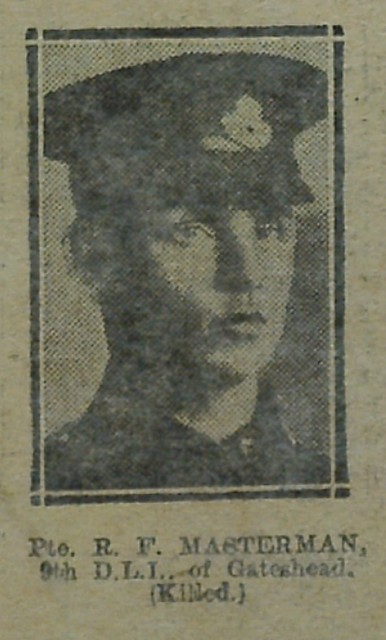
from IllustratedChronicles (flickr)
RF Masterman - 9th DLI - Gateshead (Killed)
Pinned by Simon Cotterill
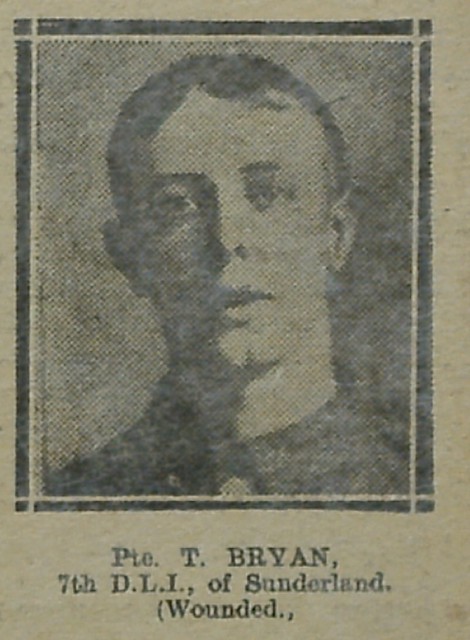
from IllustratedChronicles (flickr)
T Bryan - 7th DLI - Sunderland (Wounded)
Pinned by Simon Cotterill
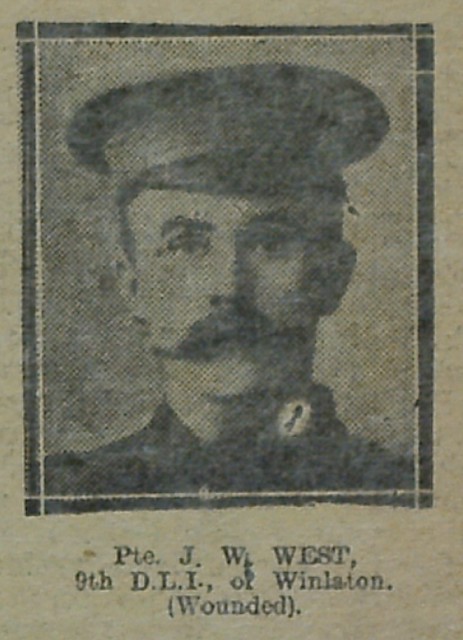
from IllustratedChronicles (flickr)
JW West - 9th DLI - Winlaton (Wounded)
Pinned by Simon Cotterill
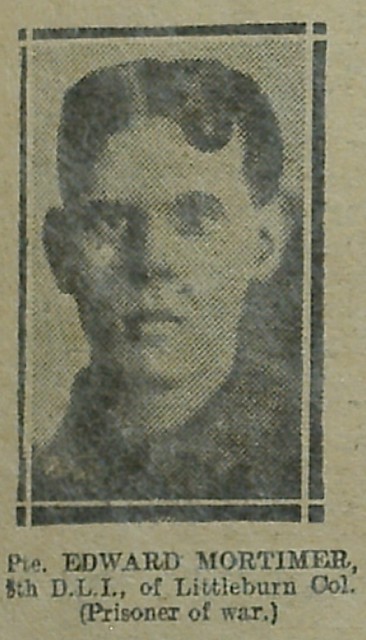
from IllustratedChronicles (flickr)
Edward Mortimer - 8th DLI - Littleburn Colliery (Prisoner of War)
Pinned by Simon Cotterill

from IllustratedChronicles (flickr)
S Forster - 9th DLI - Gateshead (Wounded)
Pinned by Simon Cotterill
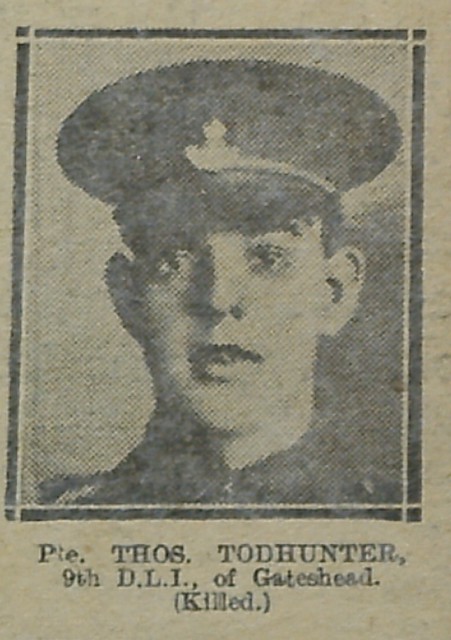
from IllustratedChronicles (flickr)
Thomas Todhunter - 9th DLI - Gateshead (Killed)
Pinned by Simon Cotterill
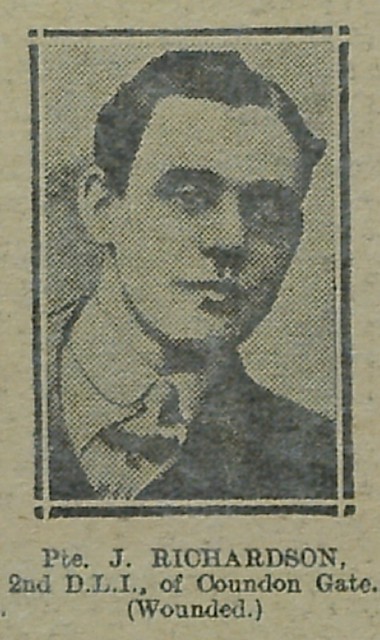
from IllustratedChronicles (flickr)
J Richardson - 2nd DLI - Coundon Gate (Wounded)
Pinned by Simon Cotterill
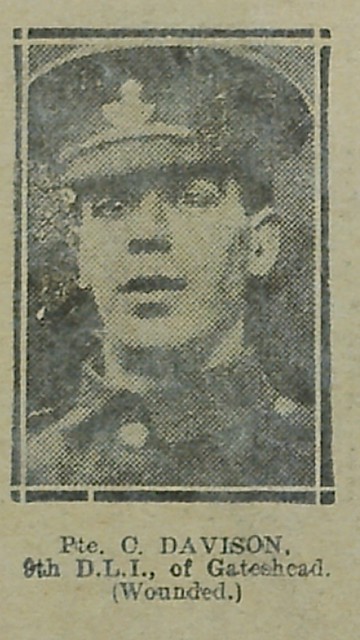
from IllustratedChronicles (flickr)
C Davison - 9th DLI - Gateshead (Wounded)
Pinned by Simon Cotterill
from IllustratedChronicles (flickr)
J Nicholson - 9th DLI - Gateshead (Wounded)
Pinned by Simon Cotterill
from IllustratedChronicles (flickr)
J Dammery - 5th DLI - Durham (Wounded)
Pinned by Simon Cotterill

from IllustratedChronicles (flickr)
W SHotton - 16th DLI - Blackhill (Killed)
Pinned by Simon Cotterill
from IllustratedChronicles (flickr)
F Newby - 9th DLI - Gateshead (Died of Wounds)
Pinned by Simon Cotterill
from IllustratedChronicles (flickr)
TW Johnson - 6th DLI - Consett (Wounded)
Pinned by Simon Cotterill
from IllustratedChronicles (flickr)
Pte Green - 5th DLI - Stockton (Killed)
Pinned by Simon Cotterill

from IllustratedChronicles (flickr)
CSM Gallagher - 7th DLI - Sunderland (Wounded)
Pinned by Simon Cotterill
from IllustratedChronicles (flickr)
M Deighton - 9th DLI - Gateshead (Wounded)
Pinned by Simon Cotterill
from IllustratedChronicles (flickr)
J Hall - 8th DLI - Ouston (Prisoner of War)
Pinned by Simon Cotterill
from IllustratedChronicles (flickr)
J Brown - 8th DLI - Sacriston (Missing)
Pinned by Simon Cotterill
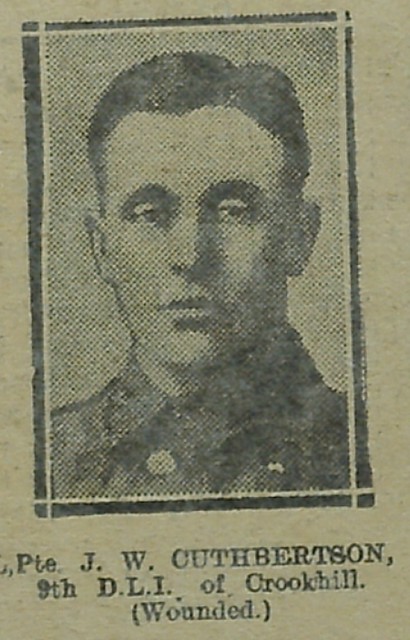
from IllustratedChronicles (flickr)
JW Cutherbertson - 9th DLI - Crookhill (Wounded)
Pinned by Simon Cotterill
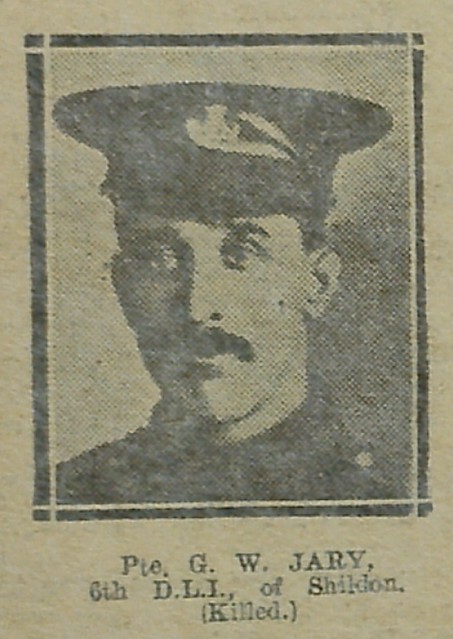

from IllustratedChronicles (flickr)
W Carnaffan - 9th DLI - Stargate (Wounded)
Pinned by Simon Cotterill
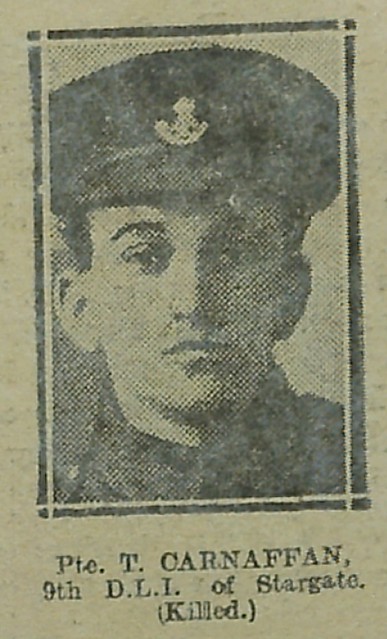
from IllustratedChronicles (flickr)
T Carnaffan - 9th DLI - Stargate (Killed)
Pinned by Simon Cotterill
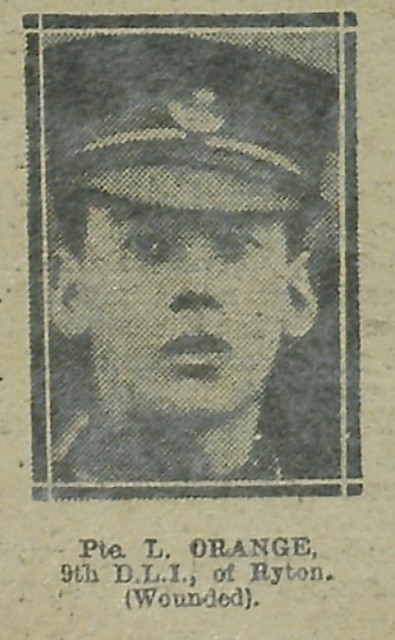
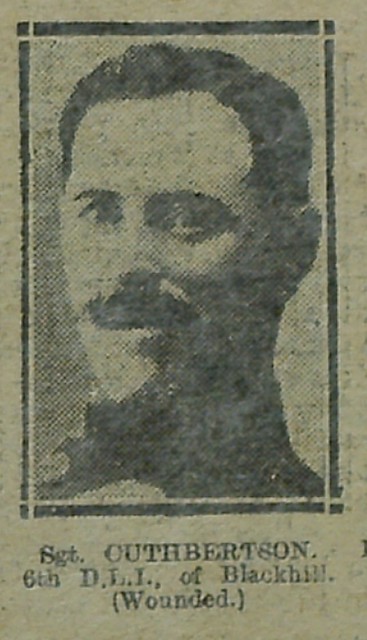
from IllustratedChronicles (flickr)
Sgt Cuthbertson - 6th DLI - Blackhill (Wounded)
Pinned by Simon Cotterill

from IllustratedChronicles (flickr)
George Dempsey - 9th DLI - Ryton (Wounded)
Pinned by Simon Cotterill
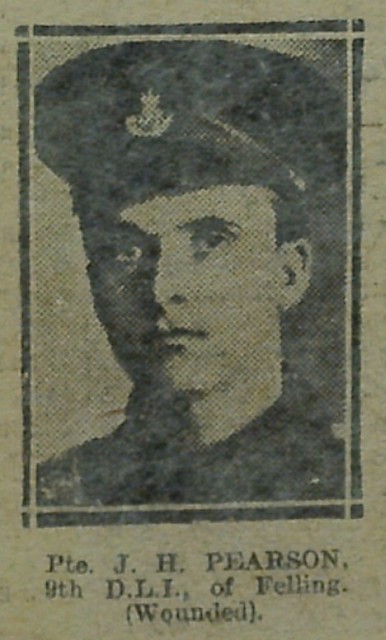
from IllustratedChronicles (flickr)
JH Pearson - 9th DLI - Felling (Wounded)
Pinned by Simon Cotterill
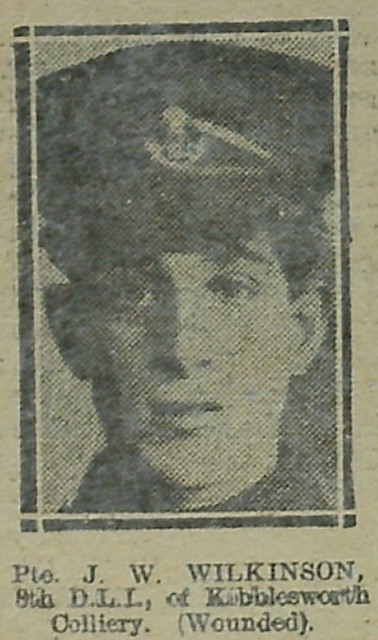
from IllustratedChronicles (flickr)
JW WIlkinson - 8th DLI - Kibblesworth Colliery (Wounded)
Pinned by Simon Cotterill

from IllustratedChronicles (flickr)
J Telford - 8th DLI - Birtley (Gassed)
Pinned by Simon Cotterill
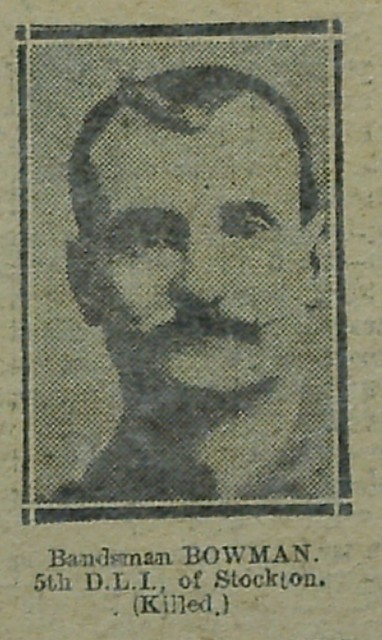
from IllustratedChronicles (flickr)
Bandsman Bowman - 5th DLI - Stockton (Killed)
Pinned by Simon Cotterill
from IllustratedChronicles (flickr)
William Shotten - 6th DLI - Blackhill (Killed)
Pinned by Simon Cotterill
from IllustratedChronicles (flickr)
J Donley - DLI - Silksworth (Prisoner of War)
Pinned by Simon Cotterill
from IllustratedChronicles (flickr)
R Rutter - 8th DLI - Wrekenton (Missing)
Pinned by Simon Cotterill
from IllustratedChronicles (flickr)
J Sproxton - 7th DLI - Sunderland (Wounded)
Pinned by Simon Cotterill

from IllustratedChronicles (flickr)
RW Surtees - 6th DLI - Coundon (Wounded)
Pinned by Simon Cotterill
from IllustratedChronicles (flickr)
J Walker - 9th DLI - Gateshead (Killed)
Pinned by Simon Cotterill
from IllustratedChronicles (flickr)
Joseph Evans - 9th DLI - Scotswood (Wounded)
Pinned by Simon Cotterill
from IllustratedChronicles (flickr)
Joseph Jameson - 9th DLI - Chopwell (Wounded)
Pinned by Simon Cotterill
from IllustratedChronicles (flickr)
J Batey - 9th DLI - South Bank (Killed)
Pinned by Simon Cotterill
from IllustratedChronicles (flickr)
A Bower - 9th DLI - Gateshead (Wounded)
Pinned by Simon Cotterill

from IllustratedChronicles (flickr)
M Mullarkey - 2nd DLI - Newcastle (Wounded)
Pinned by Simon Cotterill

from IllustratedChronicles (flickr)
M Naylor - 9th DLI - Gateshead (Wounded)
Pinned by Simon Cotterill

from IllustratedChronicles (flickr)
Robert Britton - 6th DLI - Kirkmerrington (Wounded)
Pinned by Simon Cotterill
from IllustratedChronicles (flickr)
J Cullen - 4th DLI - Consett (Wounded)
Pinned by Simon Cotterill

from IllustratedChronicles (flickr)
R Smith - 9th DLI - Gateshead (Wounded)
Pinned by Simon Cotterill


from IllustratedChronicles (flickr)
S Forster - 9th DLI - Gateshead (Wounded)
Pinned by Simon Cotterill
from IllustratedChronicles (flickr)
N McCormick - 2nd DLI - Bensham (Wounded)
Pinned by Simon Cotterill
from IllustratedChronicles (flickr)
Joseph Monroe - 9th DLI - Gateshead (Wounded)
Pinned by Simon Cotterill

from IllustratedChronicles (flickr)
SJ Lawrence - 9th DLI - Ryton (Wounded)
Pinned by Simon Cotterill
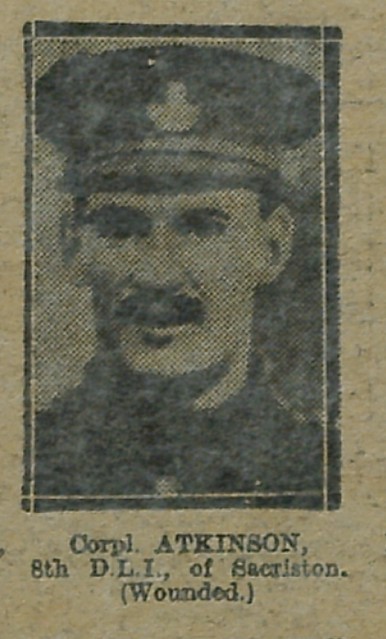
from IllustratedChronicles (flickr)
Corpl Atkinson - 8th DLI - Sacriston (Wounded)
Pinned by Simon Cotterill
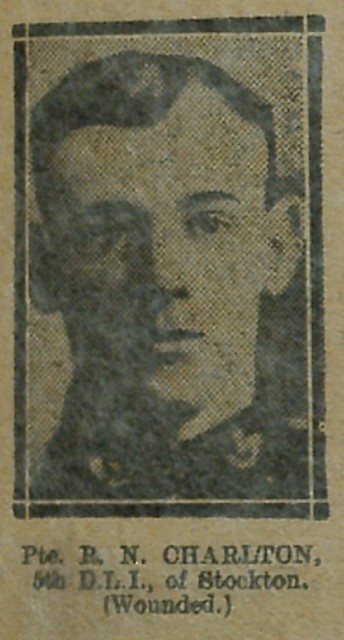
from IllustratedChronicles (flickr)
RN Charlton - 5th DLI - Stockton (Wounded)
Pinned by Simon Cotterill
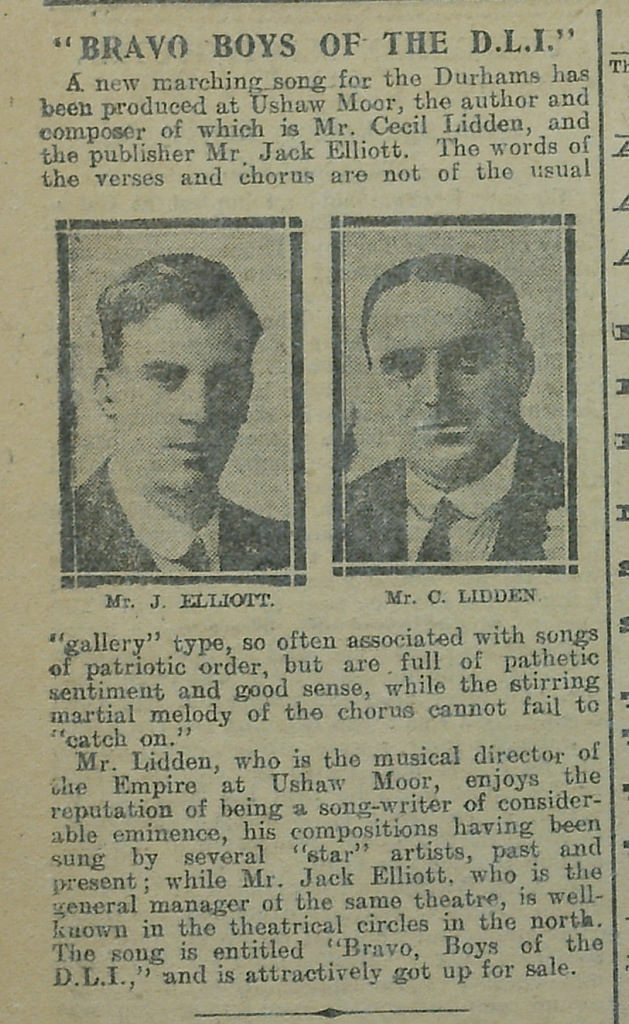
from IllustratedChronicles (flickr)
J Elliott (publisher) C Lidden (author and composer) of "Bravo Boys of the DLI"
Pinned by Simon Cotterill
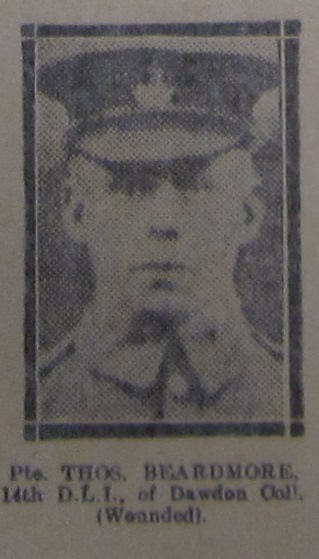
from IllustratedChronicles (flickr)
Thomas Beardmore - 14th DLI - Dawdon Colliery (Wounded)
Pinned by Simon Cotterill
from IllustratedChronicles (flickr)
Alex Ferguson - 10th DLI - West Hartlepool (Killed)
Pinned by Simon Cotterill
from IllustratedChronicles (flickr)
James Robson - 11th DLI - Gateshead (Wounded)
Pinned by Simon Cotterill
from IllustratedChronicles (flickr)
H Proctor - 15th DLI - West Hartlepool (Killed)
Pinned by Simon Cotterill
from IllustratedChronicles (flickr)
Walter Towland - 16th DLI - Kelloe (Wounded)
Pinned by Simon Cotterill

from IllustratedChronicles (flickr)
Hugh Williams - 14th DLI - Felling (Wounded)
Pinned by Simon Cotterill
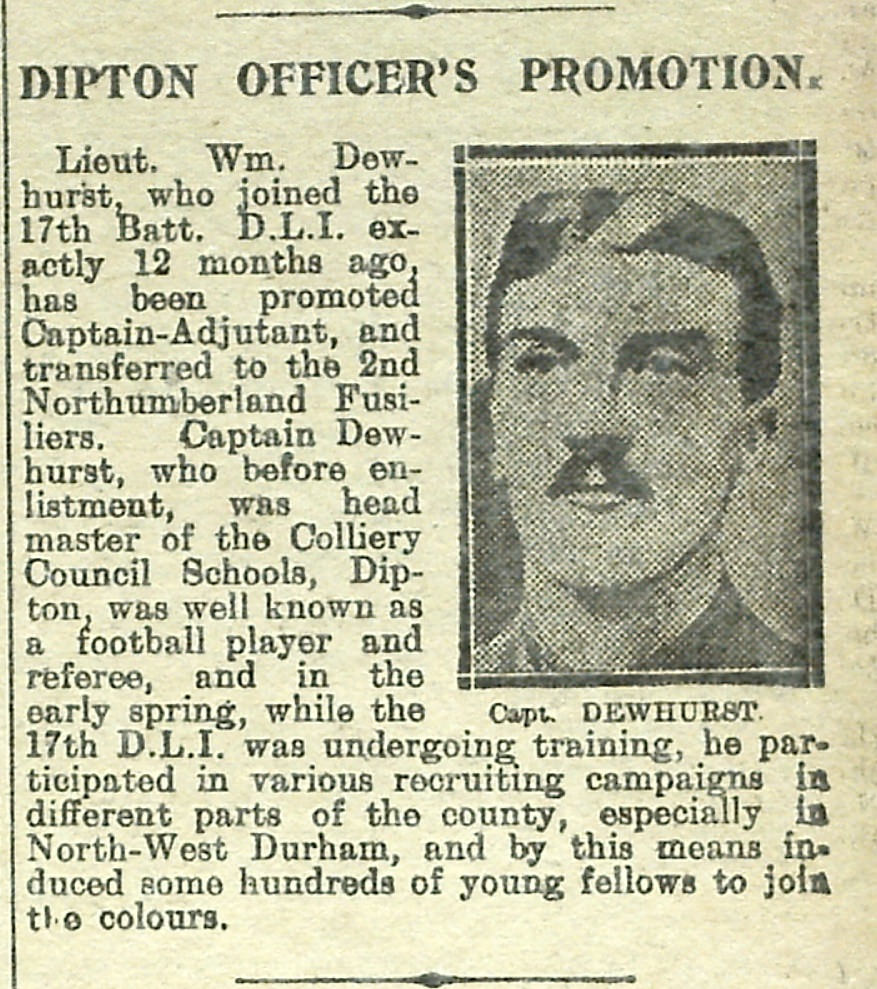
from IllustratedChronicles (flickr)
William Dewhurst - 17th DLI - Dipton (Promoted)
Pinned by Simon Cotterill
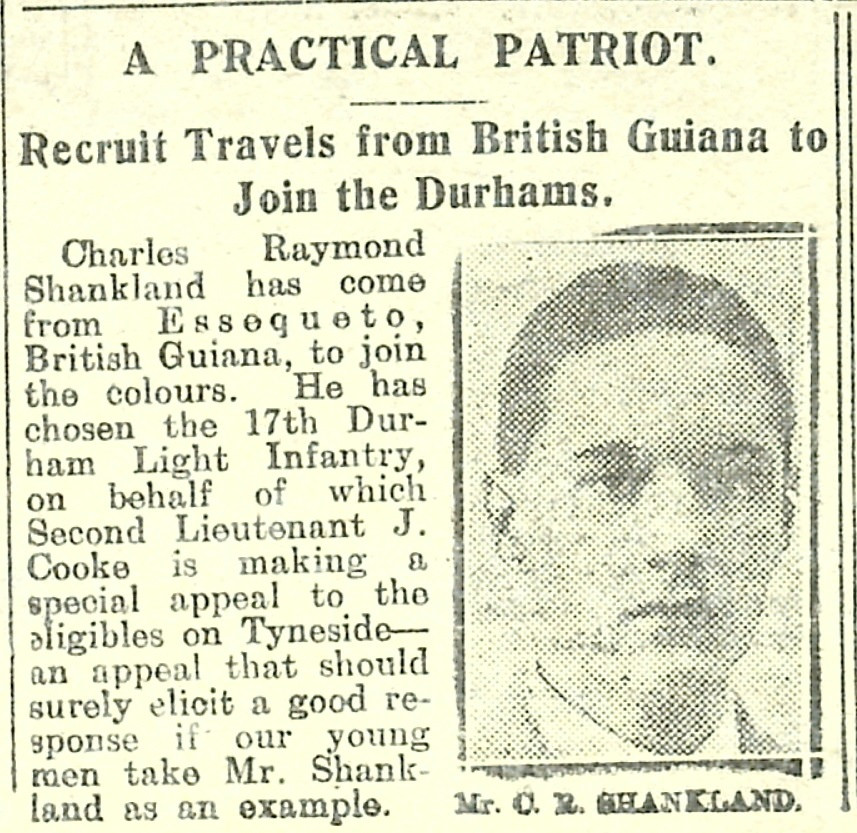
from IllustratedChronicles (flickr)
Charles Raymond Shankland - 17th DLI - Essequete, British Guiana (Enlisted)
Pinned by Simon Cotterill

from IllustratedChronicles (flickr)
JT Burne - 10th DLI - Gateshead (Wounded , third time)
Pinned by Simon Cotterill
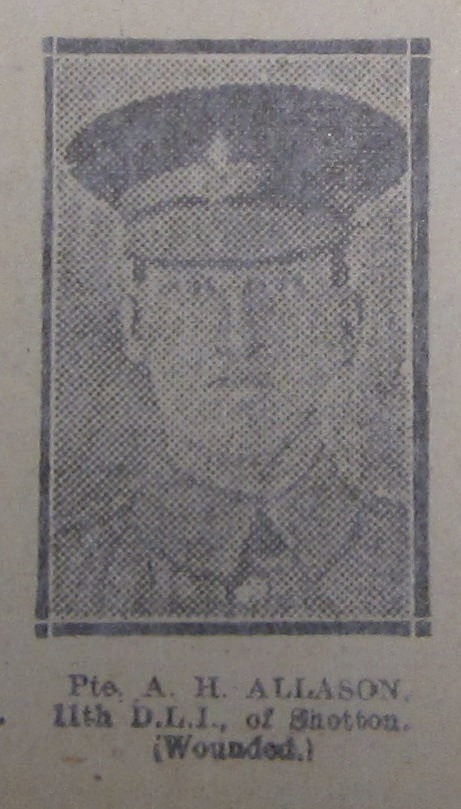
from IllustratedChronicles (flickr)
AH Allason - 11th DLI - Shotton (Wounded)
Pinned by Simon Cotterill
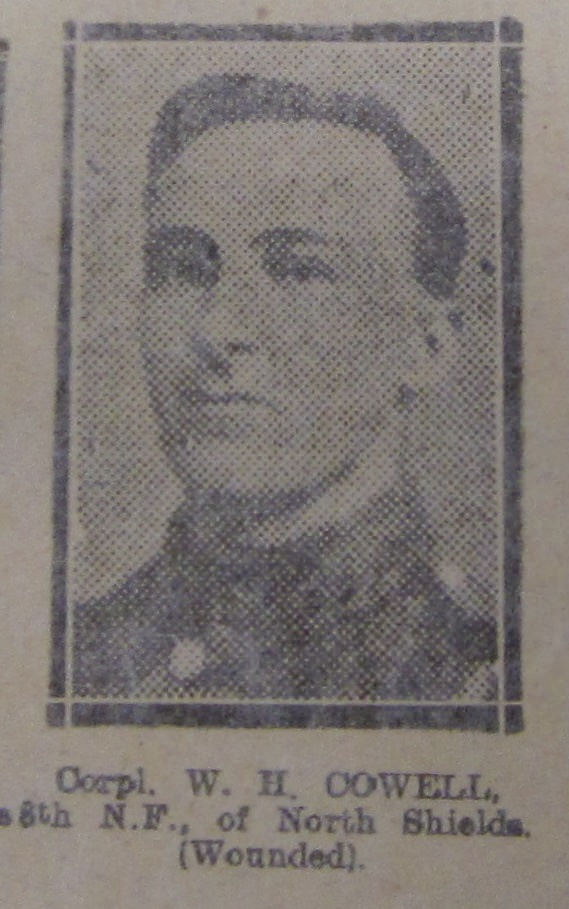
from IllustratedChronicles (flickr)
WH Cowell - 8th DLI - North Shields (Wounded)
Pinned by Simon Cotterill
from IllustratedChronicles (flickr)
J Wardle - 8th DLI - Sacriston (Prisoner of war)
Pinned by Simon Cotterill
from IllustratedChronicles (flickr)
T Guy - 13th DLI - Felling (Accidentally Killed)
Pinned by Simon Cotterill
from IllustratedChronicles (flickr)
AE Reynolds - 2nd DLI - Birtley (Invalided)
Pinned by Simon Cotterill
from IllustratedChronicles (flickr)
TR Griffiths - ?th DLI - Wheatley Hill (Wounded)
Pinned by Simon Cotterill
from IllustratedChronicles (flickr)
LC Renwick - 2nd DLI - Gatesehad (Died of Wounds)
Pinned by Simon Cotterill
from IllustratedChronicles (flickr)
N Chapman - 4th DLI - Chester-le-Street (Invalided)
Pinned by Simon Cotterill
from IllustratedChronicles (flickr)
T Thompson - 14th DLI - South Shields (Missing)
Pinned by Simon Cotterill
from IllustratedChronicles (flickr)
MJ Furness - 15th DLI - Bewick Main (Died in hospital)
Pinned by Simon Cotterill
from IllustratedChronicles (flickr)
William James - 2nd DLI - Hartlepool (Wounded and Prisoner)
Pinned by Simon Cotterill
from IllustratedChronicles (flickr)
William Sudberry - 1st DLI - Hebburn (Wounded)
Pinned by Simon Cotterill
from IllustratedChronicles (flickr)
John Dodds - 14th DLI - Annfield Plain (Wounded)
Pinned by Simon Cotterill
from IllustratedChronicles (flickr)
Peter Edwards - 3rd DLI - Seaham Harbour (Wounded)
Pinned by Simon Cotterill
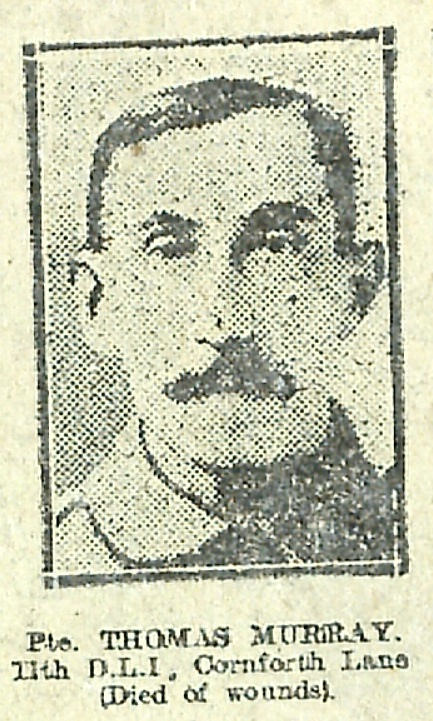
from IllustratedChronicles (flickr)
Thomas Murray - 11th DLI - Cornforth Lane (Died of wounds)
Pinned by Simon Cotterill
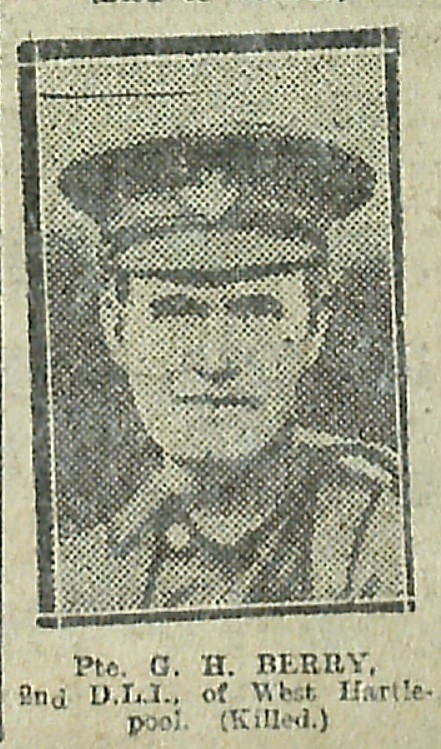
from IllustratedChronicles (flickr)
GH Berry - 2nd DLI - West Hartlepool (Killed)
Pinned by Simon Cotterill
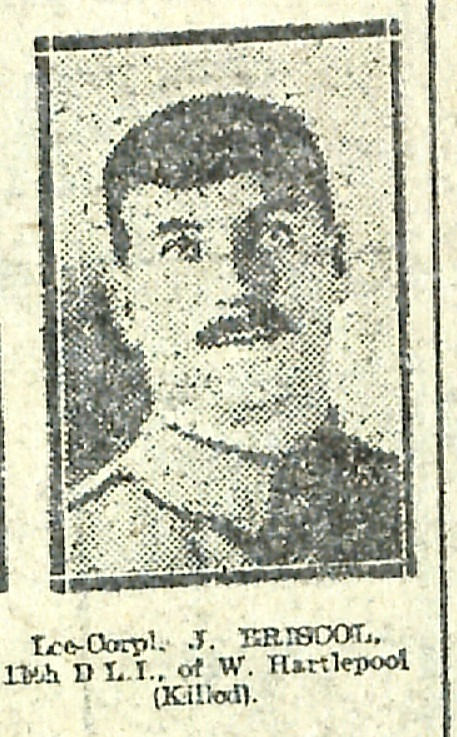
from IllustratedChronicles (flickr)
J Briscoe - 13th DLI - West Hartlepool (Killed)
Pinned by Simon Cotterill
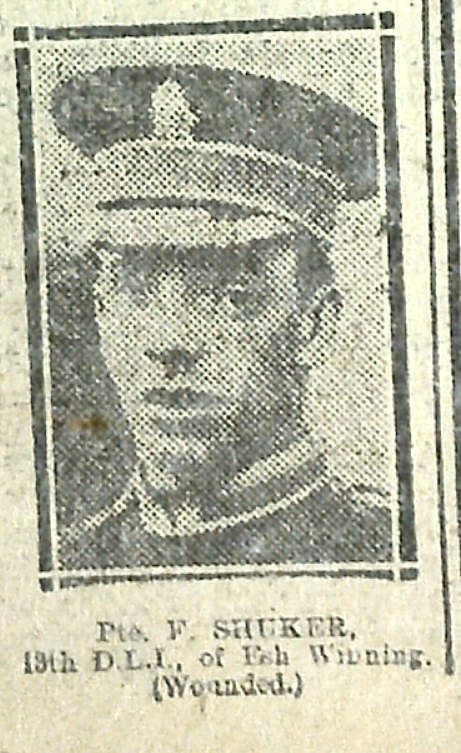
from IllustratedChronicles (flickr)
F Shucker - 13th DLI - Esh Winning (Wounded)
Pinned by Simon Cotterill
from IllustratedChronicles (flickr)
JJ Gascoigne - 2nd DLI - Blaydon (Wounded)
Pinned by Simon Cotterill
from IllustratedChronicles (flickr)
WC Siddle - 11th DLI - Shotley Bridge (Killed)
Pinned by Simon Cotterill
from IllustratedChronicles (flickr)
Ben Forrest - 14th DLI - Benwell (Missing)
Pinned by Simon Cotterill
from IllustratedChronicles (flickr)
James Hinds - 15th DLI - Marley Hill (Missing)
Pinned by Simon Cotterill
from IllustratedChronicles (flickr)
W Glennon - 9th DLI - Blaydon (Died of wounds)
Pinned by Simon Cotterill
from IllustratedChronicles (flickr)
WJ Turnbull - 13th DLI - Gateshead (Wounded)
Pinned by Simon Cotterill

from IllustratedChronicles (flickr)
G Lowerson - 12th DLI - Shiney Row (Wounded)
Pinned by Simon Cotterill
from IllustratedChronicles (flickr)
JJ Donnelly - 9th DLI - Rowlands Gill (Wounded)
Pinned by Simon Cotterill
from IllustratedChronicles (flickr)
Thomas Fisher - 13th DLI - Hartlepool (Wounded)
Pinned by Simon Cotterill
from IllustratedChronicles (flickr)
James Davies - DLI - Haswell Moor (Wounded)
Pinned by Simon Cotterill
from IllustratedChronicles (flickr)
A Liddle - 10th DLI - Lumley (Wounded)
Pinned by Simon Cotterill
from IllustratedChronicles (flickr)
WG Parker - 11th DLI - Consett (Wounded)
Pinned by Simon Cotterill
from IllustratedChronicles (flickr)
HW Boulton - 15th DLI - Hartlepool (Killed)
Pinned by Simon Cotterill
from IllustratedChronicles (flickr)
Ed Gelndinning - 14th DLI - Annfield Plain (Wounded)
Pinned by Simon Cotterill
from IllustratedChronicles (flickr)
W Gray - 10th DLI - Pelton Fell (Wounded)
Pinned by Simon Cotterill

from IllustratedChronicles (flickr)
A Jackson - 15th DLI - West Hartlepool (Wounded)
Pinned by Simon Cotterill
from IllustratedChronicles (flickr)
Fred G Hunter - 15th DLI - West Hartlepool (Wounded)
Pinned by Simon Cotterill
from IllustratedChronicles (flickr)
Andrew E Close - 10th DLI - West Hartlepool (Killed)
Pinned by Simon Cotterill
from IllustratedChronicles (flickr)
John T Reed - 9th DLI - Swalwell (Killed)
Pinned by Simon Cotterill
from IllustratedChronicles (flickr)
WH Miller - 11th DLI - Elswick (Died of wounds)
Pinned by Simon Cotterill
from IllustratedChronicles (flickr)
Colin Knox - 2nd DLI - W Hartlepool (Wounded)
Pinned by Simon Cotterill

from IllustratedChronicles (flickr)
Robert Willis - 10th DLI - Ludworth (Wounded)
Pinned by Simon Cotterill
from IllustratedChronicles (flickr)
Frank Lynch - DLI - New Hartley (Wounded)
Pinned by Simon Cotterill
from IllustratedChronicles (flickr)
LC Staples - 15th DLI - Leeholme (Wounded)
Pinned by Simon Cotterill
from IllustratedChronicles (flickr)
RH Willis - 10th DLI - West Hartlepool (Killed)
Pinned by Simon Cotterill

from IllustratedChronicles (flickr)
James McMahon - 15th DLI - Gateshead (Missing)
Pinned by Simon Cotterill
from IllustratedChronicles (flickr)
Peter Doran - 7th DLI - Sunderland (Killed)
Pinned by Simon Cotterill

from IllustratedChronicles (flickr)
TW Clark - 14th DLI - Spennymoor (Wounded)
Pinned by Simon Cotterill
from IllustratedChronicles (flickr)
Frank Carroll - 2nd DLI - West Hartlepool (Killed)
Pinned by Simon Cotterill
from IllustratedChronicles (flickr)
Ernest Blower - 2nd DLI - Old Cornforth (Wounded)
Pinned by Simon Cotterill
from IllustratedChronicles (flickr)
WH Bradley - 5th DLI - Thornaby (Wounded)
Pinned by Simon Cotterill
from IllustratedChronicles (flickr)
S Hymers - 14th DLI - South Shields (Died of Wounds)
Pinned by Simon Cotterill
from IllustratedChronicles (flickr)
Chas W Whitfield - 5th DLI - Darlington (Wounded and Missing)
Pinned by Simon Cotterill
from IllustratedChronicles (flickr)
JW Burton - 12th DLI - Benwell (Wounded)
Pinned by Simon Cotterill
from IllustratedChronicles (flickr)
T Brown - 15th DLI - Chester-le-Street (Killed)
Pinned by Simon Cotterill
from IllustratedChronicles (flickr)
J Stephenson - 11th DLI - Byker (Killed)
Pinned by Simon Cotterill
from IllustratedChronicles (flickr)
Harry Close - DLI - South Moor (Wounded)
Pinned by Simon Cotterill
from IllustratedChronicles (flickr)
William Carr - 9th DLI - Chopwell (Wounded)
Pinned by Simon Cotterill

from IllustratedChronicles (flickr)
J Wardle - 8th DLI - Sacriston (Prisoner of War)
Pinned by Simon Cotterill
from IllustratedChronicles (flickr)
G Temple - 2nd DLI - West Hartlepool (Wounded)
Pinned by Simon Cotterill
from IllustratedChronicles (flickr)
Charles Sutton - DLI - South Moor (Wounded)
Pinned by Simon Cotterill

from IllustratedChronicles (flickr)
Charles Fellowes - 9th DLI - Spennymoor (Died in Hospital)
Pinned by Simon Cotterill
from IllustratedChronicles (flickr)
TH Cox - 14th DLI - Gateshead (Gassed)
Pinned by Simon Cotterill
from IllustratedChronicles (flickr)
Thomas Wright - 14th DLI - Easington Colliery (Killed)
Pinned by Simon Cotterill
from IllustratedChronicles (flickr)
H Simpson - 14th DLI - Haswell Plough (Killed)
Pinned by Simon Cotterill
from IllustratedChronicles (flickr)
G Pearson - 12th DLI - West Hartlepool (Killed)
Pinned by Simon Cotterill
from IllustratedChronicles (flickr)
H Wickens - 16th DLI - West Hartlepool (Killed)
Pinned by Simon Cotterill
from IllustratedChronicles (flickr)
Walter Brown - 17th DLI - Washington (Wounded)
Pinned by Simon Cotterill
from IllustratedChronicles (flickr)
Ralph Fenwick - 14th DLI - Blaydon (Wounded)
Pinned by Simon Cotterill
from IllustratedChronicles (flickr)
Fred Allan - 13th DLI - Gateshead (Killed)
Pinned by Simon Cotterill
from IllustratedChronicles (flickr)
C McAllister - 1?th DLI - Pelton Fell (Wounded)
Pinned by Simon Cotterill
from IllustratedChronicles (flickr)
John Baxon - 12th DLI - Gateshead (Killed)
Pinned by Simon Cotterill
from IllustratedChronicles (flickr)
John Stott - DLI - Pelton Fell (Prisoner of war)
Pinned by Simon Cotterill
from IllustratedChronicles (flickr)
N Atkinson - 9th DLI - Wallsend (Wounded)
Pinned by Simon Cotterill
from IllustratedChronicles (flickr)
W Flathers - 11th DLI - Langley Moor (Wounded)
Pinned by Simon Cotterill
from IllustratedChronicles (flickr)
F Bailes - 15th DLI - Brandon (Wounded and Missing)
Pinned by Simon Cotterill
from IllustratedChronicles (flickr)
Ben Davies - 15th DLI - Langley Moor (Missing)
Pinned by Simon Cotterill
from IllustratedChronicles (flickr)
Dan Pennington - 18th DLI - Shincliffe (Missing)
Pinned by Simon Cotterill

from IllustratedChronicles (flickr)
G Potts - 15th DLI - Murton Colliery (Killed)
Pinned by Simon Cotterill
from IllustratedChronicles (flickr)
TW Firbank - 6th DLI - Shildon (Killed)
Pinned by Simon Cotterill
from IllustratedChronicles (flickr)
James McMullen - DLI - Silksworth (Killed)
Pinned by Simon Cotterill
from IllustratedChronicles (flickr)
J Rutter - 14th DLI - Evenwood (Wounded)
Pinned by Simon Cotterill
from IllustratedChronicles (flickr)
James Reynolds - 5th DLI - Thornaby (Wounded)
Pinned by Simon Cotterill
from IllustratedChronicles (flickr)
Robert Fenwick - 2nd DLI - Bishop Auckland (Killed)
Pinned by Simon Cotterill
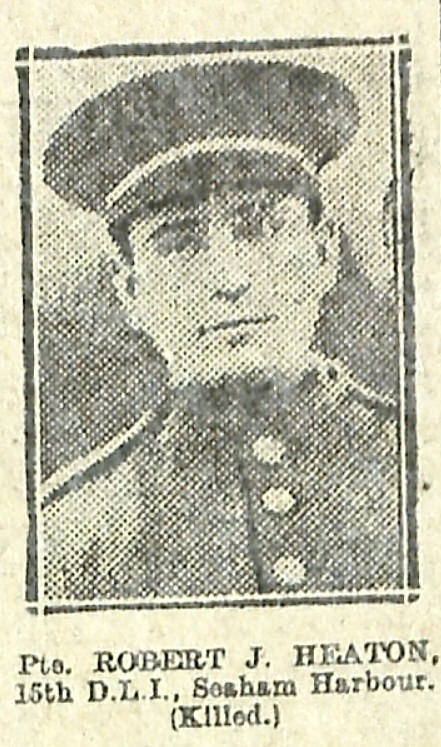
from IllustratedChronicles (flickr)
Robert J Heaton - 15th DLI - Seaham Harbour (Killed)
Pinned by Simon Cotterill
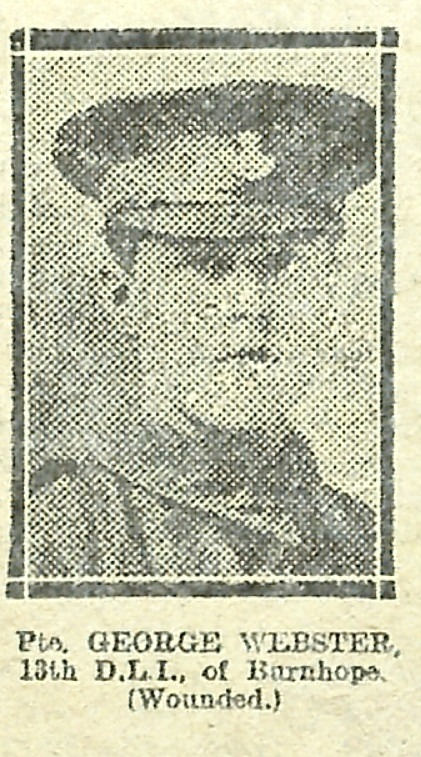
from IllustratedChronicles (flickr)
George Webster - 13th DLI - Burnhope (Wounded)
Pinned by Simon Cotterill

from IllustratedChronicles (flickr)
Thomas Gray - 15th DLI - Birtley (Killed)
Pinned by Simon Cotterill
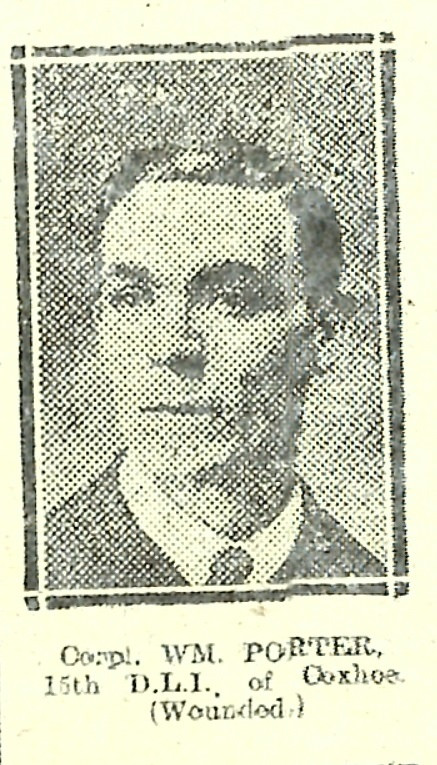
from IllustratedChronicles (flickr)
William Porter - 15th DLI - Coxhoe (Wounded)
Pinned by Simon Cotterill
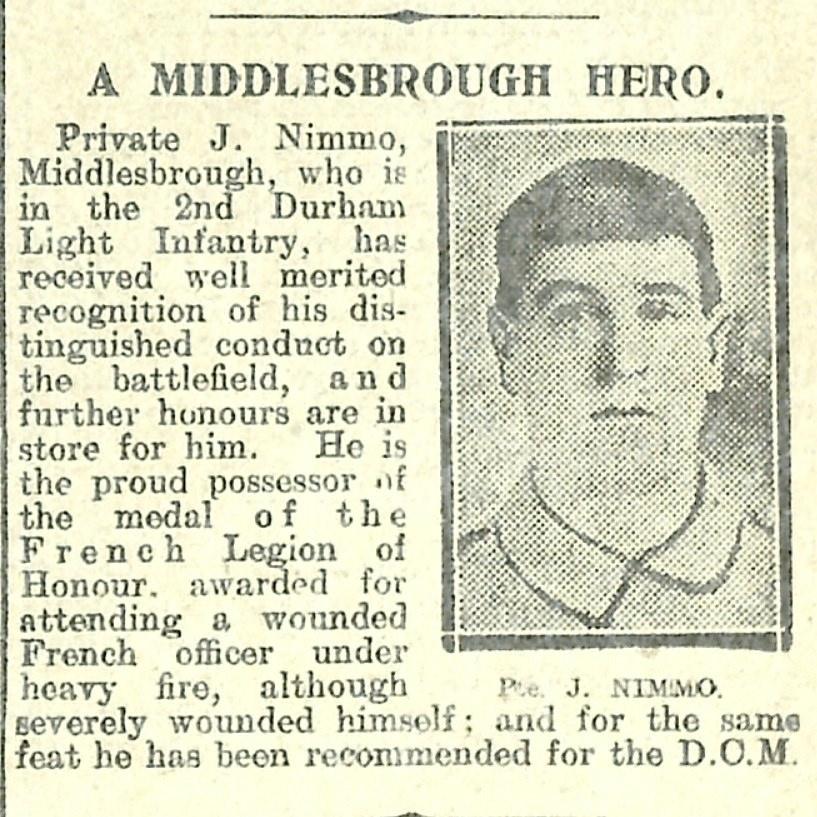
from IllustratedChronicles (flickr)
J Nimmo - 2nd DLI - Middlesbrough (French Legion of Honour and DCM)
Pinned by Simon Cotterill
from IllustratedChronicles (flickr)
John Connell - 12th DLI - Annfield Plain (Wounded)
Pinned by Simon Cotterill
from IllustratedChronicles (flickr)
E Jones - 5th DLI - Wheatley Hill (Killed)
Pinned by Simon Cotterill
from IllustratedChronicles (flickr)
Griffith Jones - 2nd DLI - Wheatley Hill (Died of wounds)
Pinned by Simon Cotterill

from https://commons.wikimedia.org…
Cap badge of the Durham Light Infantry, King's crown version.
- Public Domain image c/o Wikimedia Commons
Added by
Simon Cotterill
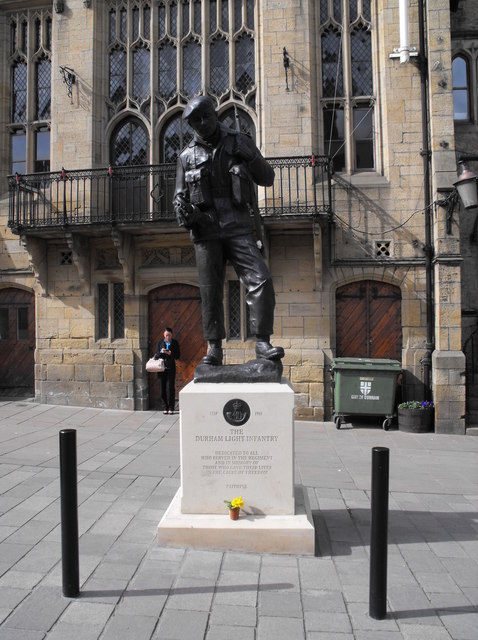
Co-Curate Page
Durham Light Infantry Memorial, Market Place
- The Durham Light Infantry Memorial on the Market Place in Durham was unveiled on the 14th of September 2014. The bronze statue, by Alan Herriot, was based on a photograph …
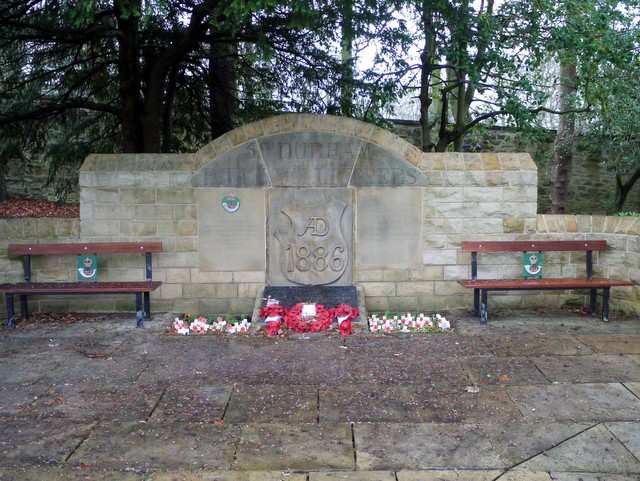
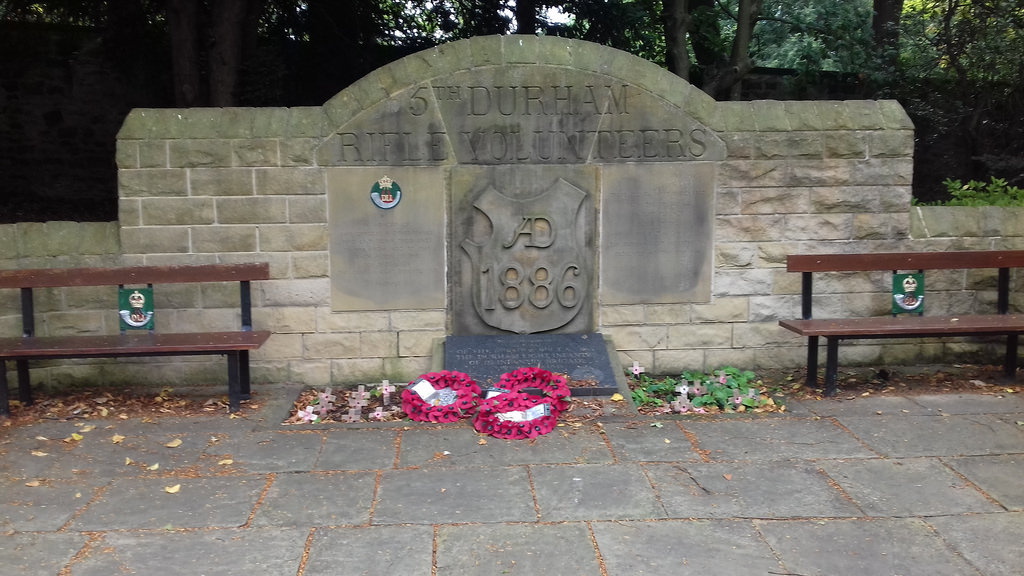
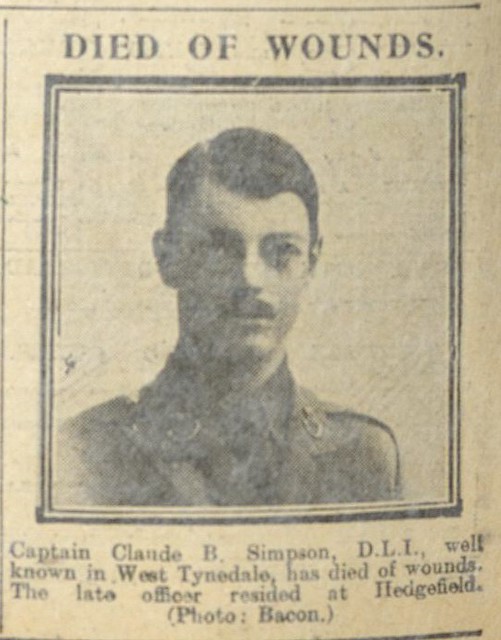
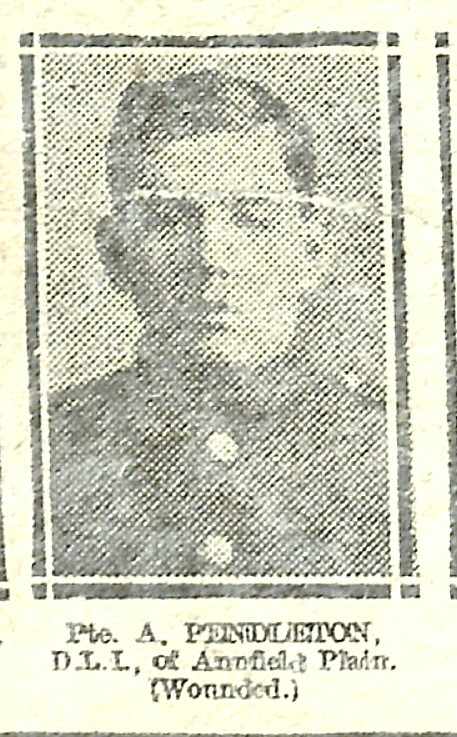
from IllustratedChronicles (flickr)
Pte. A Pendleton - D.L.I. - Annfield Plain
Pinned by Simon Cotterill
from IllustratedChronicles (flickr)
Pte. JOHN G. PURVIS, D.L.I., Bowburn, (Killed).
Pinned by Simon Cotterill

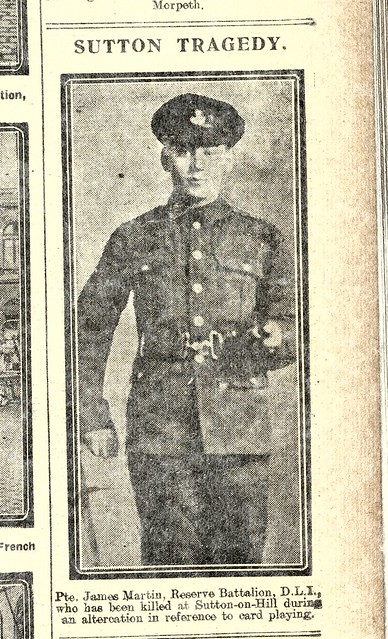
from IllustratedChronicles (flickr)
A. Hudsperth - D.L.L. Newcastle (missing)
Pinned by Simon Cotterill
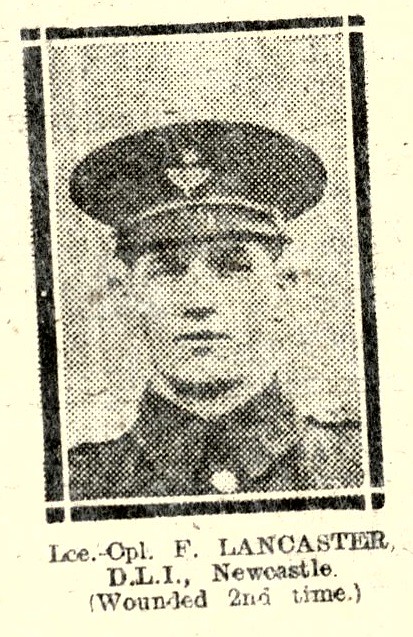
from IllustratedChronicles (flickr)
L-Corpl. F. LANCASTER, D.L.I., Newcastle, (Wounded 2nd time).
Pinned by Simon Cotterill
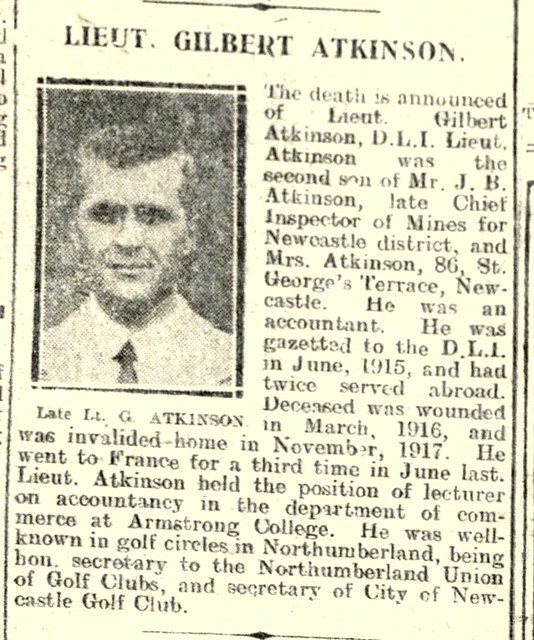
from IllustratedChronicles (flickr)
Lieut. GILBERT ATKINSON, D.L.I., Newcastle, (Died).
Pinned by Simon Cotterill
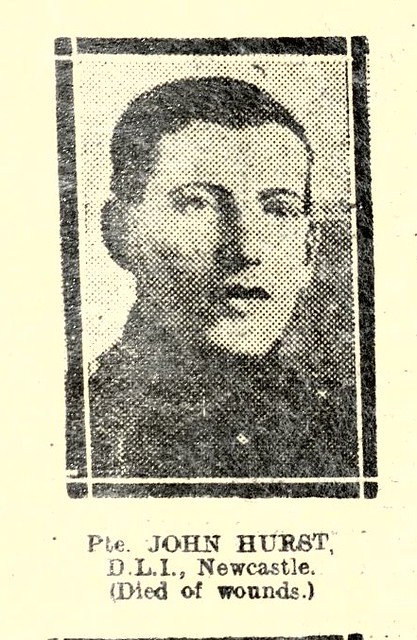
from IllustratedChronicles (flickr)
Pte. JOHN HURST, D.L.I., Newcastle, (Died of Wounds).
Pinned by Simon Cotterill
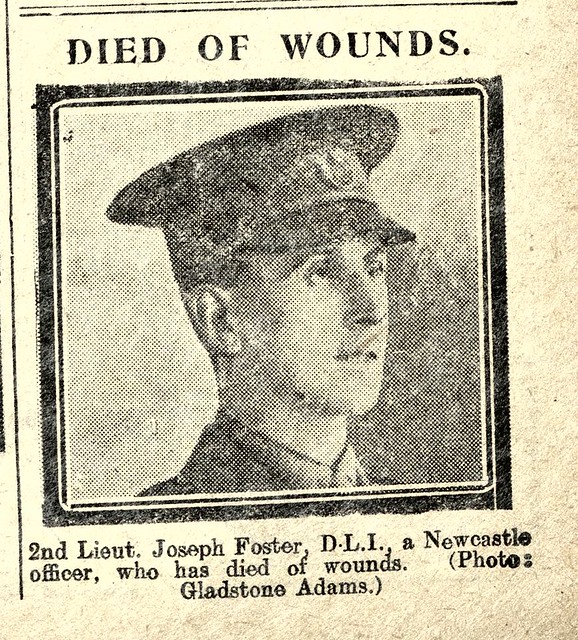
from IllustratedChronicles (flickr)
2nd Lieut. JOSEPH FOSTER, D.L.I., Newcastle, (Died of Wounds).
Pinned by Simon Cotterill
from IllustratedChronicles (flickr)
Lieut. G. ATKINSON, D.L.I., Newcastle, (Died of Wounds).
Pinned by Simon Cotterill
from IllustratedChronicles (flickr)
Pte - Frank Quinn - DLI - Gateshead - Killed
Pinned by Simon Cotterill
from IllustratedChronicles (flickr)
Pte. R. HARLAND, D.L.I., Birtley, (Believed to be Prisoner).
Pinned by Simon Cotterill
from IllustratedChronicles (flickr)
L-Corpl. J.W. PARKER, D.L.I., Chopwell, (Awarded Military Medal).
Pinned by Simon Cotterill
from IllustratedChronicles (flickr)
Lce - Cpl - E. Lakin - DLI - Sunderland - Prisoner of war
Pinned by Simon Cotterill
from IllustratedChronicles (flickr)
Pte. J.M. PORTER, D.L.I., Leadgate, (Wounded & Prisoner).
Pinned by Simon Cotterill
from IllustratedChronicles (flickr)
L-Corpl. J. TAYLOR, D.L.I., Swalwell, (Awarded Military Medal).
Pinned by Simon Cotterill
from IllustratedChronicles (flickr)
2nd Lieut. R. BIRD, D.L.I., Irthington, (Prisoner of War).
Pinned by Simon Cotterill
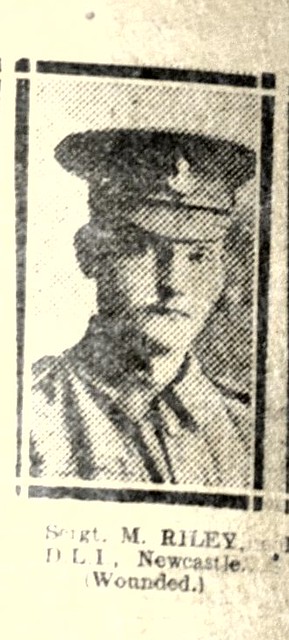
from IllustratedChronicles (flickr)
Sergt. M Riley - Durham Light Infantry - Newcastle
Pinned by Simon Cotterill
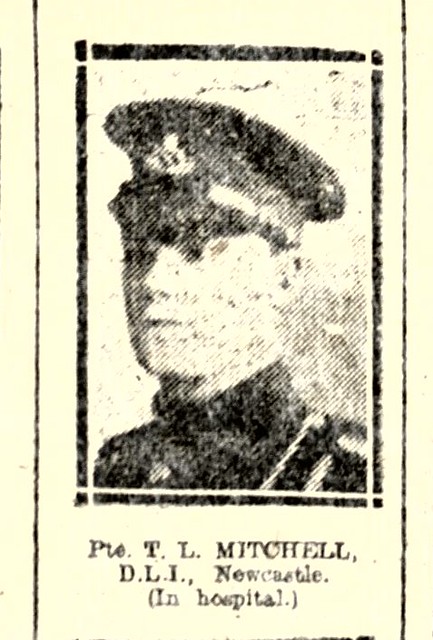
from IllustratedChronicles (flickr)
T.L. Mitchell - DLI - Newcastle - in hospital
Pinned by Simon Cotterill
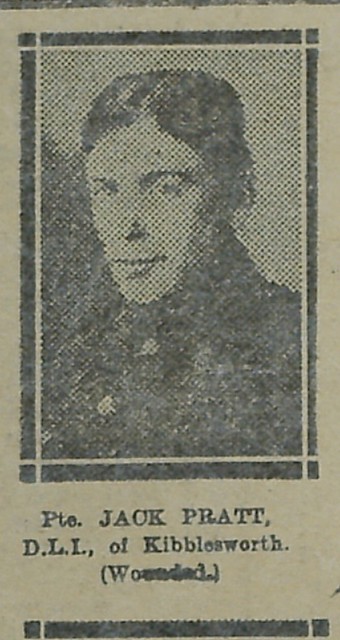
from IllustratedChronicles (flickr)
Jack Pratt - DLI - Kibblesworth - wounded
Pinned by Simon Cotterill
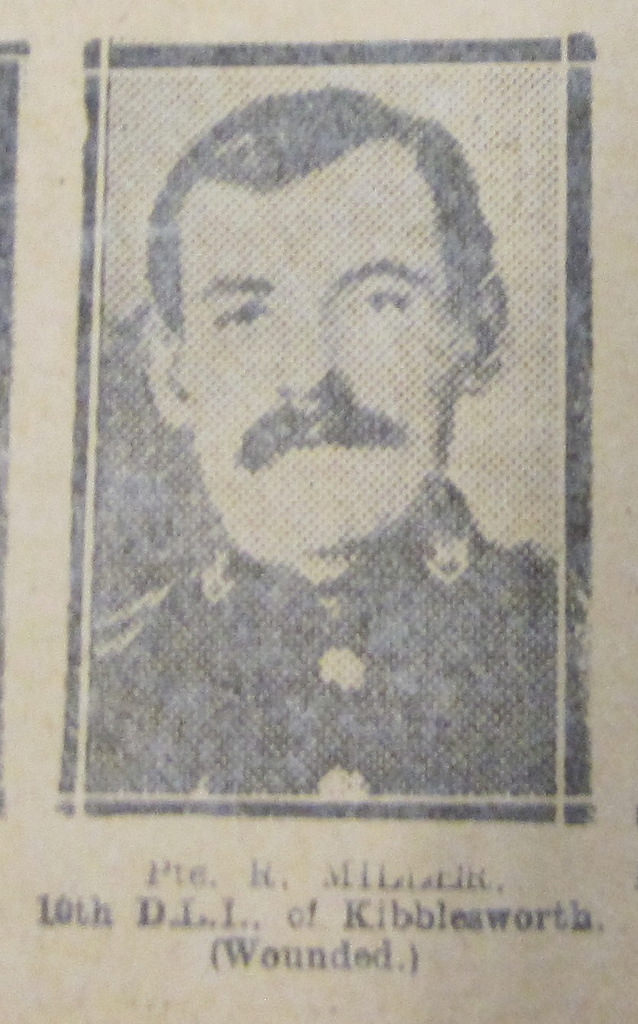
from IllustratedChronicles (flickr)
Jack Lang DLI - Gateshead - Military Medal
Pinned by Simon Cotterill
from IllustratedChronicles (flickr)
Corpl. E.R. BELL M.M., D.L.I., Gateshead, (Killed).
Pinned by Simon Cotterill

from IllustratedChronicles (flickr)
A. Henderson - DLi - Birtley - died of wounds
Pinned by Simon Cotterill
from IllustratedChronicles (flickr)
A. Pearson -DLI - Percy Main - wounded
Pinned by Simon Cotterill
from IllustratedChronicles (flickr)
J. Gundry - DLI - Chopwell - Military Medal
Pinned by Simon Cotterill
from IllustratedChronicles (flickr)
G. Etherington - DLi - Gateshead - Gassed
Pinned by Simon Cotterill
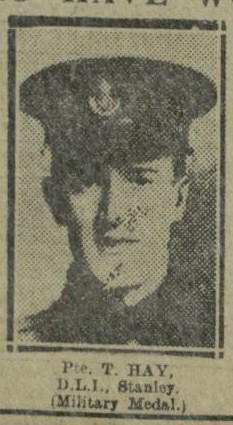
from IllustratedChronicles (flickr)
Pte T. HAY, D.L.I., Stanley, (Awarded Military Medal).
Pinned by Simon Cotterill
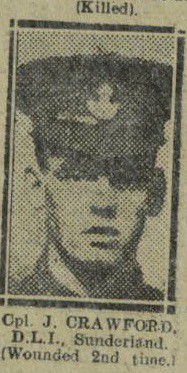
from IllustratedChronicles (flickr)
Corpl. J. CRAWFORD, D.L.I., Sunderland, (Wounded 2nd time).
Pinned by Simon Cotterill
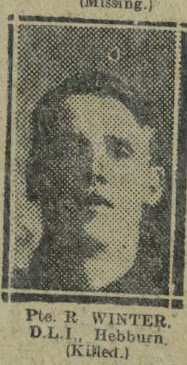
from IllustratedChronicles (flickr)
Pte. R. WINTER, D.L.I., Hebburn, (Killed).
Pinned by Simon Cotterill

from IllustratedChronicles (flickr)
Pte. R.W. BRIGNALL, D.L.I., Grange Villa, (In hospital).
Pinned by Simon Cotterill

from IllustratedChronicles (flickr)
Pte. T. BROWN, D.L.I., Jarrow, (Killed).
Pinned by Simon Cotterill
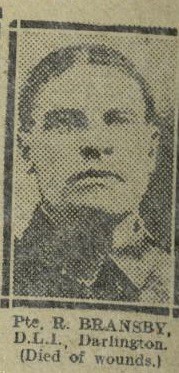
from IllustratedChronicles (flickr)
Pte. R. BRANSBY, D.L.I., Darlington, (Died of wounds).
Pinned by Simon Cotterill
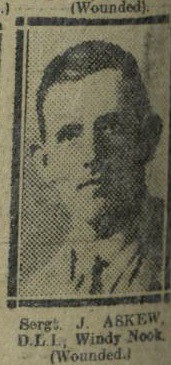
from IllustratedChronicles (flickr)
Sergt. J. ASKEW, D.L.I., Windy Nook, (Wounded).
Pinned by Simon Cotterill
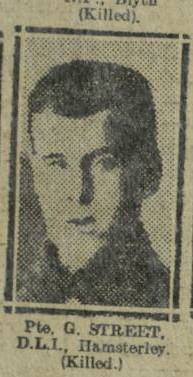
from IllustratedChronicles (flickr)
Pte. G. STREET, D.L.I., Hamsterley, (Killed).
Pinned by Simon Cotterill
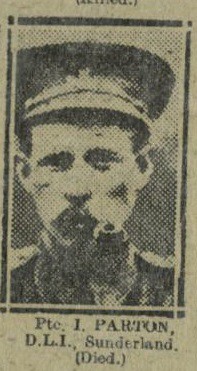
from IllustratedChronicles (flickr)
Pte. I. PARTON, D.L.I., Sunderland, (Died).
Pinned by Simon Cotterill
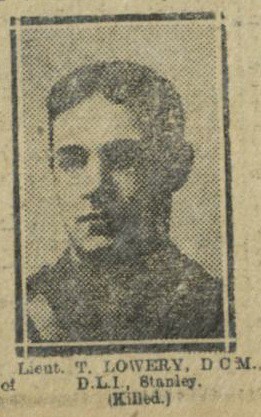
from IllustratedChronicles (flickr)
Lieut. T. LOWERY D.C.M., D.L.I., Stanley, (Killed).
Pinned by Simon Cotterill
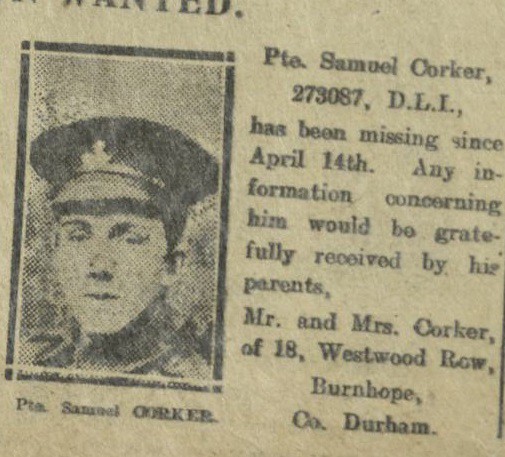
from IllustratedChronicles (flickr)
Pte. S. CORKER, D.L.I., Burnhope, (Missing).
Pinned by Simon Cotterill
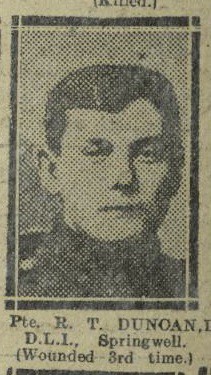
from IllustratedChronicles (flickr)
Pte. R.T. DUNCAN, D.L.I., Springwell, (Wounded 3rd time).
Pinned by Simon Cotterill
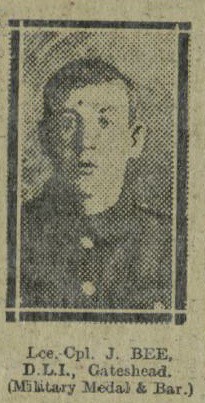
from IllustratedChronicles (flickr)
L-Corpl. J. BEE, D.L.I., Gateshead, (Awarded Military Medal & Bar).
Pinned by Simon Cotterill
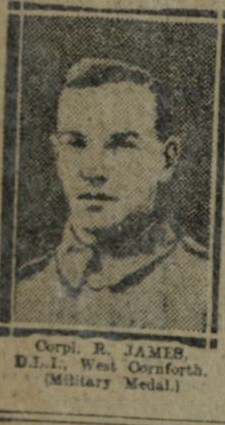
from IllustratedChronicles (flickr)
Corpl. R. JAMES, D.L.I., West Cornforth, (Awarded Military Medal).
Pinned by Simon Cotterill
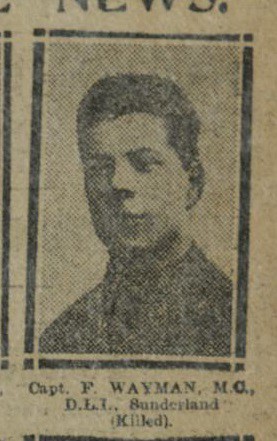
from IllustratedChronicles (flickr)
Capt. F. WAYMAN, M.C., D.L.I., Sunderland, (Killed).
Pinned by Simon Cotterill
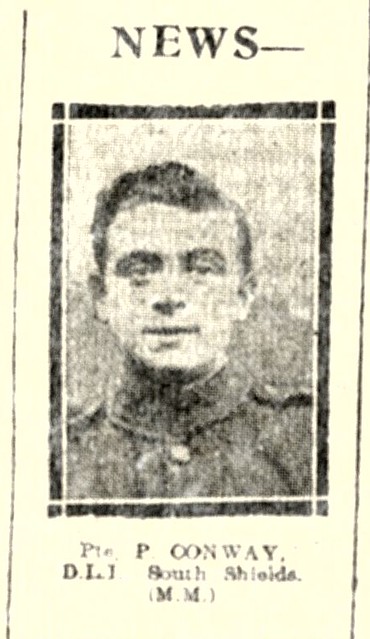
from IllustratedChronicles (flickr)
Pte. P Conway - Durham Light Infantry - South Shields
Pinned by Simon Cotterill
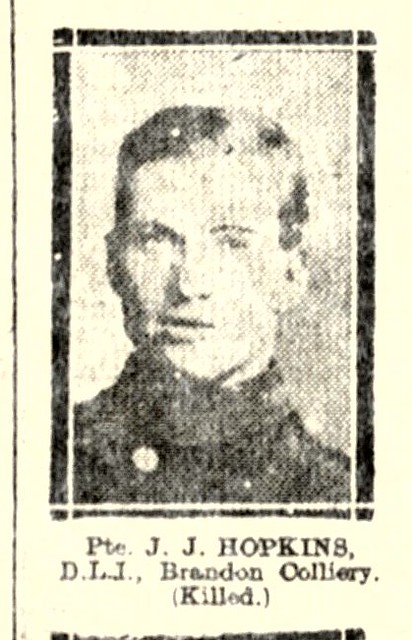
from IllustratedChronicles (flickr)
Pte. J J Hopkins - Durham Light Infantry - Brandon Colliery
Pinned by Simon Cotterill
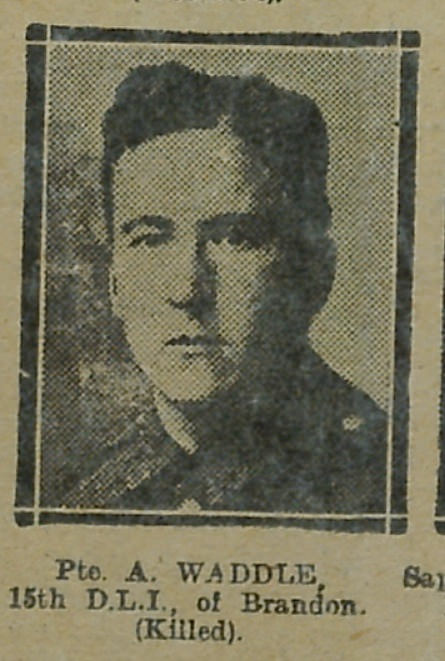
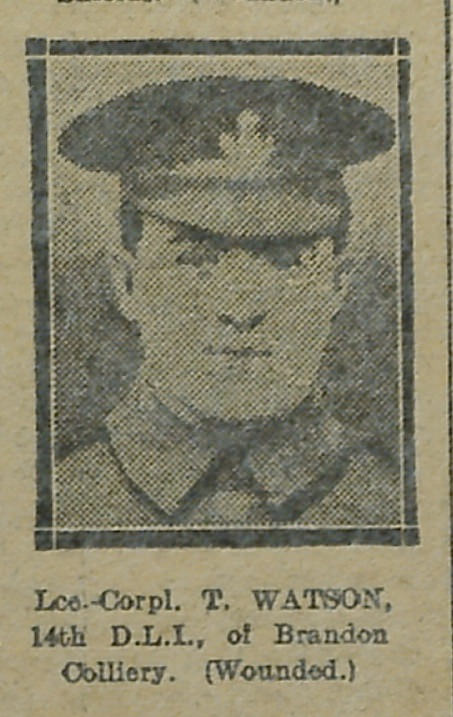

from Newcastle University (youtube)
Durham Light Infantry Brigade Aka Inkerman Day Parade Of The Durham Light Infantry (1922)
Pinned by Simon Cotterill
from Flickr (flickr)
68th Durham Light Infantry Society at Hartlepool's Maritime Experience
Pinned by Simon Cotterill
from Beamish Museum (youtube)
DLI 6th Battallion Training, Steam at Blackhill & Consett - 1908 / 1909
Pinned by Simon Cotterill
from IllustratedChronicles (flickr)
19th D.L.I. Sergeants With 317 Years' Service
Pinned by Simon Cotterill
from https://en.wikipedia.org/wiki…
Durham Light Infantry
- "The Durham Light Infantry (D.L.I.) was a light infantry regiment of the British Army in existence from 1881 to 1968. It was formed in 1881 under the Childers Reforms by …
Added by
Simon Cotterill
from IllustratedChronicles (flickr)
Abel Armstrong - 9th Durham Light Infantry - Chopwell
Pinned by Simon Cotterill
from IllustratedChronicles (flickr)
Clark Armstrong - 9th Durham Light Infantry
Pinned by Simon Cotterill
from IllustratedChronicles (flickr)
Joseph Thomas Armstrong - 9th Durham Light Infantry
Pinned by Simon Cotterill
from IllustratedChronicles (flickr)
Nicholas Armstrong - 9th Durham Light Infantry - Chopwell
Pinned by Simon Cotterill
from IllustratedChronicles (flickr)
James Magaughey (Maganghey) - 9th Durham Light Infantry
Pinned by Simon Cotterill
from IllustratedChronicles (flickr)
L Sherwood - 3rd Durham Light Infantry
Pinned by Simon Cotterill
from IllustratedChronicles (flickr)
JH Gowans - Durham Light Infantry - South Shields
Pinned by Simon Cotterill
from IllustratedChronicles (flickr)
William Tool (Toole) - 7th Battalion Durham Light Infantry - Shotley Bridge
Pinned by Simon Cotterill
from IllustratedChronicles (flickr)
JN Rohers - 8th Durham Light Infantry - Durham City (Killed)
Pinned by Simon Cotterill
from IllustratedChronicles (flickr)
BH Richardson - 8th Durham Light Infantry (Killed)
Pinned by Simon Cotterill
from IllustratedChronicles (flickr)
JT Monkhouse - 6th Durham Light Infantry (Killed)
Pinned by Simon Cotterill
from IllustratedChronicles (flickr)
Lieutenant Kirkhouse - 6th Durham Light Infantry - Consett (Wounded)
Pinned by Simon Cotterill
from IllustratedChronicles (flickr)
Major Kenneth JW Lowther to command new 20th (Sunderland) Durham Light Infantry
Pinned by Simon Cotterill
from IllustratedChronicles (flickr)
Eric George Hyden - 11th DLI (Wounded)
Pinned by Simon Cotterill
from IllustratedChronicles (flickr)
Joseph Kelly, Gateshead, killed in action
Pinned by Simon Cotterill
from IllustratedChronicles (flickr)
James Alan Bell - 7th DLI - Sunderland (wounded and gassed)
Pinned by Simon Cotterill
from IllustratedChronicles (flickr)
RS Walton - 5th DLI - Darlington (Gassed)
Pinned by Simon Cotterill
Co-Curate Page
DLI Cross
- Overview Map Street View The stone Celtic-syle cross is located by Durham Cathedral, just south-west of Palace Green. This is a war memorial dedicated to the soldiers of the Durham …
from IllustratedChronicles (flickr)
John Howarth Larmar, Easington Lane, killed
Pinned by Simon Cotterill
from IllustratedChronicles (flickr)
FJ Gowans - HMS Queen Mary - South Shields
Pinned by Simon Cotterill
from IllustratedChronicles (flickr)
Dr William Gowans - Father - South Shields
Pinned by Simon Cotterill
from IllustratedChronicles (flickr)
Christopher Leather, Belford, killed in action
Pinned by Simon Cotterill
from IllustratedChronicles (flickr)
G Wiseman - 5th DLI - Darlington (Killed)
Pinned by Simon Cotterill
from IllustratedChronicles (flickr)
M Hailes - 9th DLI - Winlaton (Killed)
Pinned by Simon Cotterill
from IllustratedChronicles (flickr)
R Munro - 9th DLI - Gateshead (Wounded)
Pinned by Simon Cotterill
from IllustratedChronicles (flickr)
R Gibson - 9th DLI - Gateshead (Wounded)
Pinned by Simon Cotterill
from IllustratedChronicles (flickr)
H Gustard - 9th DLI - Felling (Killed)
Pinned by Simon Cotterill
from IllustratedChronicles (flickr)
C Potts - 7th DLI - Sunderland (Killed)
Pinned by Simon Cotterill
from IllustratedChronicles (flickr)
P Worth - 5th DLI - Darlington (Wounded)
Pinned by Simon Cotterill
from IllustratedChronicles (flickr)
W Parritt - 2nd DLI - Jarrow (Wounded)
Pinned by Simon Cotterill
from IllustratedChronicles (flickr)
J Thornton - 5th DLI - Dawdon (Killed)
Pinned by Simon Cotterill
from IllustratedChronicles (flickr)
G Redhead - 5th DLI - Stockton (Killed)
Pinned by Simon Cotterill
from IllustratedChronicles (flickr)
R Graham - 5th DLI - Sunderland (Killed)
Pinned by Simon Cotterill
from IllustratedChronicles (flickr)
W Ritchie - 10th DLI - Dawdon (Killed)
Pinned by Simon Cotterill
from IllustratedChronicles (flickr)
William Brown - 7th DLI (Died of wounds)
Pinned by Simon Cotterill
from IllustratedChronicles (flickr)
G Bradshaw - 8th? DLI - Gateshead (Wounded)
Pinned by Simon Cotterill
from IllustratedChronicles (flickr)
JT Cant - 2nd DLI - Kirk Merrington (Killed)
Pinned by Simon Cotterill
from IllustratedChronicles (flickr)
W Dobson - 2nd DLI - Ferryhill (Killed)
Pinned by Simon Cotterill
from IllustratedChronicles (flickr)
T Turner - 10th DLI - Newcastle (Killed)
Pinned by Simon Cotterill
from IllustratedChronicles (flickr)
S Bolam - 10th DLI - Gateshead (Killed)
Pinned by Simon Cotterill
from IllustratedChronicles (flickr)
Dennis Darby - 10th DLI - Nettlersworth (Wounded)
Pinned by Simon Cotterill
from IllustratedChronicles (flickr)
G Stones - DLI - Wingate (Died of Wounds)
Pinned by Simon Cotterill
from IllustratedChronicles (flickr)
H Dunn - 10th DLI - Gateshead (Killed)
Pinned by Simon Cotterill
from IllustratedChronicles (flickr)
J Tyreman - 5th DLI - Coxhow (Wounded)
Pinned by Simon Cotterill
from IllustratedChronicles (flickr)
J Blenkinsopp - 10th DLI - Sunderland (Killed)
Pinned by Simon Cotterill
from IllustratedChronicles (flickr)
J Morgan - 10th DLI - Dipton (Wounded)
Pinned by Simon Cotterill
from IllustratedChronicles (flickr)
R Pattison - 5th DLI - Hartlepool (Killed)
Pinned by Simon Cotterill
from IllustratedChronicles (flickr)
J Spoors - 9th DLI - Felling (Wounded)
Pinned by Simon Cotterill
from IllustratedChronicles (flickr)
E Tennant - 5th DLI - Hordon (Wounded)
Pinned by Simon Cotterill
from IllustratedChronicles (flickr)
J Scott - 9th DLI - Swalwell (Wounded)
Pinned by Simon Cotterill
from IllustratedChronicles (flickr)
A Armbruster - 10th DLI - Sunderland (Wounded)
Pinned by Simon Cotterill
from IllustratedChronicles (flickr)
D Makin - 16th DLI - Wallsend (Wounded)
Pinned by Simon Cotterill
from IllustratedChronicles (flickr)
James Campbell - 8th DLI - Wesk Auckland (Killed)
Pinned by Simon Cotterill
from IllustratedChronicles (flickr)
A Todd - DLI - West Hartlepool (Wounded)
Pinned by Simon Cotterill
from IllustratedChronicles (flickr)
M Hodgson - 9th DLI - Blaydon (Gassed)
Pinned by Simon Cotterill
from IllustratedChronicles (flickr)
R Neasham - 6th DLI - Spennymoor (Wounded)
Pinned by Simon Cotterill
from IllustratedChronicles (flickr)
W Nairn - 7th DLI - Sunderland (Killed)
Pinned by Simon Cotterill
from IllustratedChronicles (flickr)
A Hawks - 8th DLI - Plawsworth (Missing)
Pinned by Simon Cotterill
from IllustratedChronicles (flickr)
HH Chapman - 10th DLI (Killed in action)
Pinned by Simon Cotterill
from IllustratedChronicles (flickr)
Joe May - 9th DLI - Gateshead (Wounded)
Pinned by Simon Cotterill
from IllustratedChronicles (flickr)
A Dickens - 7th DLI - Consett (Wounded)
Pinned by Simon Cotterill
from IllustratedChronicles (flickr)
W Gibbons - 8th DLI - Waterhouses (Killed)
Pinned by Simon Cotterill
from IllustratedChronicles (flickr)
D Crathorne - 6th DLI - Wingate (Wounded)
Pinned by Simon Cotterill
from IllustratedChronicles (flickr)
T McHugh - 10th DLI - Gateshead (Killed)
Pinned by Simon Cotterill
from IllustratedChronicles (flickr)
J Cowan - 8th DLI - Perkinsville (Gassed)
Pinned by Simon Cotterill
from IllustratedChronicles (flickr)
T Jackway - 7th DLI - Sunderland (Killed)
Pinned by Simon Cotterill
from IllustratedChronicles (flickr)
A Davies - 5th DLI - Stockton (Missing)
Pinned by Simon Cotterill
from IllustratedChronicles (flickr)
S Maddison - 8th DLI - West Stanley (Died of Wounds)
Pinned by Simon Cotterill
from IllustratedChronicles (flickr)
R Knotts - 8th DLI - Blaydon (Wounded)
Pinned by Simon Cotterill
from IllustratedChronicles (flickr)
W Taylor - 11th DLI - Portobello (Killed)
Pinned by Simon Cotterill
from IllustratedChronicles (flickr)
T Wilson - 8th DLI - West Stanley (Wounded)
Pinned by Simon Cotterill
from IllustratedChronicles (flickr)
Ben Moiser - DLI - East Stanley (Killed)
Pinned by Simon Cotterill
from IllustratedChronicles (flickr)
W Sturrock - 12th DLI - Gateshead (In Hospital)
Pinned by Simon Cotterill
from IllustratedChronicles (flickr)
A Wright - 10th DLI - West Stanley (Killed)
Pinned by Simon Cotterill
from IllustratedChronicles (flickr)
William Lashwood - 15th DLI - Murton Coll (Missing)
Pinned by Simon Cotterill
from IllustratedChronicles (flickr)
TS Carr - 10th DLI - Catchgate (Killed)
Pinned by Simon Cotterill
from IllustratedChronicles (flickr)
Robert Watt - DLI - Hartlepool (Killed)
Pinned by Simon Cotterill
from IllustratedChronicles (flickr)
E Holloway - 9th DLI - Gateshead (Killed)
Pinned by Simon Cotterill
from IllustratedChronicles (flickr)
TW Ward - 8th DLI - Willington (Gassed)
Pinned by Simon Cotterill
from IllustratedChronicles (flickr)
R Weatherstone - 9th DLI - Stargate (Wounded)
Pinned by Simon Cotterill
from IllustratedChronicles (flickr)
J McMahon - 2nd DLI - Hartlepool (Killed)
Pinned by Simon Cotterill
from IllustratedChronicles (flickr)
Thomas Stoddart - 11th DLI - Metal Bridge (Wounded)
Pinned by Simon Cotterill
from IllustratedChronicles (flickr)
J Hunter - 18th DLI - Sacriston (Wounded)
Pinned by Simon Cotterill
from IllustratedChronicles (flickr)
D Brannon - 15th DLI - Wallsend (Wounded)
Pinned by Simon Cotterill
from IllustratedChronicles (flickr)
John E Forster - 15th DLI - Ewe Hill (Wounded)
Pinned by Simon Cotterill
from IllustratedChronicles (flickr)
W Willby - 15th DLI - Cornforth Lane (Wounded)
Pinned by Simon Cotterill
from IllustratedChronicles (flickr)
Edgar Pell - 15th DLI - Ewe Hill (Wounded)
Pinned by Simon Cotterill
from IllustratedChronicles (flickr)
W Farrow - 9th DLI - Stella (In Hospital)
Pinned by Simon Cotterill
from IllustratedChronicles (flickr)
Thomas Cook - 14th DLI - ?ingthorne (Killed)
Pinned by Simon Cotterill
from IllustratedChronicles (flickr)
George Davis - 19th DLI - Murton Colliery (Wounded)
Pinned by Simon Cotterill
from IllustratedChronicles (flickr)
P McBride - 6th DLI - Consett (Killed)
Pinned by Simon Cotterill
from IllustratedChronicles (flickr)
E Thompson - 15th DLI - Leeholme (Wounded)
Pinned by Simon Cotterill
from IllustratedChronicles (flickr)
J Sanderson - 14th DLI - Byker (Missing)
Pinned by Simon Cotterill
from IllustratedChronicles (flickr)
W Gillens - 8th DLI - Ludworth (Wounded)
Pinned by Simon Cotterill
from IllustratedChronicles (flickr)
Henry Stringer - 13th DLI - Page Bank (Killed)
Pinned by Simon Cotterill
from IllustratedChronicles (flickr)
P Mathewson - 15th DLI - Murton Colliery (Wounded)
Pinned by Simon Cotterill
from IllustratedChronicles (flickr)
Moses Jones - 9th DLI - Hamsterley Colliery (Wounded)
Pinned by Simon Cotterill
from IllustratedChronicles (flickr)
S Bessford - 15th DLI - Washington (Killed)
Pinned by Simon Cotterill
from IllustratedChronicles (flickr)
Pte Cleghorn - DLI - Littleburn Colliery (Wounded and prisoner)
Pinned by Simon Cotterill
from IllustratedChronicles (flickr)
P Kitchenman - 5th DLI - Coxhoe (Wounded)
Pinned by Simon Cotterill
from IllustratedChronicles (flickr)
M Hand - 2nd DLI - Middlesbrough (Wounded)
Pinned by Simon Cotterill
from IllustratedChronicles (flickr)
H Craggs - 13th DLI - Newcastle (Wounded)
Pinned by Simon Cotterill
from IllustratedChronicles (flickr)
Oliver Redshaw - 14th DLI - Blackhill (Killed)
Pinned by Simon Cotterill
from IllustratedChronicles (flickr)
W Porthouse - 15th DLI - Jarrow (Wounded)
Pinned by Simon Cotterill
from IllustratedChronicles (flickr)
J McGowan - DLI - Middlesbrough (Prisoner of War)
Pinned by Simon Cotterill
from IllustratedChronicles (flickr)
T Patterson - 14th DLI - Blyth (Gassed)
Pinned by Simon Cotterill
from IllustratedChronicles (flickr)
C Heslop - 10th DLI - Gateshead (Wounded)
Pinned by Simon Cotterill
from IllustratedChronicles (flickr)
F Reid - 9th DLI - Gateshead (Wounded)
Pinned by Simon Cotterill
from IllustratedChronicles (flickr)
G Davidson - 14th DLI - Gateshead (Wounded)
Pinned by Simon Cotterill
from IllustratedChronicles (flickr)
?? Bradford? - 14th DLI - Dunston (Wounded)
Pinned by Simon Cotterill
from IllustratedChronicles (flickr)
William ? - 14th DLI - Blaydon (Wounded)
Pinned by Simon Cotterill
from IllustratedChronicles (flickr)
GR Simpson - 14th DLI - Shotton (Died of wounds)
Pinned by Simon Cotterill
from IllustratedChronicles (flickr)
B Walton - 16th DLI - Springwell (Killed)
Pinned by Simon Cotterill
from IllustratedChronicles (flickr)
E Robson - 2nd DLI- Gateshead (Gassed)
Pinned by Simon Cotterill
from IllustratedChronicles (flickr)
W Barras - 11th DLI - Birtley (Wounded)
Pinned by Simon Cotterill
from IllustratedChronicles (flickr)
TW Whaley - 12th DLI - Blackhill (Killed)
Pinned by Simon Cotterill
from IllustratedChronicles (flickr)
George Embleton - DLI - Tanfield Lea (Wounded)
Pinned by Simon Cotterill
from IllustratedChronicles (flickr)
RH Brown - 15th DLI - Silksworth (Wounded)
Pinned by Simon Cotterill
from IllustratedChronicles (flickr)
? Stapleton - 15th DLI - Teams (Wounded)
Pinned by Simon Cotterill
from IllustratedChronicles (flickr)
F Turrell - 18th DLI - Gateshead (Wounded)
Pinned by Simon Cotterill
from IllustratedChronicles (flickr)
E Towers - 15th DLI - Evenwood (Wounded and Missing)
Pinned by Simon Cotterill
from IllustratedChronicles (flickr)
J Huscroft - 11th DLI - Felling (Wounded)
Pinned by Simon Cotterill
from IllustratedChronicles (flickr)
F Newman - DLI - Birtley (Died in hospital)
Pinned by Simon Cotterill
from IllustratedChronicles (flickr)
G Walton - 11th DLI - Springwell (In hospital)
Pinned by Simon Cotterill
from IllustratedChronicles (flickr)
J Todd - 13th DLI - Silksworth (Missing)
Pinned by Simon Cotterill
from IllustratedChronicles (flickr)
W Peel - 2nd DLI - Middlesbrough (Killed)
Pinned by Simon Cotterill
from IllustratedChronicles (flickr)
J Wright - DLI - Tanfield Lea (Killed)
Pinned by Simon Cotterill
from IllustratedChronicles (flickr)
James Sharp - 12th DLI - Silksworth (In hospital)
Pinned by Simon Cotterill
from IllustratedChronicles (flickr)
T Turnbull - DLI - Langley Moor (Wounded)
Pinned by Simon Cotterill
from IllustratedChronicles (flickr)
J Grundy - 15th DLI - Silksworth (Missing)
Pinned by Simon Cotterill
from IllustratedChronicles (flickr)
George Hope - 15th DLI - West Cornforth (Wounded)
Pinned by Simon Cotterill
from IllustratedChronicles (flickr)
LC Blinkiron - DLI - Fence Houses (Prisoner of War)
Pinned by Simon Cotterill
from IllustratedChronicles (flickr)
J Stephenson - 11th DLI - Byker (Killed)
Pinned by Simon Cotterill
from IllustratedChronicles (flickr)
R Percival - 10th DLI - Addison Colliery (Wounded)
Pinned by Simon Cotterill
from IllustratedChronicles (flickr)
G Walton - 8th DLI - Tanhills (Wounded)
Pinned by Simon Cotterill
from IllustratedChronicles (flickr)
Sam Ashcroft - 14th DLI - Leamside (Killed)
Pinned by Simon Cotterill
from IllustratedChronicles (flickr)
LC McKenny - 14th DLI - Stanley (Wounded)
Pinned by Simon Cotterill
from IllustratedChronicles (flickr)
W Robson - 8th DLI - Birtley (Wounded)
Pinned by Simon Cotterill
from IllustratedChronicles (flickr)
R Mulvenny - 15th DLI - Sunderland (Wounded)
Pinned by Simon Cotterill
from IllustratedChronicles (flickr)
Joseph Renwick - 15th DLI - ?dworth (Wounded)
Pinned by Simon Cotterill
from IllustratedChronicles (flickr)
T Common - 9th DLI - Dunston (Wounded)
Pinned by Simon Cotterill
from IllustratedChronicles (flickr)
J Maddison - 11th DLI - Birtley (Wounded)
Pinned by Simon Cotterill
from IllustratedChronicles (flickr)
Alfred Jones - 15th DLI - Murton Colliery (Wounded)
Pinned by Simon Cotterill
from IllustratedChronicles (flickr)
R Grayson - 10th DLI - Wrekenton (Wounded)
Pinned by Simon Cotterill
from IllustratedChronicles (flickr)
G Cowell - 11th DLI - Birtley (Killed)
Pinned by Simon Cotterill
from IllustratedChronicles (flickr)
W Butterfield - 10th DLI - Hartlepool (Wounded)
Pinned by Simon Cotterill
from IllustratedChronicles (flickr)
J Errington - 15th DLI - Murton Colliery (Missing)
Pinned by Simon Cotterill
from IllustratedChronicles (flickr)
WH Wilby - 14th DLI - Cornforth Lane (Missing)
Pinned by Simon Cotterill
from IllustratedChronicles (flickr)
W Gargate - 15th DLI - Middleton (Killed)
Pinned by Simon Cotterill
from IllustratedChronicles (flickr)
W Carter - 1?th DLI - Birtley (Wounded)
Pinned by Simon Cotterill
from IllustratedChronicles (flickr)
J Wilson - 15th DLI - Murton (Wounded)
Pinned by Simon Cotterill
from IllustratedChronicles (flickr)
A McGee - 19th DLI - Bensham (Wounded)
Pinned by Simon Cotterill
from IllustratedChronicles (flickr)
JB Davidson - 15th DLI - Murton Colliery (Wounded)
Pinned by Simon Cotterill
from IllustratedChronicles (flickr)
John Daley - 15th DLI - Willington (Killed)
Pinned by Simon Cotterill
from IllustratedChronicles (flickr)
C Stott - 9th DLI - Swalwell (Wounded)
Pinned by Simon Cotterill
from IllustratedChronicles (flickr)
G Alderson - 10th DLI - Dunston (Accidentally)
Pinned by Simon Cotterill
from IllustratedChronicles (flickr)
Fred E West - DLI - Trimdon Grange (Died of Wounds)
Pinned by Simon Cotterill
from IllustratedChronicles (flickr)
T Irving - 9th DLI - Heworth (Wounded)
Pinned by Simon Cotterill
from IllustratedChronicles (flickr)
William Buckham - 15th DLI - High Shields (Wounded)
Pinned by Simon Cotterill
from IllustratedChronicles (flickr)
H Pyle - 13th DLI - Whickham (Wounded)
Pinned by Simon Cotterill
from IllustratedChronicles (flickr)
Albert Dawson - 9th DLI - Bewick Main (Killed)
Pinned by Simon Cotterill
from IllustratedChronicles (flickr)
John Turner - 15th DLI - Leasingthrone (Wounded)
Pinned by Simon Cotterill
from IllustratedChronicles (flickr)
G Potts - 15th DLI - Murton Colliery (Missing)
Pinned by Simon Cotterill
from IllustratedChronicles (flickr)
JW Adamson - 15th DLI - Murton Colliery (Wounded)
Pinned by Simon Cotterill
from IllustratedChronicles (flickr)
EW Toft - 15th DLI - Murton Colliery (Gassed)
Pinned by Simon Cotterill
from IllustratedChronicles (flickr)
J Lowes - 13th DLI - Murton Colliery (Wounded)
Pinned by Simon Cotterill
from IllustratedChronicles (flickr)
G Chisholm - 15th DLI - Murton Colliery (Wounded)
Pinned by Simon Cotterill
from IllustratedChronicles (flickr)
Robert Husband - 15th DLI - Murton (Wounded)
Pinned by Simon Cotterill
from IllustratedChronicles (flickr)
W Garrett - 15th DLI - Murton Colliery (Wounded)
Pinned by Simon Cotterill
from IllustratedChronicles (flickr)
E Taylor - 14th DLI - Murton Colliery (Wounded)
Pinned by Simon Cotterill
from IllustratedChronicles (flickr)
Joseph Barnes - 15th DLI - Murton Colliery (Wounded)
Pinned by Simon Cotterill
from IllustratedChronicles (flickr)
WE Thompson - DLI - Thornley (Wounded)
Pinned by Simon Cotterill
from IllustratedChronicles (flickr)
John Barnes - 15th DLI - Murton Colliery (Wounded)
Pinned by Simon Cotterill
from IllustratedChronicles (flickr)
H Small - 5th DLI - Gateshead (Wounded)
Pinned by Simon Cotterill
from IllustratedChronicles (flickr)
E Faley - 14th DLI - Lemington (Gassed)
Pinned by Simon Cotterill
from IllustratedChronicles (flickr)
A Murray - 15th DLI - Ludworth (Wounded)
Pinned by Simon Cotterill
from IllustratedChronicles (flickr)
T Watson - 10th DLI - Gateshead (Wounded)
Pinned by Simon Cotterill
from IllustratedChronicles (flickr)
R Hobbs - 15th DLI - Burnhope (Gassed)
Pinned by Simon Cotterill
from IllustratedChronicles (flickr)
F Reidy - 11th DLI - Gateshead (Wounded)
Pinned by Simon Cotterill
from IllustratedChronicles (flickr)
B Burns - 15th DLI - Tantobie (Wounded)
Pinned by Simon Cotterill
from IllustratedChronicles (flickr)
W Tague - 14th DLI - Witton Park (Killed)
Pinned by Simon Cotterill
from IllustratedChronicles (flickr)
F Stephenson - 5th DLI - Coxhoe (Killed)
Pinned by Simon Cotterill
from IllustratedChronicles (flickr)
Arthur Wilson - 15th DLI - Bearpark (Died of Wounds)
Pinned by Simon Cotterill
from IllustratedChronicles (flickr)
A Thomas - 15th DLI - Darlington (Wounded)
Pinned by Simon Cotterill
from IllustratedChronicles (flickr)
A Whitwham - 15th DLI - Tantobie (Wounded)
Pinned by Simon Cotterill
from IllustratedChronicles (flickr)
H Hindson - 14th DLI - Tantobie (Wounded)
Pinned by Simon Cotterill
from IllustratedChronicles (flickr)
A Barron - 4th DLI - Perkinsville (Wounded)
Pinned by Simon Cotterill
from IllustratedChronicles (flickr)
S Moore - 15th DLI - Gateshead (Wounded)
Pinned by Simon Cotterill
from IllustratedChronicles (flickr)
J Richmond - 16th DLI - Leeholme (Wounded)
Pinned by Simon Cotterill
from IllustratedChronicles (flickr)
J Cranston - 8th DLI - Tantobie (Wounded)
Pinned by Simon Cotterill
from IllustratedChronicles (flickr)
J Greener - 9th DLI - Chopwell (Wounded)
Pinned by Simon Cotterill
from IllustratedChronicles (flickr)
G Turner - 13th DLI - Easington (Wounded)
Pinned by Simon Cotterill
from IllustratedChronicles (flickr)
J Marchbanks - 10th DLI - Fence Houses (Killed)
Pinned by Simon Cotterill
from IllustratedChronicles (flickr)
A Wilson - 14th DLI - Bearpark (Killed)
Pinned by Simon Cotterill
from IllustratedChronicles (flickr)
W Jardine - 11th DLI - Walbottle (Wounded)
Pinned by Simon Cotterill
from IllustratedChronicles (flickr)
WM Scott - 10th DLI - Springwell (Wounded)
Pinned by Simon Cotterill
from IllustratedChronicles (flickr)
RW Dawson - 2nd DLI - Gilesgate Moor (Killed)
Pinned by Simon Cotterill
from IllustratedChronicles (flickr)
R Fogg - 15th DLI - Silksworth (Wounded)
Pinned by Simon Cotterill
from IllustratedChronicles (flickr)
A King - 15th DLI - Washington (Wounded)
Pinned by Simon Cotterill
from IllustratedChronicles (flickr)
Luke Thompson - 14th DLI - West Stanley (Wounded)
Pinned by Simon Cotterill
from IllustratedChronicles (flickr)
John Skinner - 15th DLI - Murton Colliery (Wounded)
Pinned by Simon Cotterill
from IllustratedChronicles (flickr)
C Lisle - 2nd DLI - Gateshead (Wounded)
Pinned by Simon Cotterill
from IllustratedChronicles (flickr)
J Finley - 10th DLI - Birtley (Wounded)
Pinned by Simon Cotterill
from IllustratedChronicles (flickr)
J Golightly - 15th DLI - Murton Colliery (Killed)
Pinned by Simon Cotterill
from IllustratedChronicles (flickr)
J Cairns - 14th DLI - Felling (Wounded)
Pinned by Simon Cotterill
from IllustratedChronicles (flickr)
Pte Raine - 6th DLI - Low Etherley (Wounded)
Pinned by Simon Cotterill
from IllustratedChronicles (flickr)
Thomas Glendinning - 2nd DLI - Grangetown (Wounded)
Pinned by Simon Cotterill
from IllustratedChronicles (flickr)
D Barron - 14th DLI - Sunderland (Wounded)
Pinned by Simon Cotterill
from IllustratedChronicles (flickr)
C Arkley - 10th DLI - Silksworth (Killed)
Pinned by Simon Cotterill
from IllustratedChronicles (flickr)
J Curtain - 15th DLI - Penshaw (Wounded)
Pinned by Simon Cotterill
from IllustratedChronicles (flickr)
Norman Hickman - 14th DLI - Hetton Downs (Wounded)
Pinned by Simon Cotterill
from IllustratedChronicles (flickr)
T Scott - 14th DLI - Sunderland (Wounded)
Pinned by Simon Cotterill
from IllustratedChronicles (flickr)
William Northey - 15th DLI - Grangetown (Wounded)
Pinned by Simon Cotterill
from IllustratedChronicles (flickr)
G Davison - 14th DLI - Nova Scotia (Wounded)
Pinned by Simon Cotterill
from IllustratedChronicles (flickr)
M Sugden - 2nd DLI - Felling (Wounded)
Pinned by Simon Cotterill
from IllustratedChronicles (flickr)
P Watson - 14th DLI - Sunderland (Wounded)
Pinned by Simon Cotterill
from IllustratedChronicles (flickr)
A Hunter - 8th DLI - Easington (Missing)
Pinned by Simon Cotterill
from IllustratedChronicles (flickr)
J Carr - 2nd DLI - Nettlesworth (Wounded)
Pinned by Simon Cotterill
from IllustratedChronicles (flickr)
O Clewes - 15th DLI - Sacriston (Wounded)
Pinned by Simon Cotterill
from IllustratedChronicles (flickr)
James Mercer -7th DLI - Grangetown (Missing)
Pinned by Simon Cotterill
from IllustratedChronicles (flickr)
J Brown - 8th DLI - Sacriston (Killed)
Pinned by Simon Cotterill
from IllustratedChronicles (flickr)
E Wright - 14th DLI - Sacriston (Wounded)
Pinned by Simon Cotterill
from IllustratedChronicles (flickr)
J Brown - 8th DLI - Sacriston (Killed)
Pinned by Simon Cotterill
from IllustratedChronicles (flickr)
C Holmes - 16th DLI - Edmondsley (Wounded)
Pinned by Simon Cotterill
from IllustratedChronicles (flickr)
E Hanson - 15th DLI - Coxhoe (Wounded)
Pinned by Simon Cotterill
from IllustratedChronicles (flickr)
L Storey - 14th DLI - Gateshead (Wounded)
Pinned by Simon Cotterill
from IllustratedChronicles (flickr)
JJ Mills - 6th DLI - Witton Park (Wounded)
Pinned by Simon Cotterill
from IllustratedChronicles (flickr)
R Rhymer - 2nd DLI - Edmondsley (Wounded)
Pinned by Simon Cotterill
from IllustratedChronicles (flickr)
P Newton - 9th DLI - Blaydon (Wounded)
Pinned by Simon Cotterill
from IllustratedChronicles (flickr)
G Walker - 15th DLI - Gateshead (Wounded)
Pinned by Simon Cotterill
from IllustratedChronicles (flickr)
G McLeod - 16th DLI - Gateshead (Wounded)
Pinned by Simon Cotterill
from IllustratedChronicles (flickr)
J Hutchinson - 2nd DLI - Durham (WOunded)
Pinned by Simon Cotterill
from IllustratedChronicles (flickr)
T Marsden - 15th DLI - Silksworth (Wounded)
Pinned by Simon Cotterill
from IllustratedChronicles (flickr)
M Richardson - 10th DLI - Gateshead (Wounded)
Pinned by Simon Cotterill
from IllustratedChronicles (flickr)
M Gallagher - 15th DLI - Silksworth (Wounded)
Pinned by Simon Cotterill
from IllustratedChronicles (flickr)
TH Pattison - 15th DLI - Silksworth (Wounded)
Pinned by Simon Cotterill
from IllustratedChronicles (flickr)
William Keers - 15th DLI - Hordern Colliery (Wounded)
Pinned by Simon Cotterill
from IllustratedChronicles (flickr)
C Fisher - 15th DLI - Kelloe (Wounded)
Pinned by Simon Cotterill
from IllustratedChronicles (flickr)
E McSherry - 6th DLI - Morpeth (Wounded)
Pinned by Simon Cotterill
from IllustratedChronicles (flickr)
Bugler Fairgrief - 15th DLI - Silksworth (Wounded)
Pinned by Simon Cotterill
from IllustratedChronicles (flickr)
James Leach - 15th DLI - Silksworth (Wounded)
Pinned by Simon Cotterill
from IllustratedChronicles (flickr)
James Goss - 15th DLI - Springwell (Wounded)
Pinned by Simon Cotterill
from IllustratedChronicles (flickr)
R Nutter - 15th DLI - Silksworth (Wounded)
Pinned by Simon Cotterill
from IllustratedChronicles (flickr)
Joseph Allen - DLI - Silksworth (Wounded)
Pinned by Simon Cotterill
from IllustratedChronicles (flickr)
W Gilroy - 10th DLI - Gateshead (Wounded)
Pinned by Simon Cotterill
from IllustratedChronicles (flickr)
Jospeh Allen - DLI - Silksworth (Wounded)
Pinned by Simon Cotterill
from IllustratedChronicles (flickr)
J McLaughlin - 14th DLI - Gateshead (Wounded)
Pinned by Simon Cotterill
from IllustratedChronicles (flickr)
F Wilson - 8th DLI - Cambois (Wounded)
Pinned by Simon Cotterill
from IllustratedChronicles (flickr)
R Bolam - DLI - Gateshead (Wounded ??)
Pinned by Simon Cotterill
from IllustratedChronicles (flickr)
JW Spence - DLI - Butterknowe (Wounded)
Pinned by Simon Cotterill
from IllustratedChronicles (flickr)
H Dyke - 2nd DLI - Edmondsley (Wounded)
Pinned by Simon Cotterill
from IllustratedChronicles (flickr)
P Boyle - 10th DLI - Blackhill (Killed)
Pinned by Simon Cotterill
from IllustratedChronicles (flickr)
J Walker - 10th DLI - Sacriston (Wounded)
Pinned by Simon Cotterill
from IllustratedChronicles (flickr)
H Rossiter - 2nd DLI - Rainton (Wounded)
Pinned by Simon Cotterill
from IllustratedChronicles (flickr)
R Davison - 9th DLI - Blaydon (Wounded)
Pinned by Simon Cotterill
from IllustratedChronicles (flickr)
T Mullighan - 26th DLI - Gateshead (Killed)
Pinned by Simon Cotterill
from IllustratedChronicles (flickr)
J Cuthbertson - 10th DLI - Blackhill (Wounded)
Pinned by Simon Cotterill
from IllustratedChronicles (flickr)
F Watson - 10th DLI - Sunderland (Killed)
Pinned by Simon Cotterill
from IllustratedChronicles (flickr)
C Johnson - 2nd DLI - St Peter's (Wounded)
Pinned by Simon Cotterill
from IllustratedChronicles (flickr)
B Olsen - 3rd DLI - Gateshead (Wounded)
Pinned by Simon Cotterill
from IllustratedChronicles (flickr)
G Kier - 10th DLI - St Peter's (Wounded)
Pinned by Simon Cotterill
from IllustratedChronicles (flickr)
A Armstrong - 10th DLI - Fence Houses (Wounded)
Pinned by Simon Cotterill
from IllustratedChronicles (flickr)
James Henderson - 10th DLI - Hamsterley Colliery (Killed)
Pinned by Simon Cotterill
from IllustratedChronicles (flickr)
M Robson - 10th DLI - Hexham (Wounded)
Pinned by Simon Cotterill
from IllustratedChronicles (flickr)
T Johnson - 2nd DLI - Crawcrook (Wounded)
Pinned by Simon Cotterill
from IllustratedChronicles (flickr)
R Mauchlan - 9th DLI - Newcastle (Wounded)
Pinned by Simon Cotterill
from IllustratedChronicles (flickr)
W Lanerick - 10th DLI - Ferry Hill (Wounded)
Pinned by Simon Cotterill
from IllustratedChronicles (flickr)
P Wright - 6th DLI - Consett (Missing)
Pinned by Simon Cotterill
from IllustratedChronicles (flickr)
J Wright - 8th DLI - Felling (Missing)
Pinned by Simon Cotterill
from IllustratedChronicles (flickr)
J Wilson - 8th DLI - Perkinsville (Gassed)
Pinned by Simon Cotterill
from IllustratedChronicles (flickr)
J Wilson - 8th DLI - Newcastle (Gassed)
Pinned by Simon Cotterill
from IllustratedChronicles (flickr)
G Wilson - 8th DLI - Hamsteels (Wounded)
Pinned by Simon Cotterill
from IllustratedChronicles (flickr)
E Wilkinson - 9th DLI - Gateshead (Wounded)
Pinned by Simon Cotterill
from IllustratedChronicles (flickr)
T Williams - 9th DLI - Felling (Gassed)
Pinned by Simon Cotterill
from IllustratedChronicles (flickr)
J Watson - 8th DLI - New Shildon (Wounded and prisoner)
Pinned by Simon Cotterill
from IllustratedChronicles (flickr)
E Ward - 5th DLI - Middlesbrough (Wounded)
Pinned by Simon Cotterill
from IllustratedChronicles (flickr)
G Turnbull - 9th DLI - Chopwell (Killed)
Pinned by Simon Cotterill
from IllustratedChronicles (flickr)
W Thornton - 7th DLI - Sunderland (Missing)
Pinned by Simon Cotterill
from IllustratedChronicles (flickr)
GR Thompson - 9th DLI - Emmaville (Gassed)
Pinned by Simon Cotterill
from IllustratedChronicles (flickr)
GW Thompson - 9th DLI - Swallwell (Wounded)
Pinned by Simon Cotterill
from IllustratedChronicles (flickr)
F Taylor - 8th DLI - Leeholme (Wounded)
Pinned by Simon Cotterill
from IllustratedChronicles (flickr)
N Stirling - 6th DLI - Chilton (Killed)
Pinned by Simon Cotterill
from IllustratedChronicles (flickr)
D Stephenson - 7th DLI - Sunderland (Wounded)
Pinned by Simon Cotterill
from IllustratedChronicles (flickr)
John Steel - 5th DLI - Cornforth Lane (Gassed)
Pinned by Simon Cotterill
from IllustratedChronicles (flickr)
T Smith - 9th DLI - Gateshead (Wounded)
Pinned by Simon Cotterill
from IllustratedChronicles (flickr)
E Slater - 6th DLI - Hunwick (Wounded)
Pinned by Simon Cotterill
from IllustratedChronicles (flickr)
J Smurthwaite - 8th DLI - Shincliffe Colliery (Prisoner of War)
Pinned by Simon Cotterill
from IllustratedChronicles (flickr)
J Sinclair - 8th DLI - Gainford (Prisoner of War)
Pinned by Simon Cotterill
from IllustratedChronicles (flickr)
B Sallas - 7th DLI - Gateshead (Killed)
Pinned by Simon Cotterill
from IllustratedChronicles (flickr)
B Robinson - 8th DLI - Walker (Wounded)
Pinned by Simon Cotterill
from IllustratedChronicles (flickr)
C Riseborough - 8th DLI - Bede College (Prisoner of War)
Pinned by Simon Cotterill
from IllustratedChronicles (flickr)
K Robinson - 9th DLI - Garesfield (Wounded)
Pinned by Simon Cotterill
from IllustratedChronicles (flickr)
T Raper - 8th DLI - Langley Park (Missing)
Pinned by Simon Cotterill
from IllustratedChronicles (flickr)
G Reed - 7th DLI - Sunderland (Wounded)
Pinned by Simon Cotterill
from IllustratedChronicles (flickr)
W Ramsden - 6th DLI - Consett (Wounded)
Pinned by Simon Cotterill
from IllustratedChronicles (flickr)
J Powton - 2nd DLI - Blucher Colliery (Wounded)
Pinned by Simon Cotterill
from IllustratedChronicles (flickr)
F Potts - 7th DLI - Sunderland (Wounded)
Pinned by Simon Cotterill
from IllustratedChronicles (flickr)
Thomas Pooley - 8th DLI - Sunnyside (Killed)
Pinned by Simon Cotterill
from IllustratedChronicles (flickr)
R Phillipson - 9th DLI - Stella (Gassed)
Pinned by Simon Cotterill
from IllustratedChronicles (flickr)
C Pattison - 8th DLI - Fence Houses (Gassed)
Pinned by Simon Cotterill
from IllustratedChronicles (flickr)
T Oliver - 8th DLI - Fence Houses (Killed)
Pinned by Simon Cotterill
from IllustratedChronicles (flickr)
W Morrow - 9th DLI - Gateshead (Gassed)
Pinned by Simon Cotterill
from IllustratedChronicles (flickr)
R Nesbitt - 2nd DLI - Gateshead (Wounded)
Pinned by Simon Cotterill
from IllustratedChronicles (flickr)
G Moody - 8th DLI - Witton Gilbert (Killed)
Pinned by Simon Cotterill
from IllustratedChronicles (flickr)
J Moodie - 9th DLI - Gateshead (Gassed)
Pinned by Simon Cotterill
from IllustratedChronicles (flickr)
L Moodie - 9th DLI - Gateshead (Gassed)
Pinned by Simon Cotterill
from IllustratedChronicles (flickr)
F Mohan - 9th DLI - Gateshead (Gassed)
Pinned by Simon Cotterill
from IllustratedChronicles (flickr)
J Miller - 9th DLI - Gateshead (Wounded)
Pinned by Simon Cotterill
from IllustratedChronicles (flickr)
John Merrigan - 8th DLI - Langley Park (Killed)
Pinned by Simon Cotterill
from IllustratedChronicles (flickr)
G McKeown - 9th DLI - Gateshead (Killed)
Pinned by Simon Cotterill
from IllustratedChronicles (flickr)
Joseph May - 8th DLI - Birtley (Killed)
Pinned by Simon Cotterill
from IllustratedChronicles (flickr)
R Martin - 6th DLI - Witton Park (Wounded)
Pinned by Simon Cotterill
from IllustratedChronicles (flickr)
J Malarkey - 8th DLI - Houghton0le-Spring (Wounded and gassed)
Pinned by Simon Cotterill
from IllustratedChronicles (flickr)
Sam Maddison - 8th DLI - West Stanley (Missing)
Pinned by Simon Cotterill
from IllustratedChronicles (flickr)
Adam Lowery - 9th DLI - Newbiggin (Wounded)
Pinned by Simon Cotterill
from IllustratedChronicles (flickr)
R Lowes - 9th DLI - Gateshead (Gassed)
Pinned by Simon Cotterill
from IllustratedChronicles (flickr)
R Lawson - 2nd DLI - Sunderland (Killed)
Pinned by Simon Cotterill
from IllustratedChronicles (flickr)
W Langston - 5th DLI - Horden (Gassed)
Pinned by Simon Cotterill
from IllustratedChronicles (flickr)
JW Kirkwood - 8th DLI - Carrville (Gassed)
Pinned by Simon Cotterill
from IllustratedChronicles (flickr)
H Laverick - 7th DLI - Sunderland (Gassed)
Pinned by Simon Cotterill
from IllustratedChronicles (flickr)
A Jolly - 8th DLI - Easington Col (Wounded)
Pinned by Simon Cotterill
from IllustratedChronicles (flickr)
W Johnstone - 9th DLI - Felling (Wounded)
Pinned by Simon Cotterill
from IllustratedChronicles (flickr)
W Johnson - 8th DLI - Pelton (Prisoner of war)
Pinned by Simon Cotterill
from IllustratedChronicles (flickr)
WAS Johnson - 8th DLI - Pelton (Prisoner of War)
Pinned by Simon Cotterill
from IllustratedChronicles (flickr)
S Johnson - 8th DLI - Pelton (Wounded and prisoner)
Pinned by Simon Cotterill
from IllustratedChronicles (flickr)
S Johnson - 8th DLI - Pelton (Prisoner of War)
Pinned by Simon Cotterill
from IllustratedChronicles (flickr)
Sergt Hunter - 6th DLI - Blackhill (killed)
Pinned by Simon Cotterill
from IllustratedChronicles (flickr)
J Houchen - 8th DLI - Sacriston (Missing)
Pinned by Simon Cotterill
from IllustratedChronicles (flickr)
Major Hines - 7th DLI (Killed in action)
Pinned by Simon Cotterill
from IllustratedChronicles (flickr)
T Herron - 9th DLI - Winlaton (Killed)
Pinned by Simon Cotterill
from IllustratedChronicles (flickr)
C Heads - 5th DLI - Cornforth (wounded)
Pinned by Simon Cotterill
from IllustratedChronicles (flickr)
W Hayes - 7th DLI - Lemington (Wounded)
Pinned by Simon Cotterill
from IllustratedChronicles (flickr)
J Green - 7th DLI - Sunderland (Wounded)
Pinned by Simon Cotterill
from IllustratedChronicles (flickr)
S Hall - 9th DLI - Gateshead (Wounded)
Pinned by Simon Cotterill
from IllustratedChronicles (flickr)
W Goodall - 2nd DLI - Langley Park (Prisoner of War)
Pinned by Simon Cotterill
from IllustratedChronicles (flickr)
R Garrod - 5th DLI - Metal Bridge (Killed)
Pinned by Simon Cotterill
from IllustratedChronicles (flickr)
W Gambling - 9th DLI - Gateshead (Wounded)
Pinned by Simon Cotterill
from IllustratedChronicles (flickr)
Robert Forster - DLI - Winlaton (Gassed)
Pinned by Simon Cotterill
from IllustratedChronicles (flickr)
JW Fish - 8th DLI - Cornhill (Prisoner of War)
Pinned by Simon Cotterill
from IllustratedChronicles (flickr)
M Doddy - 9th DLI - Gateshead (Wounded)
Pinned by Simon Cotterill
from IllustratedChronicles (flickr)
John Dixon - 8th DLI - Oxhill Villa (Wounded)
Pinned by Simon Cotterill
from IllustratedChronicles (flickr)
W Davenport - 9th DLI - Gateshead (Wounded)
Pinned by Simon Cotterill
from IllustratedChronicles (flickr)
J Corcoran - 7th DLI - Sunderland (Wounded)
Pinned by Simon Cotterill
from IllustratedChronicles (flickr)
C Colebrook - 6th DLI - Spennymoor (Wounded)
Pinned by Simon Cotterill
from IllustratedChronicles (flickr)
J Chalmers - 9th DLI - Winlaton (Gassed)
Pinned by Simon Cotterill
from IllustratedChronicles (flickr)
J Campbell - 8th DLI - Sacriston (Killed)
Pinned by Simon Cotterill
from IllustratedChronicles (flickr)
R Burdon - 5th DLI - Stockton (Wounded)
Pinned by Simon Cotterill
from IllustratedChronicles (flickr)
J Bramfitt - 5th DLI - Wingate (Wounded)
Pinned by Simon Cotterill
from IllustratedChronicles (flickr)
H Bowman - 8th DLI - Nettlesworth (Wounded)
Pinned by Simon Cotterill
from IllustratedChronicles (flickr)
J Bradley - DLI - Sunderland (Wounded)
Pinned by Simon Cotterill
from IllustratedChronicles (flickr)
W Black - 9th DLI - Chopwell (Wounded)
Pinned by Simon Cotterill
from IllustratedChronicles (flickr)
R Blayney - 8th DLI - Craghead (Wounded)
Pinned by Simon Cotterill
from IllustratedChronicles (flickr)
E Binns - 9th DLI - Gateshead (Wounded)
Pinned by Simon Cotterill
from IllustratedChronicles (flickr)
A Bell - 7th DLI - Sunderland (Wounded)
Pinned by Simon Cotterill
from IllustratedChronicles (flickr)
H Baker - 5th DLI - Thornley (Wounded)
Pinned by Simon Cotterill
from IllustratedChronicles (flickr)
J Arkless - 9th DLI - Gateshead (Wounded)
Pinned by Simon Cotterill
from IllustratedChronicles (flickr)
H Barhan - 8th DLI - Gateshead (Wounded)
Pinned by Simon Cotterill
from IllustratedChronicles (flickr)
J Batey - 9th DLI - South Bank (Killed)
Pinned by Simon Cotterill
from IllustratedChronicles (flickr)
J Anderson - 7th DLI - Sunderland (Wounded)
Pinned by Simon Cotterill
from IllustratedChronicles (flickr)
W Allison - 6th DLI - Consett (Killed)
Pinned by Simon Cotterill
from IllustratedChronicles (flickr)
J Wilson - DLI - Fatfield (Wounded and gassed)
Pinned by Simon Cotterill
from IllustratedChronicles (flickr)
M Usher - 2nd DLI - Sunderland (Killed)
Pinned by Simon Cotterill
from IllustratedChronicles (flickr)
D Bell - 2nd DLI - Sunderland (Killed)
Pinned by Simon Cotterill
from IllustratedChronicles (flickr)
A Browbank - 4th DLI - Consett (Missing)
Pinned by Simon Cotterill
from IllustratedChronicles (flickr)
M Fletcher - 2nd DLI - Byker (Wounded)
Pinned by Simon Cotterill
from IllustratedChronicles (flickr)
J Jackson - 6th DLI - Croxdale (Wounded)
Pinned by Simon Cotterill
from IllustratedChronicles (flickr)
W Askew - 8th DLI - Blackhill (Killed)
Pinned by Simon Cotterill
from IllustratedChronicles (flickr)
T Hodgkins - 5th DLI - Silksworth (Gassed)
Pinned by Simon Cotterill
from IllustratedChronicles (flickr)
A Peacock - 5th DLI - Thornaby (Killed)
Pinned by Simon Cotterill
from IllustratedChronicles (flickr)
N Featherstone - 6th DLI - Thornaby (Killed)
Pinned by Simon Cotterill
from IllustratedChronicles (flickr)
JW Ward - 8th DLI - Craghead (Missing)
Pinned by Simon Cotterill
from IllustratedChronicles (flickr)
F Ayre - 9th DLI - Gateshead (Wounded)
Pinned by Simon Cotterill
from IllustratedChronicles (flickr)
J Wilkinson - 2nd DLI - Gateshead (Killed)
Pinned by Simon Cotterill
from IllustratedChronicles (flickr)
J Cowan - 8th DLI - Perkinsville (Gassed)
Pinned by Simon Cotterill
from IllustratedChronicles (flickr)
W Galloway - 5th DLI - Coxhoe (Wounded)
Pinned by Simon Cotterill
from IllustratedChronicles (flickr)
T Hayton - 9th DLI - Crawcrook (Wounded)
Pinned by Simon Cotterill
from IllustratedChronicles (flickr)
J Smith - 8th DLI - Brandon Colliery (Killed)
Pinned by Simon Cotterill
from IllustratedChronicles (flickr)
VR Grey - 9th DLI - Gateshead (Killed)
Pinned by Simon Cotterill
from IllustratedChronicles (flickr)
R Usher - 7th DLI - Sunderland (Wounded and prisoner)
Pinned by Simon Cotterill
from IllustratedChronicles (flickr)
A Stewart - 9th DLI - Gateshead (Killed)
Pinned by Simon Cotterill
from IllustratedChronicles (flickr)
W Wright - 8th DLI - South Moor (Missing)
Pinned by Simon Cotterill
from IllustratedChronicles (flickr)
J Jackson - 10th DLI - Dudley Colliery (Wounded)
Pinned by Simon Cotterill
from IllustratedChronicles (flickr)
WW Bootes - 8th DLI - Washington (Wounded and prisoner)
Pinned by Simon Cotterill
from IllustratedChronicles (flickr)
HR Brockbanks - 7th DLI - Sunderland (Missing)
Pinned by Simon Cotterill
from IllustratedChronicles (flickr)
AR Thomas - 8th DLI - South Moor (Wounded)
Pinned by Simon Cotterill
from IllustratedChronicles (flickr)
Joseph Lamb - 8th DLI - Sacriston (Prisoner of war)
Pinned by Simon Cotterill
from IllustratedChronicles (flickr)
RA Brewis - 10th DLI - Felling (Wounded)
Pinned by Simon Cotterill
from IllustratedChronicles (flickr)
F Cummins - 10th DLI - Spennymoor (Died of Wounds)
Pinned by Simon Cotterill
from IllustratedChronicles (flickr)
C Castling - 8th DLI - Annfield Plain (Wounded)
Pinned by Simon Cotterill
from IllustratedChronicles (flickr)
W Henson - 8th DLI - Grange Villa (Wounded and Gassed)
Pinned by Simon Cotterill
from IllustratedChronicles (flickr)
Thomas McKeown - 10th DLI - Gateshead (Wounded)
Pinned by Simon Cotterill
from IllustratedChronicles (flickr)
WD Murton - 16th DLI - Gateshead (Wounded)
Pinned by Simon Cotterill
from IllustratedChronicles (flickr)
W Hogan - 2nd DLI - Wallsend (Wounded and prisoner)
Pinned by Simon Cotterill
from IllustratedChronicles (flickr)
James Bell - 10th DLI - Felling (Killed)
Pinned by Simon Cotterill
from IllustratedChronicles (flickr)
Joseph Clark - 10th DLI - Felling (Wounded)
Pinned by Simon Cotterill
from IllustratedChronicles (flickr)
TE Turnbull - 8th DLI - West Hartlepool (Killed)
Pinned by Simon Cotterill
from IllustratedChronicles (flickr)
TA Robson - DLI - Low Fell (In Hospital)
Pinned by Simon Cotterill
from IllustratedChronicles (flickr)
Sergt-Major Davidson DCM - 9th DLI - Greenside (Killed)
Pinned by Simon Cotterill
from IllustratedChronicles (flickr)
HH Tindle - 7th DLI - Sunderland (Wounded)
Pinned by Simon Cotterill
from IllustratedChronicles (flickr)
Ed Cassidy - 7th DLI - Sunderland (Killed)
Pinned by Simon Cotterill
from IllustratedChronicles (flickr)
R Thurloway - 8th DLI - Chester-le-Street (Killed)
Pinned by Simon Cotterill
from IllustratedChronicles (flickr)
CH Harrison - 9th DLI - Gateshead (Killed)
Pinned by Simon Cotterill
from IllustratedChronicles (flickr)
JW Brown - 7th DLI - Sunderland (Killed)
Pinned by Simon Cotterill
from IllustratedChronicles (flickr)
James Hoole - 10th DLI - Wheatley Hill (Wounded)
Pinned by Simon Cotterill
from IllustratedChronicles (flickr)
R Ferguson - 5th DLI - Walker (WOudned and Missing)
Pinned by Simon Cotterill
from IllustratedChronicles (flickr)
A Burns - 7th DLI - Sunderland (Wounded and Prisoner)
Pinned by Simon Cotterill
from IllustratedChronicles (flickr)
J Underwood - 8th DLI - Esh Winning (Wounded)
Pinned by Simon Cotterill
from IllustratedChronicles (flickr)
E Hughes - 5th DLI - Esh Winning (Prisoner of War)
Pinned by Simon Cotterill
from IllustratedChronicles (flickr)
Sergt Coggins - 5th DLI - Stockton (Wounded)
Pinned by Simon Cotterill
from IllustratedChronicles (flickr)
Private McGurk - 9th DLI - Gateshead (Wounded)
Pinned by Simon Cotterill
from IllustratedChronicles (flickr)
TT Clarkson - 8th DLI - Chester Moor (Wounded)
Pinned by Simon Cotterill
from IllustratedChronicles (flickr)
JW Colquhoun - 7th DLI - Sunderland (Wounded and missing)
Pinned by Simon Cotterill
from IllustratedChronicles (flickr)
CJ Bowman - 9th DLI - Netherton (Killed)
Pinned by Simon Cotterill
from IllustratedChronicles (flickr)
James Hickson - 10th DLI - Gateshead (Wounded)
Pinned by Simon Cotterill
from IllustratedChronicles (flickr)
WP Elliott - 10th DLI - Alnwick (Killed)
Pinned by Simon Cotterill
from IllustratedChronicles (flickr)
P Brown - 8th DLI - Chester-le-Street (Missing)
Pinned by Simon Cotterill
from IllustratedChronicles (flickr)
RR Blake - 8th DLI - Thornaby (Killed)
Pinned by Simon Cotterill
from IllustratedChronicles (flickr)
Thomas O'Neill - 8th DLI - Birtley (Missing)
Pinned by Simon Cotterill
from IllustratedChronicles (flickr)
TH Soutter - 10th DLI - Gateshead (Wounded)
Pinned by Simon Cotterill
from IllustratedChronicles (flickr)
JT Hallimand - 5th DLI - Coxhoe (Wounded and Missing)
Pinned by Simon Cotterill
from IllustratedChronicles (flickr)
Thomas Lumley - DLI - South Moor (Wounded)
Pinned by Simon Cotterill
from IllustratedChronicles (flickr)
EB Robinson - 5th DLI - Dunston (Gassed)
Pinned by Simon Cotterill
from IllustratedChronicles (flickr)
James L Herron - 7th DLI - Sunderland (Wounded)
Pinned by Simon Cotterill
from IllustratedChronicles (flickr)
W Fairless - 6th DLI - Bishop Auckland (Wounded)
Pinned by Simon Cotterill
from IllustratedChronicles (flickr)
James Anderson - 7th DLI - South Shields (Wounded)
Pinned by Simon Cotterill
from IllustratedChronicles (flickr)
T Merryweather - 2nd DLI - Cockfield (Wounded)
Pinned by Simon Cotterill
from IllustratedChronicles (flickr)
R Weatherburn - 8th DLI - Chester-le-Street (Missing)
Pinned by Simon Cotterill
from IllustratedChronicles (flickr)
JW Waggott - 6th DLI - Byers Green (Wounded)
Pinned by Simon Cotterill
from IllustratedChronicles (flickr)
William Brown - 7th DLI - Monkwearmouth (Missing)
Pinned by Simon Cotterill
from IllustratedChronicles (flickr)
A Colter - 9th DLI - Newcastle (Wounded and Gassed)
Pinned by Simon Cotterill
from IllustratedChronicles (flickr)
JW Herring - 8th DLI - Pelton Fell (Wounded)
Pinned by Simon Cotterill
from IllustratedChronicles (flickr)
Private Sroker - DLI - Willington Quay (Killed)
Pinned by Simon Cotterill
from IllustratedChronicles (flickr)
FJ Wilson - 7th DLI - Sunderland (Killed)
Pinned by Simon Cotterill
from IllustratedChronicles (flickr)
F Bell - 9th DLI - Gateshead (Wounded and Gassed)
Pinned by Simon Cotterill
from IllustratedChronicles (flickr)
Joseph Allison - 9th DLI - Felling (Gassed)
Pinned by Simon Cotterill
from IllustratedChronicles (flickr)
Robert Carr - 7th DLI - Sunderland (Wounded)
Pinned by Simon Cotterill
from IllustratedChronicles (flickr)
N Morris - 7th DLI - Sunderland (Gassed and wounded)
Pinned by Simon Cotterill
from IllustratedChronicles (flickr)
W Throp - 8th DLI - Thornley (Prisoner of War)
Pinned by Simon Cotterill
from IllustratedChronicles (flickr)
Bugle Major Jackson - 6th DLI - Spennymoor (Wounded)
Pinned by Simon Cotterill
from IllustratedChronicles (flickr)
N Spooner - 16th DLI - Shotton Colliery (Wounded)
Pinned by Simon Cotterill
from IllustratedChronicles (flickr)
George Lumsden - 10th DLI - Byker (Killed)
Pinned by Simon Cotterill
from IllustratedChronicles (flickr)
RC Mole - 8th DLI - West Pelton (Wounded)
Pinned by Simon Cotterill
from IllustratedChronicles (flickr)
Oscar Rompen - DLI - Hetton-le-Hole (Missing)
Pinned by Simon Cotterill
from IllustratedChronicles (flickr)
Pat Hamill - 9th DLI - Blaydon (Wounded)
Pinned by Simon Cotterill
from IllustratedChronicles (flickr)
R Fleming - 2nd DLI - Brandon Colliery (Suffering from shock)
Pinned by Simon Cotterill
from IllustratedChronicles (flickr)
TW Flows - 8th DLI - Wheatley Hill (Wounded)
Pinned by Simon Cotterill
from IllustratedChronicles (flickr)
T Collins - 8th DLI - South Moor (Wounded)
Pinned by Simon Cotterill
from IllustratedChronicles (flickr)
Fred Dent - 4th DLI - Bishop Auckland (Wounded)
Pinned by Simon Cotterill
from IllustratedChronicles (flickr)
Thomas Chilton - 5th DLI - Stockton (Killed)
Pinned by Simon Cotterill
from IllustratedChronicles (flickr)
GW Smith - 9th DLI - Felling (Died of Wounds)
Pinned by Simon Cotterill
from IllustratedChronicles (flickr)
Corpl Ousby - ?th DLI - South Shields (Wounded)
Pinned by Simon Cotterill
from IllustratedChronicles (flickr)
FJ Markwell - 5th DLI - Hartlepool (Killed)
Pinned by Simon Cotterill
from IllustratedChronicles (flickr)
TW Hodgson - 8th DLI - Annfield Plain (Gassed)
Pinned by Simon Cotterill
from IllustratedChronicles (flickr)
J Burn - 8th DLI - Nettlesworth (Missing)
Pinned by Simon Cotterill
from IllustratedChronicles (flickr)
Fred Dixon - 9th DLI - Chopwell (Killed)
Pinned by Simon Cotterill
from IllustratedChronicles (flickr)
W Climpson - 8th DLI - Spennymoor (Wounded and prisoner)
Pinned by Simon Cotterill
from IllustratedChronicles (flickr)
M Lewis - 9th DLI - Gateshead (Wounded)
Pinned by Simon Cotterill
from IllustratedChronicles (flickr)
W Brashier - 7th DLI - Saltmeadows (Died of wounds)
Pinned by Simon Cotterill
from IllustratedChronicles (flickr)
Henry Best - 8th DLI - Edmondley (Killed)
Pinned by Simon Cotterill
from IllustratedChronicles (flickr)
Ralph Watson - 9th DLI - Teams (Wounded)
Pinned by Simon Cotterill
from IllustratedChronicles (flickr)
TW Ledger - 6th DLI - Leadgate (Wounded)
Pinned by Simon Cotterill
from IllustratedChronicles (flickr)
H Leggett - 8th DLI - Alum Waters (Wounded and Prisoner)
Pinned by Simon Cotterill
from IllustratedChronicles (flickr)
Charles Pycroft - 8th DLI - Coxlodge (Wounded)
Pinned by Simon Cotterill
from IllustratedChronicles (flickr)
D Roberts - 8th DLI - Kimblesworth (Prisoner of War)
Pinned by Simon Cotterill
from IllustratedChronicles (flickr)
P Shannon - 6th DLI - Blackhill (Wounded)
Pinned by Simon Cotterill
from IllustratedChronicles (flickr)
Thomas Frazer - 9th DLI - Gateshead (Wounded)
Pinned by Simon Cotterill
from IllustratedChronicles (flickr)
Fred Dixon - 9th DLI - Chopwell (Killed)
Pinned by Simon Cotterill
from IllustratedChronicles (flickr)
WH Davies - 9th DLI - Gateshead (Gassed)
Pinned by Simon Cotterill
from IllustratedChronicles (flickr)
S Wallace - 8th DLI - New Brancpeth (Wounded and Prisoner)
Pinned by Simon Cotterill
from IllustratedChronicles (flickr)
A Coates - ?th DLI - Sunderland (Wounded)
Pinned by Simon Cotterill
from IllustratedChronicles (flickr)
GW Gargett - 8th DLI - Birtley (Gassed)
Pinned by Simon Cotterill
from IllustratedChronicles (flickr)
HH Tindle - 7th DLI - Sunderland (Wounded)
Pinned by Simon Cotterill
from IllustratedChronicles (flickr)
JT Hodgson - 9th DLI - Gateshead (Killed)
Pinned by Simon Cotterill
from IllustratedChronicles (flickr)
RH Watson - 9th DLI - Swalwell (Wounded)
Pinned by Simon Cotterill
from IllustratedChronicles (flickr)
J Wilkinson - 9th DLI - Chopwell (Wounded and gassed)
Pinned by Simon Cotterill
from IllustratedChronicles (flickr)
JC Williams - 9th DLI - Gateshead (Killed)
Pinned by Simon Cotterill
from IllustratedChronicles (flickr)
John Clark - 9th DLI - Swalwell (Wounded)
Pinned by Simon Cotterill
from IllustratedChronicles (flickr)
R Watson - 9th DLI - Swalwell (Wounded)
Pinned by Simon Cotterill
from IllustratedChronicles (flickr)
David Gardiner - 9th DLI - Gateshead (Wounded)
Pinned by Simon Cotterill
from IllustratedChronicles (flickr)
RF Masterman - 9th DLI - Gateshead (Killed)
Pinned by Simon Cotterill
from IllustratedChronicles (flickr)
T Bryan - 7th DLI - Sunderland (Wounded)
Pinned by Simon Cotterill
from IllustratedChronicles (flickr)
JW West - 9th DLI - Winlaton (Wounded)
Pinned by Simon Cotterill
from IllustratedChronicles (flickr)
Edward Mortimer - 8th DLI - Littleburn Colliery (Prisoner of War)
Pinned by Simon Cotterill
from IllustratedChronicles (flickr)
S Forster - 9th DLI - Gateshead (Wounded)
Pinned by Simon Cotterill
from IllustratedChronicles (flickr)
Thomas Todhunter - 9th DLI - Gateshead (Killed)
Pinned by Simon Cotterill
from IllustratedChronicles (flickr)
J Richardson - 2nd DLI - Coundon Gate (Wounded)
Pinned by Simon Cotterill
from IllustratedChronicles (flickr)
C Davison - 9th DLI - Gateshead (Wounded)
Pinned by Simon Cotterill
from IllustratedChronicles (flickr)
J Nicholson - 9th DLI - Gateshead (Wounded)
Pinned by Simon Cotterill
from IllustratedChronicles (flickr)
J Dammery - 5th DLI - Durham (Wounded)
Pinned by Simon Cotterill
from IllustratedChronicles (flickr)
W SHotton - 16th DLI - Blackhill (Killed)
Pinned by Simon Cotterill
from IllustratedChronicles (flickr)
F Newby - 9th DLI - Gateshead (Died of Wounds)
Pinned by Simon Cotterill
from IllustratedChronicles (flickr)
TW Johnson - 6th DLI - Consett (Wounded)
Pinned by Simon Cotterill
from IllustratedChronicles (flickr)
Pte Green - 5th DLI - Stockton (Killed)
Pinned by Simon Cotterill
from IllustratedChronicles (flickr)
CSM Gallagher - 7th DLI - Sunderland (Wounded)
Pinned by Simon Cotterill
from IllustratedChronicles (flickr)
M Deighton - 9th DLI - Gateshead (Wounded)
Pinned by Simon Cotterill
from IllustratedChronicles (flickr)
J Hall - 8th DLI - Ouston (Prisoner of War)
Pinned by Simon Cotterill
from IllustratedChronicles (flickr)
J Brown - 8th DLI - Sacriston (Missing)
Pinned by Simon Cotterill
from IllustratedChronicles (flickr)
JW Cutherbertson - 9th DLI - Crookhill (Wounded)
Pinned by Simon Cotterill
from IllustratedChronicles (flickr)
W Carnaffan - 9th DLI - Stargate (Wounded)
Pinned by Simon Cotterill
from IllustratedChronicles (flickr)
T Carnaffan - 9th DLI - Stargate (Killed)
Pinned by Simon Cotterill
from IllustratedChronicles (flickr)
Sgt Cuthbertson - 6th DLI - Blackhill (Wounded)
Pinned by Simon Cotterill
from IllustratedChronicles (flickr)
George Dempsey - 9th DLI - Ryton (Wounded)
Pinned by Simon Cotterill
from IllustratedChronicles (flickr)
JH Pearson - 9th DLI - Felling (Wounded)
Pinned by Simon Cotterill
from IllustratedChronicles (flickr)
JW WIlkinson - 8th DLI - Kibblesworth Colliery (Wounded)
Pinned by Simon Cotterill
from IllustratedChronicles (flickr)
J Telford - 8th DLI - Birtley (Gassed)
Pinned by Simon Cotterill
from IllustratedChronicles (flickr)
Bandsman Bowman - 5th DLI - Stockton (Killed)
Pinned by Simon Cotterill
from IllustratedChronicles (flickr)
William Shotten - 6th DLI - Blackhill (Killed)
Pinned by Simon Cotterill
from IllustratedChronicles (flickr)
J Donley - DLI - Silksworth (Prisoner of War)
Pinned by Simon Cotterill
from IllustratedChronicles (flickr)
R Rutter - 8th DLI - Wrekenton (Missing)
Pinned by Simon Cotterill
from IllustratedChronicles (flickr)
J Sproxton - 7th DLI - Sunderland (Wounded)
Pinned by Simon Cotterill
from IllustratedChronicles (flickr)
RW Surtees - 6th DLI - Coundon (Wounded)
Pinned by Simon Cotterill
from IllustratedChronicles (flickr)
J Walker - 9th DLI - Gateshead (Killed)
Pinned by Simon Cotterill
from IllustratedChronicles (flickr)
Joseph Evans - 9th DLI - Scotswood (Wounded)
Pinned by Simon Cotterill
from IllustratedChronicles (flickr)
Joseph Jameson - 9th DLI - Chopwell (Wounded)
Pinned by Simon Cotterill
from IllustratedChronicles (flickr)
J Batey - 9th DLI - South Bank (Killed)
Pinned by Simon Cotterill
from IllustratedChronicles (flickr)
A Bower - 9th DLI - Gateshead (Wounded)
Pinned by Simon Cotterill
from IllustratedChronicles (flickr)
M Mullarkey - 2nd DLI - Newcastle (Wounded)
Pinned by Simon Cotterill
from IllustratedChronicles (flickr)
M Naylor - 9th DLI - Gateshead (Wounded)
Pinned by Simon Cotterill
from IllustratedChronicles (flickr)
Robert Britton - 6th DLI - Kirkmerrington (Wounded)
Pinned by Simon Cotterill
from IllustratedChronicles (flickr)
J Cullen - 4th DLI - Consett (Wounded)
Pinned by Simon Cotterill
from IllustratedChronicles (flickr)
R Smith - 9th DLI - Gateshead (Wounded)
Pinned by Simon Cotterill
from IllustratedChronicles (flickr)
S Forster - 9th DLI - Gateshead (Wounded)
Pinned by Simon Cotterill
from IllustratedChronicles (flickr)
N McCormick - 2nd DLI - Bensham (Wounded)
Pinned by Simon Cotterill
from IllustratedChronicles (flickr)
Joseph Monroe - 9th DLI - Gateshead (Wounded)
Pinned by Simon Cotterill
from IllustratedChronicles (flickr)
SJ Lawrence - 9th DLI - Ryton (Wounded)
Pinned by Simon Cotterill
from IllustratedChronicles (flickr)
Corpl Atkinson - 8th DLI - Sacriston (Wounded)
Pinned by Simon Cotterill
from IllustratedChronicles (flickr)
RN Charlton - 5th DLI - Stockton (Wounded)
Pinned by Simon Cotterill
from IllustratedChronicles (flickr)
J Elliott (publisher) C Lidden (author and composer) of "Bravo Boys of the DLI"
Pinned by Simon Cotterill
from IllustratedChronicles (flickr)
Thomas Beardmore - 14th DLI - Dawdon Colliery (Wounded)
Pinned by Simon Cotterill
from IllustratedChronicles (flickr)
Alex Ferguson - 10th DLI - West Hartlepool (Killed)
Pinned by Simon Cotterill
from IllustratedChronicles (flickr)
James Robson - 11th DLI - Gateshead (Wounded)
Pinned by Simon Cotterill
from IllustratedChronicles (flickr)
H Proctor - 15th DLI - West Hartlepool (Killed)
Pinned by Simon Cotterill
from IllustratedChronicles (flickr)
Walter Towland - 16th DLI - Kelloe (Wounded)
Pinned by Simon Cotterill
from IllustratedChronicles (flickr)
Hugh Williams - 14th DLI - Felling (Wounded)
Pinned by Simon Cotterill
from IllustratedChronicles (flickr)
William Dewhurst - 17th DLI - Dipton (Promoted)
Pinned by Simon Cotterill
from IllustratedChronicles (flickr)
Charles Raymond Shankland - 17th DLI - Essequete, British Guiana (Enlisted)
Pinned by Simon Cotterill
from IllustratedChronicles (flickr)
JT Burne - 10th DLI - Gateshead (Wounded , third time)
Pinned by Simon Cotterill
from IllustratedChronicles (flickr)
AH Allason - 11th DLI - Shotton (Wounded)
Pinned by Simon Cotterill
from IllustratedChronicles (flickr)
WH Cowell - 8th DLI - North Shields (Wounded)
Pinned by Simon Cotterill
from IllustratedChronicles (flickr)
J Wardle - 8th DLI - Sacriston (Prisoner of war)
Pinned by Simon Cotterill
from IllustratedChronicles (flickr)
T Guy - 13th DLI - Felling (Accidentally Killed)
Pinned by Simon Cotterill
from IllustratedChronicles (flickr)
AE Reynolds - 2nd DLI - Birtley (Invalided)
Pinned by Simon Cotterill
from IllustratedChronicles (flickr)
TR Griffiths - ?th DLI - Wheatley Hill (Wounded)
Pinned by Simon Cotterill
from IllustratedChronicles (flickr)
LC Renwick - 2nd DLI - Gatesehad (Died of Wounds)
Pinned by Simon Cotterill
from IllustratedChronicles (flickr)
N Chapman - 4th DLI - Chester-le-Street (Invalided)
Pinned by Simon Cotterill
from IllustratedChronicles (flickr)
T Thompson - 14th DLI - South Shields (Missing)
Pinned by Simon Cotterill
from IllustratedChronicles (flickr)
MJ Furness - 15th DLI - Bewick Main (Died in hospital)
Pinned by Simon Cotterill
from IllustratedChronicles (flickr)
William James - 2nd DLI - Hartlepool (Wounded and Prisoner)
Pinned by Simon Cotterill
from IllustratedChronicles (flickr)
William Sudberry - 1st DLI - Hebburn (Wounded)
Pinned by Simon Cotterill
from IllustratedChronicles (flickr)
John Dodds - 14th DLI - Annfield Plain (Wounded)
Pinned by Simon Cotterill
from IllustratedChronicles (flickr)
Peter Edwards - 3rd DLI - Seaham Harbour (Wounded)
Pinned by Simon Cotterill
from IllustratedChronicles (flickr)
Thomas Murray - 11th DLI - Cornforth Lane (Died of wounds)
Pinned by Simon Cotterill
from IllustratedChronicles (flickr)
GH Berry - 2nd DLI - West Hartlepool (Killed)
Pinned by Simon Cotterill
from IllustratedChronicles (flickr)
J Briscoe - 13th DLI - West Hartlepool (Killed)
Pinned by Simon Cotterill
from IllustratedChronicles (flickr)
F Shucker - 13th DLI - Esh Winning (Wounded)
Pinned by Simon Cotterill
from IllustratedChronicles (flickr)
JJ Gascoigne - 2nd DLI - Blaydon (Wounded)
Pinned by Simon Cotterill
from IllustratedChronicles (flickr)
WC Siddle - 11th DLI - Shotley Bridge (Killed)
Pinned by Simon Cotterill
from IllustratedChronicles (flickr)
Ben Forrest - 14th DLI - Benwell (Missing)
Pinned by Simon Cotterill
from IllustratedChronicles (flickr)
James Hinds - 15th DLI - Marley Hill (Missing)
Pinned by Simon Cotterill
from IllustratedChronicles (flickr)
W Glennon - 9th DLI - Blaydon (Died of wounds)
Pinned by Simon Cotterill
from IllustratedChronicles (flickr)
WJ Turnbull - 13th DLI - Gateshead (Wounded)
Pinned by Simon Cotterill
from IllustratedChronicles (flickr)
G Lowerson - 12th DLI - Shiney Row (Wounded)
Pinned by Simon Cotterill
from IllustratedChronicles (flickr)
JJ Donnelly - 9th DLI - Rowlands Gill (Wounded)
Pinned by Simon Cotterill
from IllustratedChronicles (flickr)
Thomas Fisher - 13th DLI - Hartlepool (Wounded)
Pinned by Simon Cotterill
from IllustratedChronicles (flickr)
James Davies - DLI - Haswell Moor (Wounded)
Pinned by Simon Cotterill
from IllustratedChronicles (flickr)
A Liddle - 10th DLI - Lumley (Wounded)
Pinned by Simon Cotterill
from IllustratedChronicles (flickr)
WG Parker - 11th DLI - Consett (Wounded)
Pinned by Simon Cotterill
from IllustratedChronicles (flickr)
HW Boulton - 15th DLI - Hartlepool (Killed)
Pinned by Simon Cotterill
from IllustratedChronicles (flickr)
Ed Gelndinning - 14th DLI - Annfield Plain (Wounded)
Pinned by Simon Cotterill
from IllustratedChronicles (flickr)
W Gray - 10th DLI - Pelton Fell (Wounded)
Pinned by Simon Cotterill
from IllustratedChronicles (flickr)
A Jackson - 15th DLI - West Hartlepool (Wounded)
Pinned by Simon Cotterill
from IllustratedChronicles (flickr)
Fred G Hunter - 15th DLI - West Hartlepool (Wounded)
Pinned by Simon Cotterill
from IllustratedChronicles (flickr)
Andrew E Close - 10th DLI - West Hartlepool (Killed)
Pinned by Simon Cotterill
from IllustratedChronicles (flickr)
John T Reed - 9th DLI - Swalwell (Killed)
Pinned by Simon Cotterill
from IllustratedChronicles (flickr)
WH Miller - 11th DLI - Elswick (Died of wounds)
Pinned by Simon Cotterill
from IllustratedChronicles (flickr)
Colin Knox - 2nd DLI - W Hartlepool (Wounded)
Pinned by Simon Cotterill
from IllustratedChronicles (flickr)
Robert Willis - 10th DLI - Ludworth (Wounded)
Pinned by Simon Cotterill
from IllustratedChronicles (flickr)
Frank Lynch - DLI - New Hartley (Wounded)
Pinned by Simon Cotterill
from IllustratedChronicles (flickr)
LC Staples - 15th DLI - Leeholme (Wounded)
Pinned by Simon Cotterill
from IllustratedChronicles (flickr)
RH Willis - 10th DLI - West Hartlepool (Killed)
Pinned by Simon Cotterill
from IllustratedChronicles (flickr)
James McMahon - 15th DLI - Gateshead (Missing)
Pinned by Simon Cotterill
from IllustratedChronicles (flickr)
Peter Doran - 7th DLI - Sunderland (Killed)
Pinned by Simon Cotterill
from IllustratedChronicles (flickr)
TW Clark - 14th DLI - Spennymoor (Wounded)
Pinned by Simon Cotterill
from IllustratedChronicles (flickr)
Frank Carroll - 2nd DLI - West Hartlepool (Killed)
Pinned by Simon Cotterill
from IllustratedChronicles (flickr)
Ernest Blower - 2nd DLI - Old Cornforth (Wounded)
Pinned by Simon Cotterill
from IllustratedChronicles (flickr)
WH Bradley - 5th DLI - Thornaby (Wounded)
Pinned by Simon Cotterill
from IllustratedChronicles (flickr)
S Hymers - 14th DLI - South Shields (Died of Wounds)
Pinned by Simon Cotterill
from IllustratedChronicles (flickr)
Chas W Whitfield - 5th DLI - Darlington (Wounded and Missing)
Pinned by Simon Cotterill
from IllustratedChronicles (flickr)
JW Burton - 12th DLI - Benwell (Wounded)
Pinned by Simon Cotterill
from IllustratedChronicles (flickr)
T Brown - 15th DLI - Chester-le-Street (Killed)
Pinned by Simon Cotterill
from IllustratedChronicles (flickr)
J Stephenson - 11th DLI - Byker (Killed)
Pinned by Simon Cotterill
from IllustratedChronicles (flickr)
Harry Close - DLI - South Moor (Wounded)
Pinned by Simon Cotterill
from IllustratedChronicles (flickr)
William Carr - 9th DLI - Chopwell (Wounded)
Pinned by Simon Cotterill
from IllustratedChronicles (flickr)
J Wardle - 8th DLI - Sacriston (Prisoner of War)
Pinned by Simon Cotterill
from IllustratedChronicles (flickr)
G Temple - 2nd DLI - West Hartlepool (Wounded)
Pinned by Simon Cotterill
from IllustratedChronicles (flickr)
Charles Sutton - DLI - South Moor (Wounded)
Pinned by Simon Cotterill
from IllustratedChronicles (flickr)
Charles Fellowes - 9th DLI - Spennymoor (Died in Hospital)
Pinned by Simon Cotterill
from IllustratedChronicles (flickr)
TH Cox - 14th DLI - Gateshead (Gassed)
Pinned by Simon Cotterill
from IllustratedChronicles (flickr)
Thomas Wright - 14th DLI - Easington Colliery (Killed)
Pinned by Simon Cotterill
from IllustratedChronicles (flickr)
H Simpson - 14th DLI - Haswell Plough (Killed)
Pinned by Simon Cotterill
from IllustratedChronicles (flickr)
G Pearson - 12th DLI - West Hartlepool (Killed)
Pinned by Simon Cotterill
from IllustratedChronicles (flickr)
H Wickens - 16th DLI - West Hartlepool (Killed)
Pinned by Simon Cotterill
from IllustratedChronicles (flickr)
Walter Brown - 17th DLI - Washington (Wounded)
Pinned by Simon Cotterill
from IllustratedChronicles (flickr)
Ralph Fenwick - 14th DLI - Blaydon (Wounded)
Pinned by Simon Cotterill
from IllustratedChronicles (flickr)
Fred Allan - 13th DLI - Gateshead (Killed)
Pinned by Simon Cotterill
from IllustratedChronicles (flickr)
C McAllister - 1?th DLI - Pelton Fell (Wounded)
Pinned by Simon Cotterill
from IllustratedChronicles (flickr)
John Baxon - 12th DLI - Gateshead (Killed)
Pinned by Simon Cotterill
from IllustratedChronicles (flickr)
John Stott - DLI - Pelton Fell (Prisoner of war)
Pinned by Simon Cotterill
from IllustratedChronicles (flickr)
N Atkinson - 9th DLI - Wallsend (Wounded)
Pinned by Simon Cotterill
from IllustratedChronicles (flickr)
W Flathers - 11th DLI - Langley Moor (Wounded)
Pinned by Simon Cotterill
from IllustratedChronicles (flickr)
F Bailes - 15th DLI - Brandon (Wounded and Missing)
Pinned by Simon Cotterill
from IllustratedChronicles (flickr)
Ben Davies - 15th DLI - Langley Moor (Missing)
Pinned by Simon Cotterill
from IllustratedChronicles (flickr)
Dan Pennington - 18th DLI - Shincliffe (Missing)
Pinned by Simon Cotterill
from IllustratedChronicles (flickr)
G Potts - 15th DLI - Murton Colliery (Killed)
Pinned by Simon Cotterill
from IllustratedChronicles (flickr)
TW Firbank - 6th DLI - Shildon (Killed)
Pinned by Simon Cotterill
from IllustratedChronicles (flickr)
James McMullen - DLI - Silksworth (Killed)
Pinned by Simon Cotterill
from IllustratedChronicles (flickr)
J Rutter - 14th DLI - Evenwood (Wounded)
Pinned by Simon Cotterill
from IllustratedChronicles (flickr)
James Reynolds - 5th DLI - Thornaby (Wounded)
Pinned by Simon Cotterill
from IllustratedChronicles (flickr)
Robert Fenwick - 2nd DLI - Bishop Auckland (Killed)
Pinned by Simon Cotterill
from IllustratedChronicles (flickr)
Robert J Heaton - 15th DLI - Seaham Harbour (Killed)
Pinned by Simon Cotterill
from IllustratedChronicles (flickr)
George Webster - 13th DLI - Burnhope (Wounded)
Pinned by Simon Cotterill
from IllustratedChronicles (flickr)
Thomas Gray - 15th DLI - Birtley (Killed)
Pinned by Simon Cotterill
from IllustratedChronicles (flickr)
William Porter - 15th DLI - Coxhoe (Wounded)
Pinned by Simon Cotterill
from IllustratedChronicles (flickr)
J Nimmo - 2nd DLI - Middlesbrough (French Legion of Honour and DCM)
Pinned by Simon Cotterill
from IllustratedChronicles (flickr)
John Connell - 12th DLI - Annfield Plain (Wounded)
Pinned by Simon Cotterill
from IllustratedChronicles (flickr)
E Jones - 5th DLI - Wheatley Hill (Killed)
Pinned by Simon Cotterill
from IllustratedChronicles (flickr)
Griffith Jones - 2nd DLI - Wheatley Hill (Died of wounds)
Pinned by Simon Cotterill
from https://commons.wikimedia.org…
Cap badge of the Durham Light Infantry, King's crown version.
- Public Domain image c/o Wikimedia Commons
Added by
Simon Cotterill
Co-Curate Page
Durham Light Infantry Memorial, Market Place
- The Durham Light Infantry Memorial on the Market Place in Durham was unveiled on the 14th of September 2014. The bronze statue, by Alan Herriot, was based on a photograph …
from IllustratedChronicles (flickr)
Pte. A Pendleton - D.L.I. - Annfield Plain
Pinned by Simon Cotterill
from IllustratedChronicles (flickr)
Pte. JOHN G. PURVIS, D.L.I., Bowburn, (Killed).
Pinned by Simon Cotterill
from IllustratedChronicles (flickr)
A. Hudsperth - D.L.L. Newcastle (missing)
Pinned by Simon Cotterill
from IllustratedChronicles (flickr)
L-Corpl. F. LANCASTER, D.L.I., Newcastle, (Wounded 2nd time).
Pinned by Simon Cotterill
from IllustratedChronicles (flickr)
Lieut. GILBERT ATKINSON, D.L.I., Newcastle, (Died).
Pinned by Simon Cotterill
from IllustratedChronicles (flickr)
Pte. JOHN HURST, D.L.I., Newcastle, (Died of Wounds).
Pinned by Simon Cotterill
from IllustratedChronicles (flickr)
2nd Lieut. JOSEPH FOSTER, D.L.I., Newcastle, (Died of Wounds).
Pinned by Simon Cotterill
from IllustratedChronicles (flickr)
Lieut. G. ATKINSON, D.L.I., Newcastle, (Died of Wounds).
Pinned by Simon Cotterill
from IllustratedChronicles (flickr)
Pte - Frank Quinn - DLI - Gateshead - Killed
Pinned by Simon Cotterill
from IllustratedChronicles (flickr)
Pte. R. HARLAND, D.L.I., Birtley, (Believed to be Prisoner).
Pinned by Simon Cotterill
from IllustratedChronicles (flickr)
L-Corpl. J.W. PARKER, D.L.I., Chopwell, (Awarded Military Medal).
Pinned by Simon Cotterill
from IllustratedChronicles (flickr)
Lce - Cpl - E. Lakin - DLI - Sunderland - Prisoner of war
Pinned by Simon Cotterill
from IllustratedChronicles (flickr)
Pte. J.M. PORTER, D.L.I., Leadgate, (Wounded & Prisoner).
Pinned by Simon Cotterill
from IllustratedChronicles (flickr)
L-Corpl. J. TAYLOR, D.L.I., Swalwell, (Awarded Military Medal).
Pinned by Simon Cotterill
from IllustratedChronicles (flickr)
2nd Lieut. R. BIRD, D.L.I., Irthington, (Prisoner of War).
Pinned by Simon Cotterill
from IllustratedChronicles (flickr)
Sergt. M Riley - Durham Light Infantry - Newcastle
Pinned by Simon Cotterill
from IllustratedChronicles (flickr)
T.L. Mitchell - DLI - Newcastle - in hospital
Pinned by Simon Cotterill
from IllustratedChronicles (flickr)
Jack Pratt - DLI - Kibblesworth - wounded
Pinned by Simon Cotterill
from IllustratedChronicles (flickr)
Jack Lang DLI - Gateshead - Military Medal
Pinned by Simon Cotterill
from IllustratedChronicles (flickr)
Corpl. E.R. BELL M.M., D.L.I., Gateshead, (Killed).
Pinned by Simon Cotterill
from IllustratedChronicles (flickr)
A. Henderson - DLi - Birtley - died of wounds
Pinned by Simon Cotterill
from IllustratedChronicles (flickr)
A. Pearson -DLI - Percy Main - wounded
Pinned by Simon Cotterill
from IllustratedChronicles (flickr)
J. Gundry - DLI - Chopwell - Military Medal
Pinned by Simon Cotterill
from IllustratedChronicles (flickr)
G. Etherington - DLi - Gateshead - Gassed
Pinned by Simon Cotterill
from IllustratedChronicles (flickr)
Pte T. HAY, D.L.I., Stanley, (Awarded Military Medal).
Pinned by Simon Cotterill
from IllustratedChronicles (flickr)
Corpl. J. CRAWFORD, D.L.I., Sunderland, (Wounded 2nd time).
Pinned by Simon Cotterill
from IllustratedChronicles (flickr)
Pte. R. WINTER, D.L.I., Hebburn, (Killed).
Pinned by Simon Cotterill
from IllustratedChronicles (flickr)
Pte. R.W. BRIGNALL, D.L.I., Grange Villa, (In hospital).
Pinned by Simon Cotterill
from IllustratedChronicles (flickr)
Pte. T. BROWN, D.L.I., Jarrow, (Killed).
Pinned by Simon Cotterill
from IllustratedChronicles (flickr)
Pte. R. BRANSBY, D.L.I., Darlington, (Died of wounds).
Pinned by Simon Cotterill
from IllustratedChronicles (flickr)
Sergt. J. ASKEW, D.L.I., Windy Nook, (Wounded).
Pinned by Simon Cotterill
from IllustratedChronicles (flickr)
Pte. G. STREET, D.L.I., Hamsterley, (Killed).
Pinned by Simon Cotterill
from IllustratedChronicles (flickr)
Pte. I. PARTON, D.L.I., Sunderland, (Died).
Pinned by Simon Cotterill
from IllustratedChronicles (flickr)
Lieut. T. LOWERY D.C.M., D.L.I., Stanley, (Killed).
Pinned by Simon Cotterill
from IllustratedChronicles (flickr)
Pte. S. CORKER, D.L.I., Burnhope, (Missing).
Pinned by Simon Cotterill
from IllustratedChronicles (flickr)
Pte. R.T. DUNCAN, D.L.I., Springwell, (Wounded 3rd time).
Pinned by Simon Cotterill
from IllustratedChronicles (flickr)
L-Corpl. J. BEE, D.L.I., Gateshead, (Awarded Military Medal & Bar).
Pinned by Simon Cotterill
from IllustratedChronicles (flickr)
Corpl. R. JAMES, D.L.I., West Cornforth, (Awarded Military Medal).
Pinned by Simon Cotterill
from IllustratedChronicles (flickr)
Capt. F. WAYMAN, M.C., D.L.I., Sunderland, (Killed).
Pinned by Simon Cotterill
from IllustratedChronicles (flickr)
Pte. P Conway - Durham Light Infantry - South Shields
Pinned by Simon Cotterill
from IllustratedChronicles (flickr)
Pte. J J Hopkins - Durham Light Infantry - Brandon Colliery
Pinned by Simon Cotterill
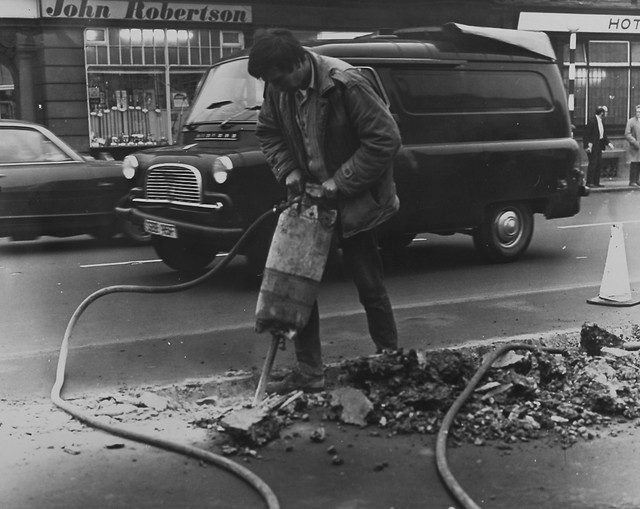


.jpg)